ADI: Adding and Setting Up Wix Events
4 min read
Important:
The Wix Events app is no longer available to add to ADI sites. However, if you already have the app, you can keep using it as usual.
Wix Events lets you create and display events on your site. You can send event invitations, sell tickets, organize your guest list and more, all in one place.

Step 1 | Add the Wix Events app
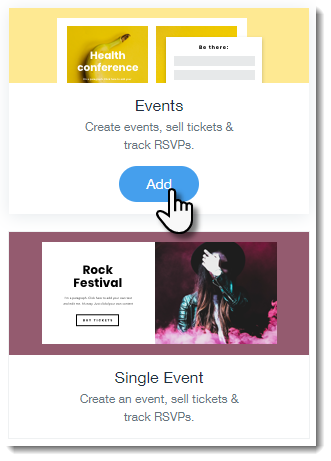
To get started, add Wix Events to your site. Select whether you want to showcase a single event, such as a wedding, or multiple events, like at a concert venue.
To add Wix Events:
- Hover over Add on the top bar of ADI.
- Click Apps.
- Scroll down and hover over one of the event options:
- Events: To add multiple events.
- Single Event: To add a single event.
- Click Add.
- Select where to display your event(s) from the Select Page drop-down.
- Click Add to Page.
Step 2 | Display & customize your events
After you create one or more events, you can display them on your site. Then, customize the display to get the perfect look.
To display & customize events:
- Click the Event section on your site.
- Choose what you want to do:
Set up and customize single event display
Set up and customize a multiple event display
Step 3 | Set up your Event Details Page
Guests visiting your site view the events you offer on the Events List page. From there they can learn more on the Events Details page.
To set up the Event Details Page:
- Click the Pages menu in the ADI top bar.
- Select the Event Info page.
- Click the Event Info section on the page.
- Click the Edit icon
 next to Event Details.
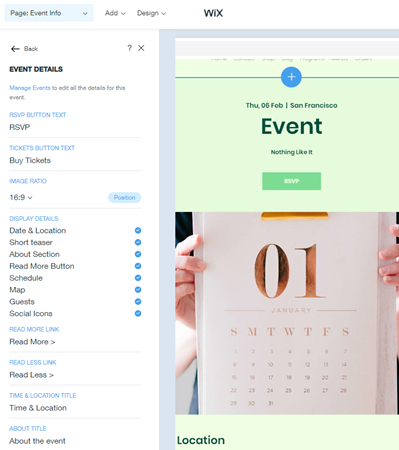
 - Customize the following details:
- RSVP Button Text: Personalize the text of your button.
- Image Ratio: Choose whether your image is square or rectangle and its position.
- Display Details: Select or deselect the checkboxes to show or hide elements.
- Update the text of the following elements: Read More Link, Read Less Link, Time & Location Title, About Title, Social Share Title.
Step 4 | Set up your Registration Form
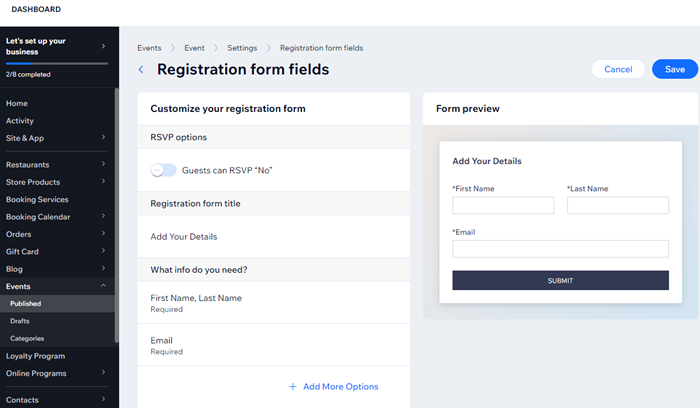
Set up a registration form on your site to collect info from people when they RSVP to an event of yours.
To set up your form:
- Click the Pages menu in the top bar inside ADI.
- Select the Event Info page.
- Click the Event Info section on the page.
- Click the Edit icon next to Registration Form.
- Click Customize Form to set it up using the options available. Learn More
FAQs
Click a question below to learn more about adding and setting up Wix Events:
The Event Info Page is missing my from my Page list. How can I find it?

How can I read responses to registration form questions?
Can I delete an event?
Did this help?
|