Wix Media: Creating Images or Logos with Transparent Backgrounds
2 min
Remove the background of an image to focus the eye on the key element, for example a logo. Cut out any surrounding noise to add impact or perform object segmentation. Once you've done this, your image appears on a transparent background.
To make an image or logo background transparent:
- Go to your Media Manager.
- Click the image you want to edit.
- Click Crop & Edit.
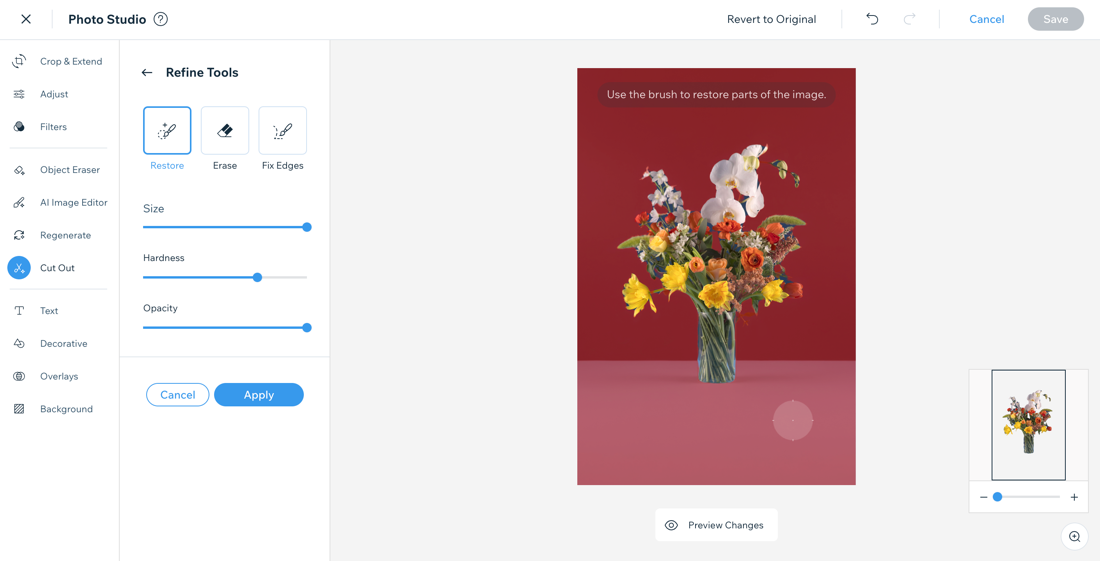
- Click Cut Out on the left.
- Click Auto Cut Out.
- Click Refine Cut Out to edit the image cut out with a brush. Use the editing options:
- Restore: Restore parts of the cut out that you removed.
- Erase: Edit the image to remove parts of the cut out.
- Fix Edges: Fix soft edges (for example, around hair).
- Size: Select the brush size to make more accurate edits.
- Hardness: Select the brush hardness to make more accurate edits.
- Opacity: Select the brush opacity to make more accurate edits.
- (Optional) Click and hold the Preview Changes icon
 to preview the changes you've made.
 - Click Apply once you're happy with your changes.
- Click Save to save the new image in your Media Manager.