

Wix Studio: Creating Proposals
6 min
In this article
- Step 1 | Create a proposal
- Step 2 | Customize your proposal
- Step 3 | Preview and share your proposal
- FAQs
Create and send professionally designed proposals to new or existing clients with Wix Proposals by Prospero. Start from scratch or customize a template and set the payment terms and schedules. Once your client accepts the proposal, you can send invoices manually or automatically.
Before you begin:
Connect a payment method to enable online payments for accepted proposals. In your Invoices tab, click More Actions at the top right and select Accept Payments.
Step 1 | Create a proposal
Start by entering general information, adding products or services, and defining payment terms.
To create a proposal:
- Go to CRM & Client Billing in your Wix Studio workspace.
- Click the Proposals tab.
- Click Create Proposal.
- Enter the general info for the proposal:
- Title: Add a title for the proposal.
- Customer: Select a client to send this proposal to.
- Proposal expiration date: Specify when the proposal will expire.
- Click Add Custom Item and enter the proposal details:
- Add an item: Add a product or service for the proposal.
- (Optional) Description: Enter a description for the product or service.
- Price: Enter a price for the product or service.
- Quantity: Specify the quantity of the product or service.
- (Optional) Tax 1 / Tax 2: Add one or two tax rates to the proposal.
- (Optional) + Add Line Item: Add additional services to the proposal.
- (Optional) Discount: Apply a percentage discount to the total amount.
- Define the terms for the proposal under Payment terms:
Charge a one-time payment

Split total into multiple payments

7. Select the Enable automated invoices toggle to automatically send payment requests to your client on the defined dates.
8. Click Next at the top.
9. Hover over a template and click Use template to select it.
Step 2 | Customize your proposal
Tailor your proposal to fit the project and reflect your agency's branding by customizing text, buttons, tables, and images.
Most proposal templates include sections such as Cover, Cost, Payment Schedule, Terms, and Signature. Click on any element to customize it (e.g. text, button, table, or image). You can also drag and drop additional items from the elements tab on the right.
Tips:
- You can always come back and edit your proposal. Click the More Actions icon
 at the top right, then click Save & Close to save your changes.
 - Learn more about customizing your proposals in Prospero's help center. Some Prospero capabilities may differ on Wix.
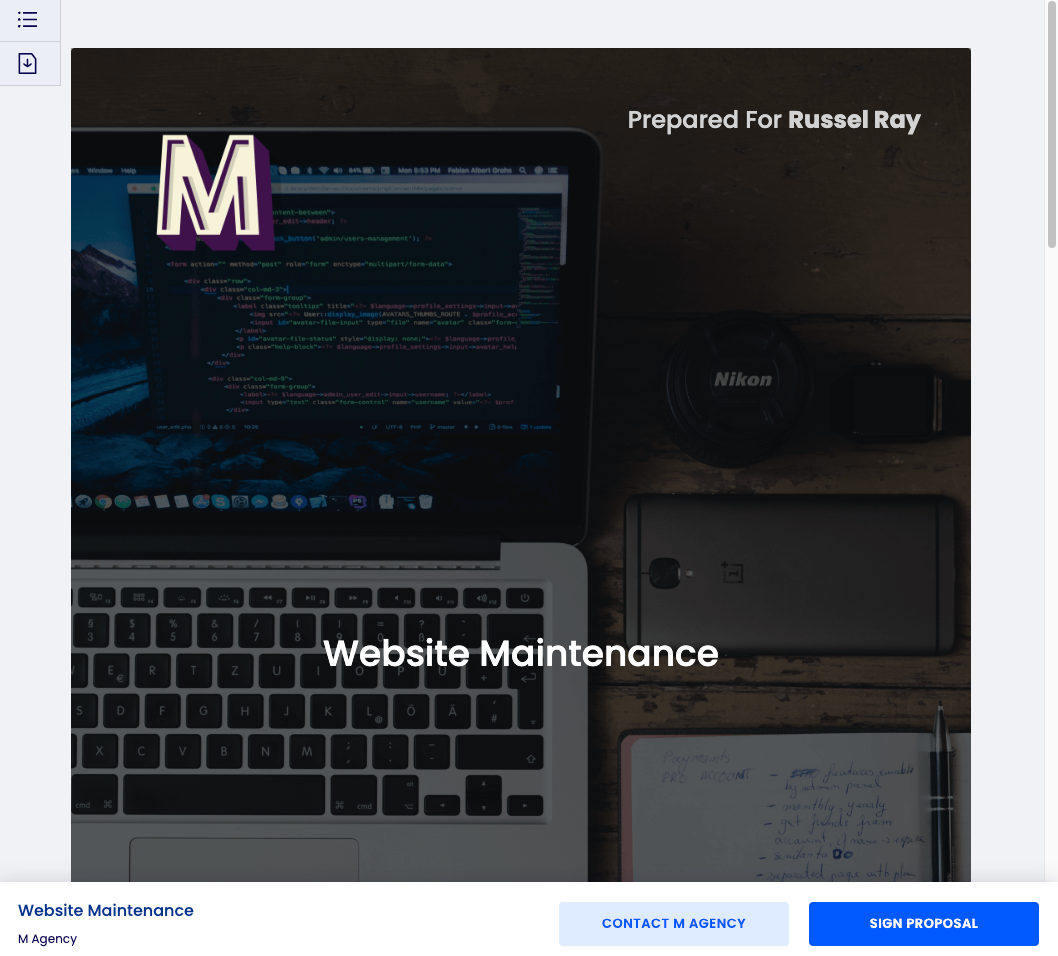
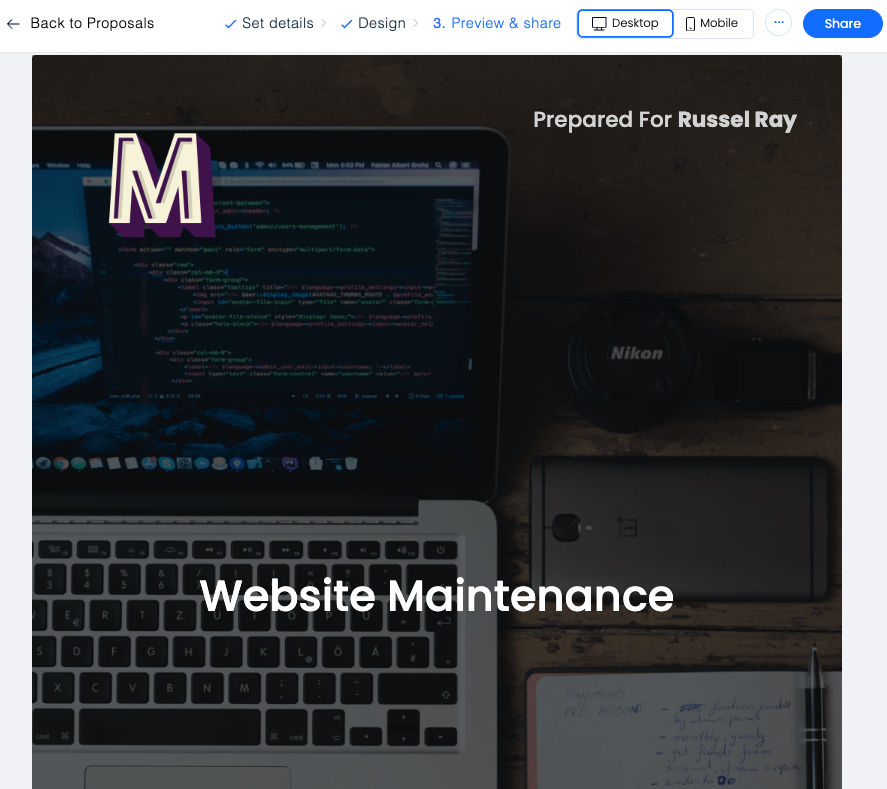
Step 3 | Preview and share your proposal
When you've finished customizing your proposal, you can preview, save, and share it with your client.
To share your proposal:
- Click Preview when you've finished designing your proposal.
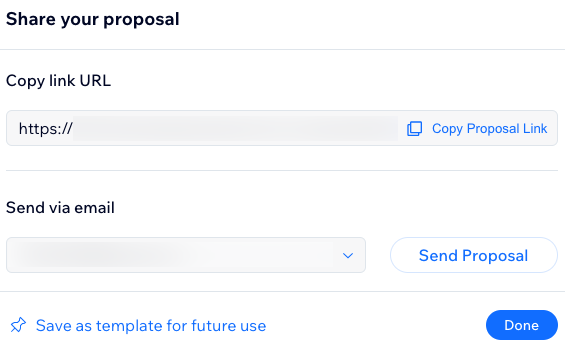
Tip: Click Desktop and Mobile at the top to preview your proposal on both types of devices. - Click Share at the top and choose how to send your proposal:
- Copy Proposal Link: Copy the link to share it directly with your client.
- Send via email: Click Send Proposal to email the proposal directly to your client.
- Save as template for future use: Save the proposal as a template for future projects.
FAQs
Click a question below to learn more about creating proposals.
What happens if my client doesn't agree to the proposed terms?
How do clients accept the proposal, and what happens next?
Can I modify the payment schedule after the proposal has been accepted?

What should I do if there are failed payments within one of my proposals?
Where can I find more information about tax setup for Wix Proposals?
Do I need to set up taxes for my proposals?
