

Wix Stores: Setting Up Shipping Rate By Product
7 min
In this article
- Example of How to Set Up Shipping Rate By Product
- Step 1 | Create or Select a Shipping Region
- Step 2 | Create Product Groups and Add Products to the Group
- Step 3 | Set Shipping Rates for Product Groups
- Step 4 | Select Advanced Settings
- Step 5 | (Optional) Offer Local Delivery or Pickup Options
- Step 6 | (Optional) Set Up Additional Regions
Important:
This article refers to the previous version of the Wix Stores shipping page.
Charge customers shipping rates that reflect the shipping costs you actually pay for each product.
Start by planning how many regions you ship to, how many product groups you need to set up, and how many delivery options you want to offer your clients. Let's look at an example.
Example of How to Set Up Shipping Rate By Product
Kathrine sells handmade home accessories. Her store is based in the US, but she also ships to Canada and Mexico - 3 regions in total. After looking at how much it costs to ship her products, Kathrine has decided to create 3 product groups: "Ceramics" for her breakable items, "Heavy" for items that weigh more than 4 pounds, and "Default" for everything else. She decides to offer American customers 2 delivery options at checkout: Standard shipping or Express but just one option for Mexico and Canada. To keep track, Kathrine prepares a table:
Region | Default | Ceramics | Heavy |
|---|---|---|---|
US | Standard: $2 Express: $4 | Standard: $5 Express: $10 | Standard: $6 Express: $12 |
Canada | Standard: $4 | Standard: $10 | Standard: $12 |
Mexico | Standard: $3 | Standard: $7 | Standard: $9 |
Step 1 | Create or Select a Shipping Region
To start, create the region the shipping rule applies to.
Tip:
If you already created the shipping region, just select it and move on to step 2.
A region can be made of one or more countries. Alternatively, it can be made of one or more regions within a country. You can set up different shipping regions for your store. For example, a merchant might set up 4 shipping rules: a local shipping region for California, a region for the rest of the US, another for Mexico and Canada, and finally one for the rest of the world.
Show me how


Step 2 | Create Product Groups and Add Products to the Group
After selecting the Rate by Product option, you can start creating the product groups you need. When that's done, you can assign each product to the correct group.
Tip:
Your first group acts as your default product group. We suggest you name it Default. All new products you add to your store are automatically added to the default group. You can re-assign products after, if needed.
Show me how


Step 3 | Set Shipping Rates for Product Groups
Now that your store's product groups have been created, you can set how much you want to charge for shipping. You can set up one delivery option (e.g. Standard Shipping) or offer your customers a variety of options (e.g. Standard, Express, and Overnight Shipping).
Show me how

Step 4 | Select Advanced Settings
Now you can decide what happens when customers buy more than one product. Are the shipping rates applied per product or per package? This setting applies for all regions you ship to using the shipping rate by product option.
In addition, here is where you can add a handling fee and allow local customers to pick up purchases from your location. These settings are per region.
Show me how
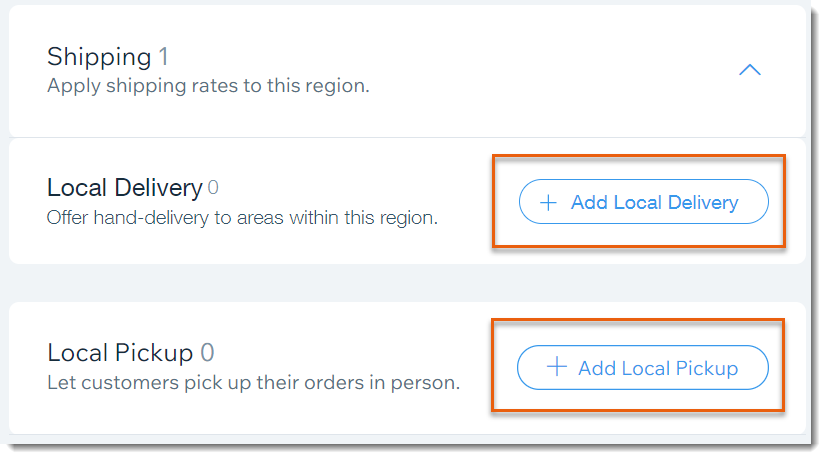
Step 5 | (Optional) Offer Local Delivery or Pickup Options
After saving your shipping rule, you can select the region again and add local delivery or pickup options.
Step 6 | (Optional) Set Up Additional Regions
If you want to ship to other regions, you can set those up now. For other regions, follow the same instructions as above, skipping the product group creation step (that's done).
After choosing a new region (e.g. Canada) and selecting Rate by Product from the drop-down, enter the name, time and rates for each delivery option you want to set up. The product groups are already there.
After the initial setup:
- Adding new product groups: To add a new product group or make changes, go to the Shipping & fulfillment settings, select a region, click Shipping, and then Manage Product Groups.

From there, click the Settings icon at the top right. Note that any new product groups you create appear in all regions and are assigned the default rate. Make sure to update the rates in each region, if necessary.
 - Adding new products: While adding a new product, you can assign it to the correct product group in the Advanced section on the right.
