

Wix Stores: Creating Delivery Profiles
10 min
In this article
- Information about setting up delivery profiles
- Step 1 | Set up your general delivery profile
- Step 2 | Create additional delivery profiles
- FAQs
Does your store sell different types of products where each type requires a different set of shipping, delivery, and pickup rules? Merchants may require different types of shipping for products that are:
- Heavy and lightweight
- Perishable and non-perishable
- Fragile and non-fragile
- Oversize and regular-sized
Delivery profiles help you offer tailored shipping methods for different types of products, making them perfect for stores with diverse inventory. You can create 2 or more profiles, assign different products to each one, and give each a completely different set of delivery rules.
At checkout, customers will only see the delivery options that apply to the items in their cart.
Information about setting up delivery profiles
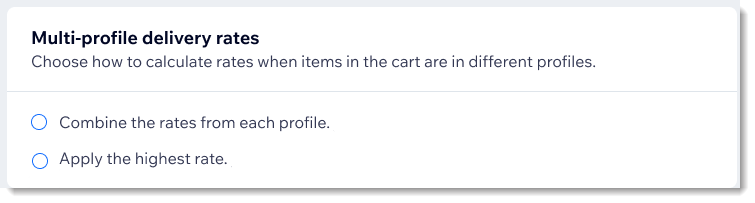
The names you assign to shipping options affect how delivery rates are applied when a customer purchases items from different delivery profiles. Additionally, you can select how you want to calculate rates when there are products from different profiles in the cart.
Examples when rates from each profile are combined
In the examples below, the store sells both pianos and other musical instruments. The store owner has set up a profile for pianos. All other products are in the general delivery profile.
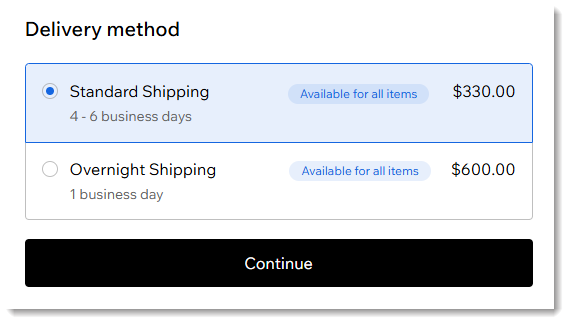
Example 1: Options in both profiles have the exact same names & rates are combined
Example 2: Both options have different names & rates are combined
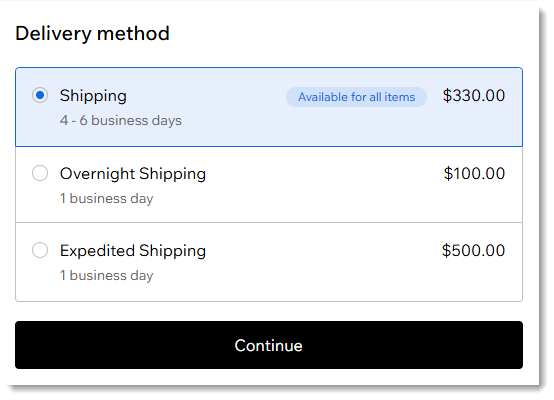
Example 3: Some option names match and some don't & rates are combined

Examples when rates from each profile are NOT combined
As before, in the examples below, the store sells both pianos and other musical instruments. The store owner has set up a profile for pianos. All other products are in the general delivery profile.
Example 1 | Options in both profiles have the exact same names: Rates not combined

Example 2 | Both options have different names: Rates not combined


Example 3 | Some option names match and some don't: Rates not combined

Step 1 | Set up your general delivery profile
To start, we suggest you set up your first delivery profile for the kinds of products you sell most often. This includes creating the necessary region(s) and creating appropriate shipping, delivery, and/or pickup options. In other words, set up delivery as you would normally do if you had only one delivery profile.
Step 2 | Create additional delivery profiles
Now you can create one or more additional delivery profiles for products that need shipping, delivery, or pickup to be handled in a different way.
Tips:
- Regions for new profiles can be completely different from the general profile.
- All products are automatically assigned to your general profile. When you create a new profile, you need to assign the relevant products to it.
To create a delivery profile:
- Go to Shipping, delivery & fulfillment in your site's dashboard.
- Click the More Actions icon
 at the top right.
 - Select Create delivery profiles.
- Click +Create New Profile.
- Enter a profile name at the top (e.g. Pianos).
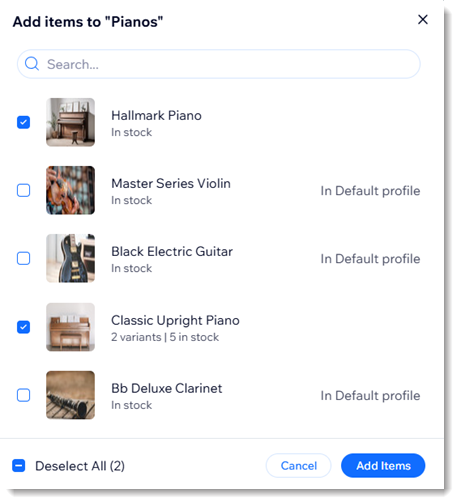
- Assign products to the new profile:
- Click Add Items.
- Select the checkboxes next to the relevant products.
- Click Add Items.
- Click Create Region to start setting up regions.
- Create shipping, delivery, and pickup rules for each region in this delivery profile using one of the following options:
Select an existing rate used in another profile
Create a new rate
FAQs
Click a question below to learn more.
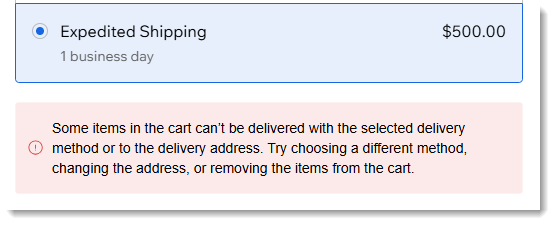
What happens at checkout when customers purchase items from 2 profiles?
How are handling fees applied when customers purchase items from 2 profiles?
How do rate names affect local delivery and pickup?

Do the regions or shipping / delivery / pickup options for profiles need to be similar?
How do I add or remove products assigned to a profile or view the products?
 .
.
 next to a product to remove it.
How do I go back to managing shipping and delivery without delivery profiles?
 next to the profile name.
What happens when I create new products?
Why don’t estimated delivery times appear at checkout?
