

Wix Stores: Adding and Setting Up an 'Add to Cart' Button
3 min
In this article
- Step 1 | Add the 'Add to Cart' button
- Step 2 | Connect the button to a product
- Step 3 | Design the button
You can place a standalone 'Add to Cart' button anywhere on your site. The button is linked to the product you choose. This can come in handy when you're writing about a product somewhere on your site and want to make it easy for a customer to add the product to their cart.
Step 1 | Add the 'Add to Cart' button
Start by navigating to the relevant page and then dragging the Add the Cart button from the Add Panel to the ideal spot.

Wix Editor
Studio Editor
- Go to your editor.
- Click Add Elements
 on the left side of the editor.
 - Click Stores.
- Drag the Add to Cart Button to the page.
Step 2 | Connect the button to a product
For the button to work properly, you need to select which product is added to the customer's cart when clicked.
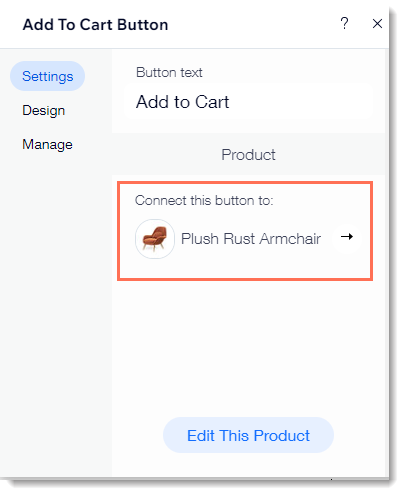
To connect the button to a product:
- Click the Add to Cart button in your editor.
- Click Settings.
- (Optional) Edit the button text.
- Connect the button to a product. Select the default product or select a different product.
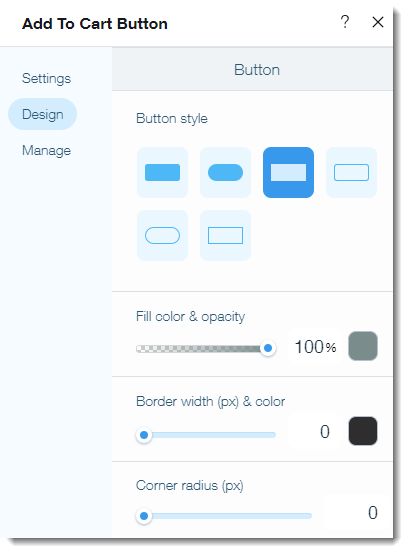
Step 3 | Design the button
Now you can design the button to fit perfectly on the page.
To customize the design of the button:
- Click the Add to Cart button in your editor.
- Click Settings.
- Click Design.
- Make any of the following customizations:
- Select a button style.
- Select a button color and drag the slider to adjust the opacity.
- Select a border color and drag the slider to adjust the border width.
- Drag the slider to make the corners rounder or more square.
- Select a text color or font.
Note:
When a product is out of stock, the button text changes to "Out of Stock". It is not possible to edit the design of the "Out of Stock" button.
