Wix Pro Gallery: Adding Frames to Your Gallery Items
2 min read
Highlight your gallery items by adding frames to them. You can create unique, colorful frames using the Border and Corner Radius options available in your gallery's Design settings.
![A screenshot of a Pro Gallery with frames around each image.](https://d2x3xhvgiqkx42.cloudfront.net/12345678-1234-1234-1234-1234567890ab/5c3e602a-8647-41f7-bb22-686374bf97ce/2022/08/25/1905ab7d-ac67-4c25-a08c-b53940fdd33f/164b6b9e-f6db-4121-bb1f-4ef1bfc2683f.png)
To add frames to your Wix Pro Gallery items:
- Go to your editor.
- Click the pro gallery element on your page.
- Click Settings.
- Click the Design tab.
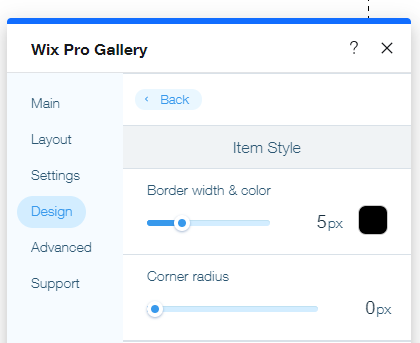
- Click Item Style and customize your frame using the following options:
Border width & color
Corner Radius
![A screenshot of the Design tab in the gallery settings.](https://d2x3xhvgiqkx42.cloudfront.net/12345678-1234-1234-1234-1234567890ab/5c3e602a-8647-41f7-bb22-686374bf97ce/2021/07/21/d3c1ffe3-b051-40c5-82fd-f12ecb508db6/8fdb9055-8677-4740-902f-3454e01f35b9.png)
Note:
The Border width & color and Corner radius design options are only available when you choose Crop as your thumbnail resize option in the Customize Layout panel.
![A screenshot of the Crop Thumbnail resize option in the Layout tab of the gallery settings.](https://d2x3xhvgiqkx42.cloudfront.net/12345678-1234-1234-1234-1234567890ab/5c3e602a-8647-41f7-bb22-686374bf97ce/2021/12/15/c391f98d-f2e7-4986-8305-4f2ee5a82170/457786ab-dbc6-4796-ac29-20c91a74a8c6.png)