

Wix Photo Albums: Adding Titles and Descriptions to Photos
2 min
In this article
- Adding a title and description to your photos
- FAQs
Once you've created your albums and added photos, you can customize them further by adding a title and description to each of your photos. This allows visitors to your site to get more detail on each image.
Adding a title and description to your photos
Add catchy titles and informative descriptions to tell the story of each photo in your album.
To add a title and description:
- Go to Photo Albums in your site's dashboard.
- Click Manage Album next to the relevant album.
- Click Edit on the top right.
- Click the Text tab in the panel on the left.
- Click the Galleries tab at the top.
- Click the checkbox to enable or disable the title and description that appears on your gallery.

- Customize how the text appears on your gallery:
- Alignment: Choose how you want to align your text (to the left, in the center, or to the right).
- Vertical alignment: Choose how you want the button to align on hover (above, in the center, or below the photo).
Note: The above options depend on what gallery layout you choose. Different options are available if you choose Grid, Slider, Strip or Column layouts.
- Click the toggle to add a Buy Now button.
- Customize the text in the text box that will appear on the button.
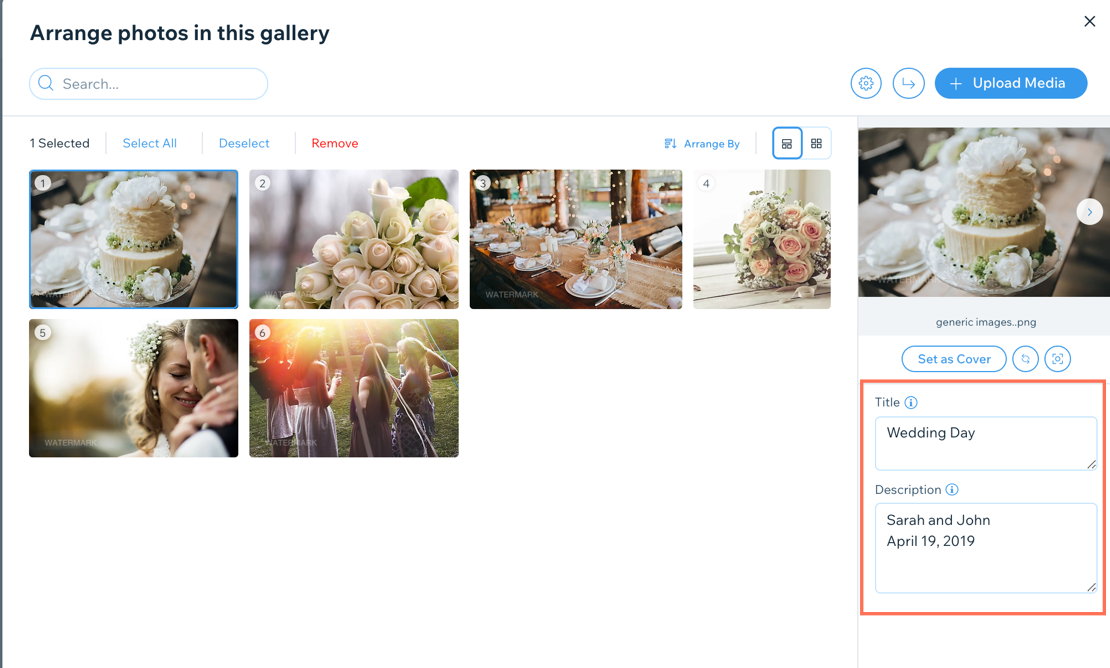
- Click the Media tab
- Hover over the relevant gallery and click Manage Media.
- Select the relevant image.
- Edit the title and description on the right.
- Click Done on the bottom left.
- (Optional) Publish your changes by clicking Publish Now at the top right.
FAQs
Click a question below to learn more abut adding titles and descriptions to your photos.
Some of my photo's titles and descriptions are being cut off. How can I fix this?

