Wix Partners: Creating and Managing Proposals in Client Billing
5 min read
Create, manage and send customized proposals to existing and potential clients. Choose from one of our templates to create proposals in minutes and share it with your clients. Once your client accepts a proposal, you can turn it into an invoice and get paid online.
Before you begin:
Make sure to connect your Partner account to a payment method so you can get paid online. If you plan on offering services that automatically renew on a monthly basis, make sure you've connected a payment provider that supports recurring payments.
In this article, learn how to:
Creating a proposal
Choose from several templates to customize and create your proposal. Then send it to your client for their review and approval. Once they accept your proposal, a new invoice is created where your client can pay for your services online.
To create a proposal:
- Click Partner Dashboard at the top of your Wix account.
- Click the Client Billing tab on the left.
- Click the Proposals tab on the left.
- Click + Create New Proposal.
Note: Skip this step if you haven't created a proposal yet. - Hover over the relevant template and click Use Template.
Tip: Click Preview to view the template before editing it. - Enter the following details:
- Proposal name: Enter a name for the proposal.
- Expiration date: Set when this proposal expires.
- Client's name: Click the field and select a client for this invoice.
Note: Click + Add Customer to add a new contact to your contact list and send them this proposal. - Client's business name: Enter your client's business name.
- Click Create Proposal.
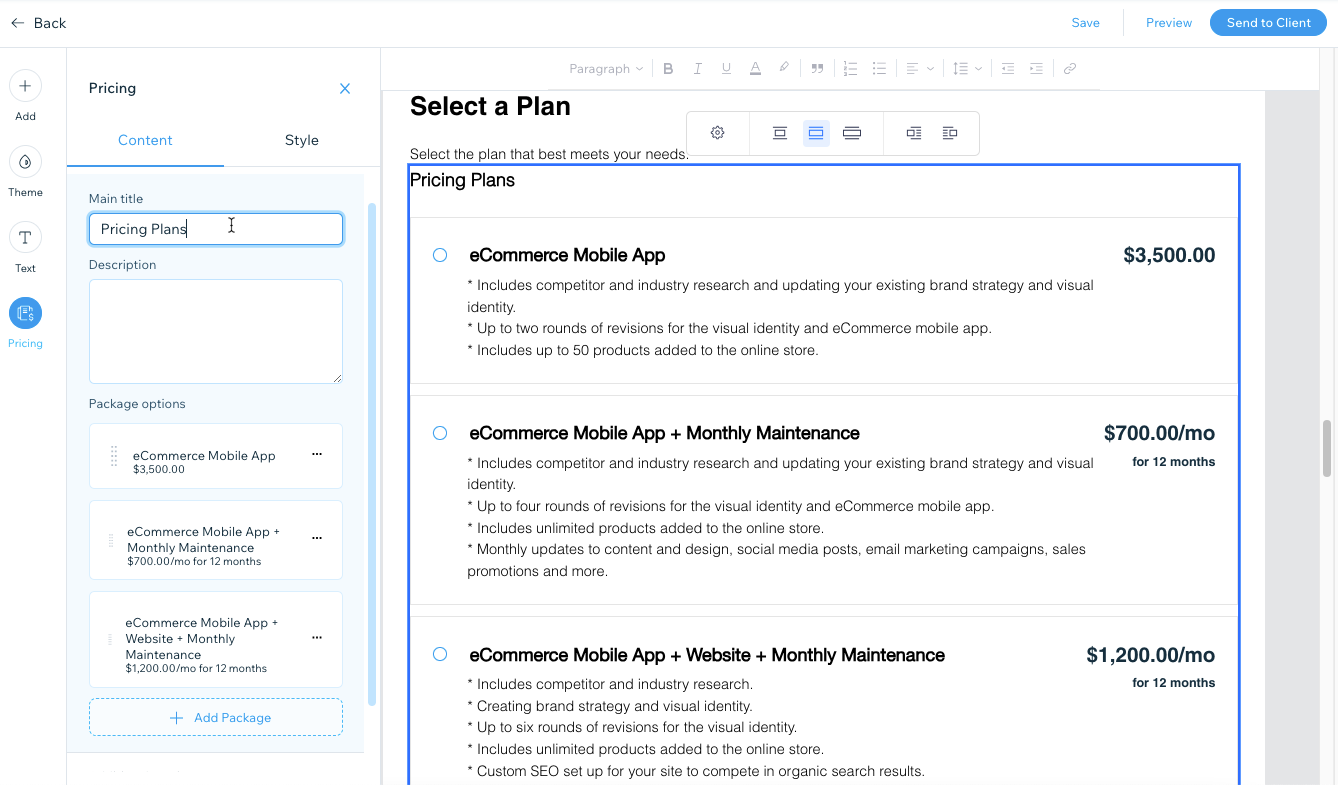
- Customize your proposal:
- Add elements: Click Add on the left and select an element to add it to your proposal.
Tip: After adding an element, select it to view formatting options or click and drag it to move it up or down in the proposal. - Customize the theme: Click Theme on the left to edit the design theme and background.
- Edit text: Click Text to change fonts. You can click the relevant text to edit it in the proposal and use the options at the top to format your text.
- Edit the pricing: Click Pricing on the left to edit the pricing from the relevant tabs:
- Content: Click the relevant drop-down to edit the packages, single services or proposal currency.
Tip: You can offer single services as optional to allow customers to select only the ones they need. Click the Single Services drop-down, click the More Actions icon next to the relevant service, and select Edit. Then enable the Make this optional toggle
  .
. - Style: Click the relevant drop-down to edit the design of the title and description, package options, price, and border.
- Content: Click the relevant drop-down to edit the packages, single services or proposal currency.
- Add elements: Click Add on the left and select an element to add it to your proposal.
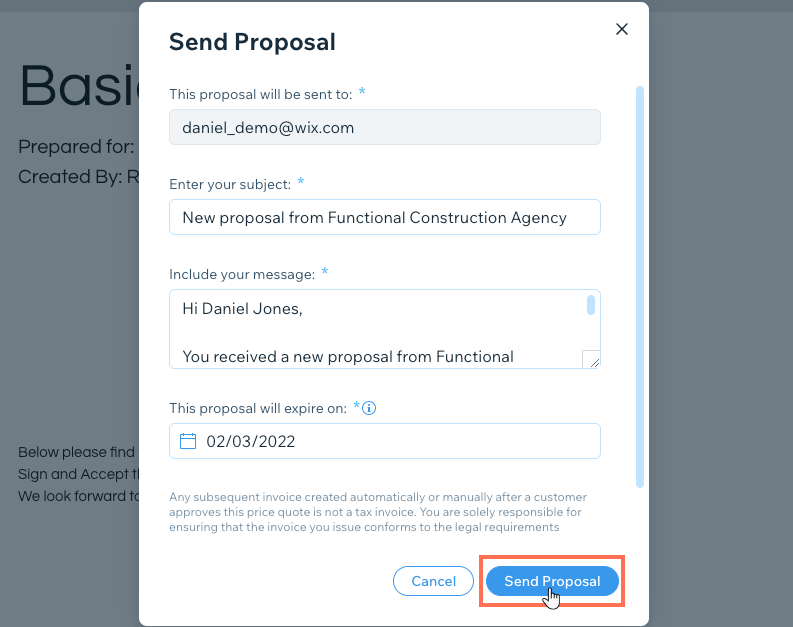
- Click Send to Client at the top to send the proposal to your client.
Note: Alternatively, click Save to save it for later, or Preview to see how it looks. - Review the recipient's email address and edit the message details:
- Enter your subject: Edit the subject of the email message.
- Include your message: Edit the content of the email message.
- This proposal will expire on: Edit the date the proposal must be signed by.
- Click Send Proposal.
Next:
Once your client receives your proposal, they can review it and select a pricing package if you included one. They can also choose which single services they want if you added optional services.
When your client accepts the proposal, they sign it electronically and a new invoice is created. Your client receives a new email with the invoice where they can pay for your services. Go to your Client Billing Invoices tab to view the invoice.
Important:
Legal recognition to electronic signatures may have different and additional requirements according to internal laws/regulations per country. Make sure you verify which requirements apply to you in accordance with local laws.
Managing your proposals
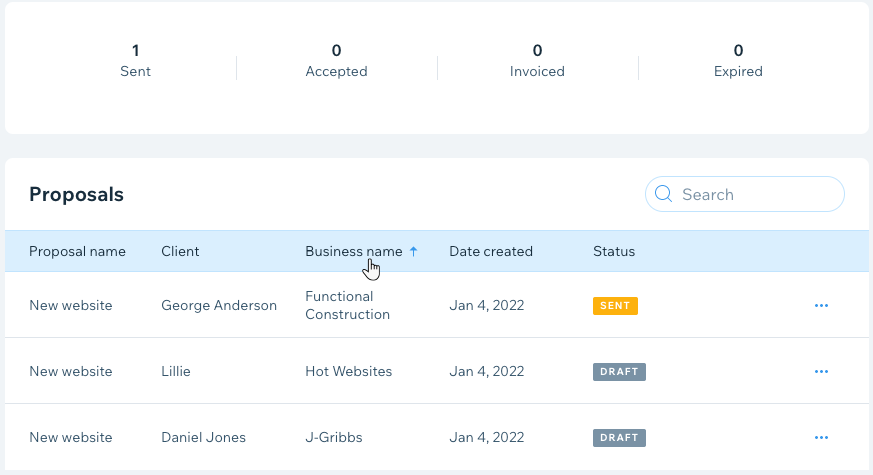
From your Proposals tab, you can view, edit, resend, and take other actions on any of your proposals.
To manage your proposals:
- Click Partner Dashboard at the top of your Wix account.
- Click the Client Billing tab on the left.
- Click the Proposals tab on the left.
- View your proposal stats and details.
Tip: Click the relevant heading on the Proposals table to sort the list.
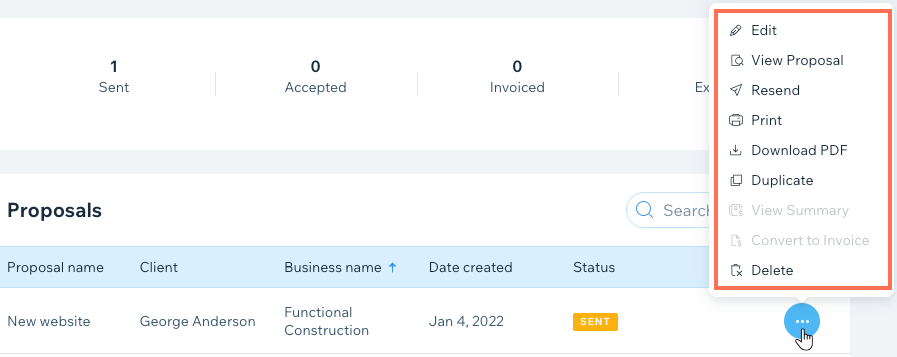
- Click the More Actions icon
 next to the relevant proposal and select:
- Edit: Make changes to the proposal.
- View Proposal: View the proposal in preview mode.
- Send/Resend: Send the proposal to your client.
- Print: Print a copy of the proposal.
- Download PDF: Download the proposal as a PDF file.
- Duplicate: Create a copy of the proposal.
- View summary: View a payment summary of the services your client has accepted.
- Convert to invoice: Turn the proposal into an invoice.
- Delete: Permanently remove the proposal from your list of proposals.
Did this help?
|