Wix Partners: Creating Invoices in Client Billing
2 min read
Create, send, and keep track of all your client invoices. Your clients receive an email with their invoice and a link to complete the payment and you get paid online.
Before you begin:
Make sure to connect your Partner account to a payment method so you can get paid online. Learn more
To create an invoice:
- Click Partner Dashboard at the top of your Wix account.
- Click the Client Billing tab on the left.
- Click the Invoices tab on the left.
- Click Get Started or click + New Invoice.
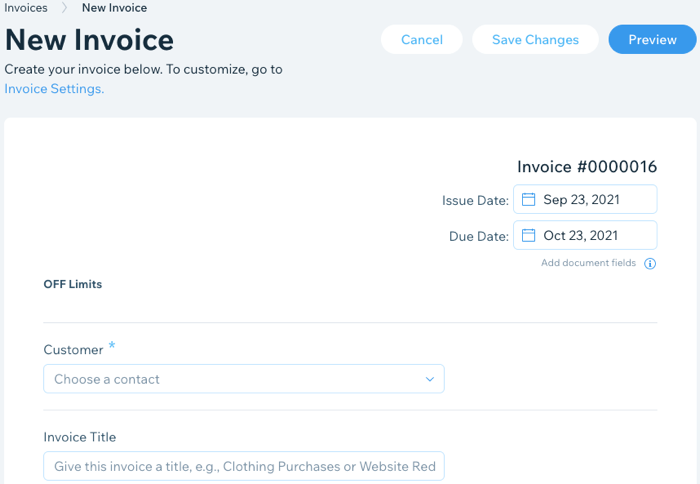
- Enter the invoice details:
- Due Date: Select a due date for the invoice (Within 7 days, Within 14 Days, Within 30 days or Custom due date).
Note: Issue Date is the same as the send date. - Customer: Select a client for this invoice.
- Invoice Title: Enter a title for this invoice.
- Due Date: Select a due date for the invoice (Within 7 days, Within 14 Days, Within 30 days or Custom due date).
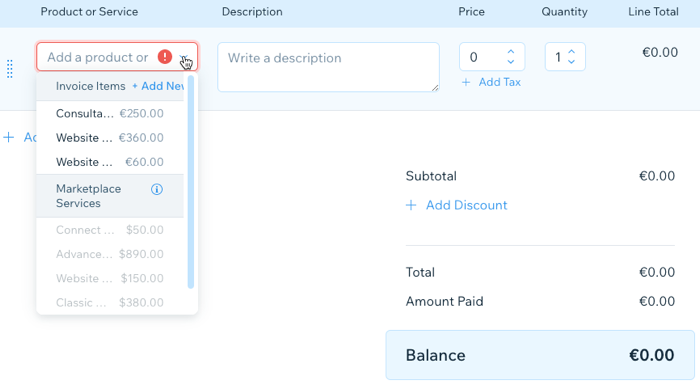
- Click the Product or Service drop-down to add your services to the invoice.
- (Optional) Enter a description for the product or service.
- Enter a price for the product or service.
- Enter the quantity of the product or service.
- (Optional) Click the Tax field to add tax to the invoice.
- (Optional) Click + Add Line Item to add additional services to the invoice.
- (Optional) Click + Add Discount to add a discount to the subtotal.
- Enter or edit the text in the Notes and Legal Terms fields.
Note: These fields appear at the bottom of your invoice. - Select an option:
- Save Changes: Save the invoice to send at a later time.
- Preview: See your invoice before sending it. When ready, click Send.
Did this help?
|