Wix Mobile Apps: Customizing Your Member App's Navigation Menu
9 min
In this article
- Reordering the screens in your navigation menu
- Hiding a screen from your navigation menu
- Changing the location of your navigation menu in your own mobile app
Your Wix member apps, like Spaces by Wix ap or Fit by Wix app, are made up of screens. Each screen, such as the Home screen or the Services screen, acts as a separate 'page' in your app. Your app's navigation menu enables your members to navigate between these screens seamlessly.
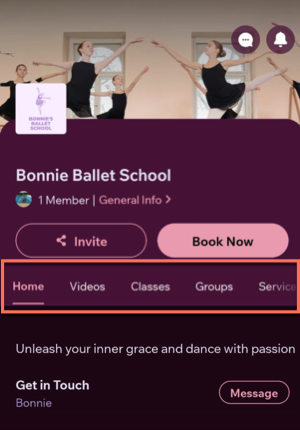
You can customize the navigation menu by choosing which screens appear in it and in what order, and whether it appears at the top or bottom of the screen (for your own mobile app only).
Reordering the screens in your navigation menu
Rearrange your app's navigation menu to prioritize the most important screens for your members.
Dashboard
Wix App
Wix Studio App
- Go to Mobile App in your site's dashboard.
- Select the relevant tab (e.g. Spaces by Wix app, Your own mobile app).
- Click Edit Mobile App.
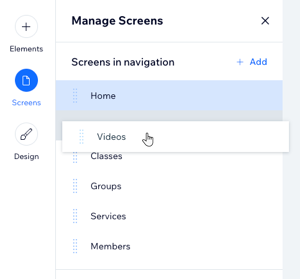
- Click Screens on the left.
- Click and drag the screens up or down the list.
Tip: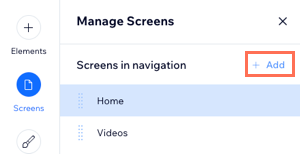
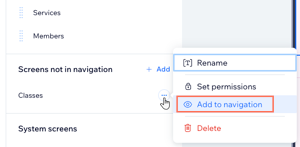
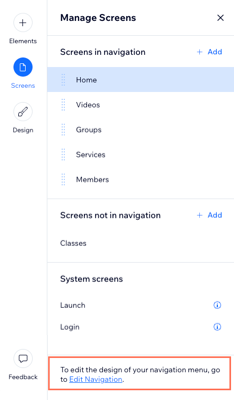
To add new screens to your app and navigation menu, click + Add under Manage Screens.
Hiding a screen from your navigation menu
By default, every screen that you add to your app appears in your navigation menu. You can hide a screen from the navigation menu to streamline your member's experience by decluttering irrelevant or seldom-used screens.
Dashboard
Wix App
Wix Studio app
- Go to Mobile App in your site's dashboard.
- Select the relevant tab (e.g. Spaces by Wix app, Your own mobile app).
- Click Edit Mobile App.
- Click Screens on the left.
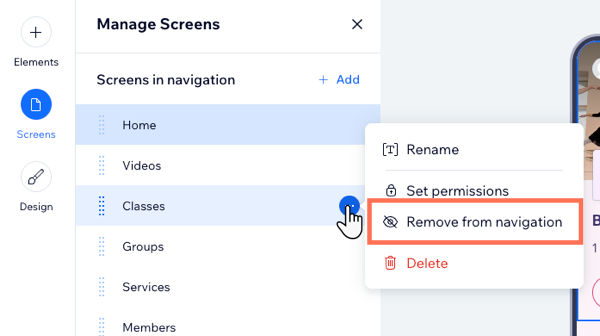
- Hover over the screen you want to hide and click the More Actions icon
 .
. - Click Remove from navigation.
Tip:
After removing the screen from your navigation menu, it appears under the Screens not in navigation section. You can add it back at any time.
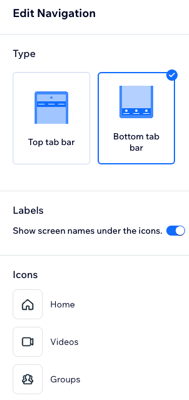
Changing the location of your navigation menu in your own mobile app
When using your own mobile app, you can change the location of the navigation menu from the top bar to the bottom bar. When you place your menu on the bottom bar, it changes from a text menu to an icon menu (with or without text).
See example of the navigation menu on the top and bottom bars


Dashboard
Wix App
Wix Studio App
- Go to Mobile App in your dashboard.
- Click the Your own mobile app tab or click the tab with the name of your own mobile app.
- Click Edit Mobile App.
- Click Screens on the left.
- Click Edit Navigation at the bottom left.
- Select an option under Edit Navigation on the right:
- Top tab bar: Your navigation menu remains in the top bar of the screen.
- Bottom tab bar: Your navigation menu moves to the bottom bar of the screen, and changes to an icon menu instead of a text menu. You can customize the menu as follows:
- Enable or disable the Show screen names under the icons toggle to show or hide the screen name text.
- Hover over an icon and click Change icon to change to a different icon.