

Wix Mobile Apps: Managing Your App Elements
11 min
In this article
- Adding an element to your mobile apps
- Reordering elements on your mobile apps
- Deleting an element
- FAQs
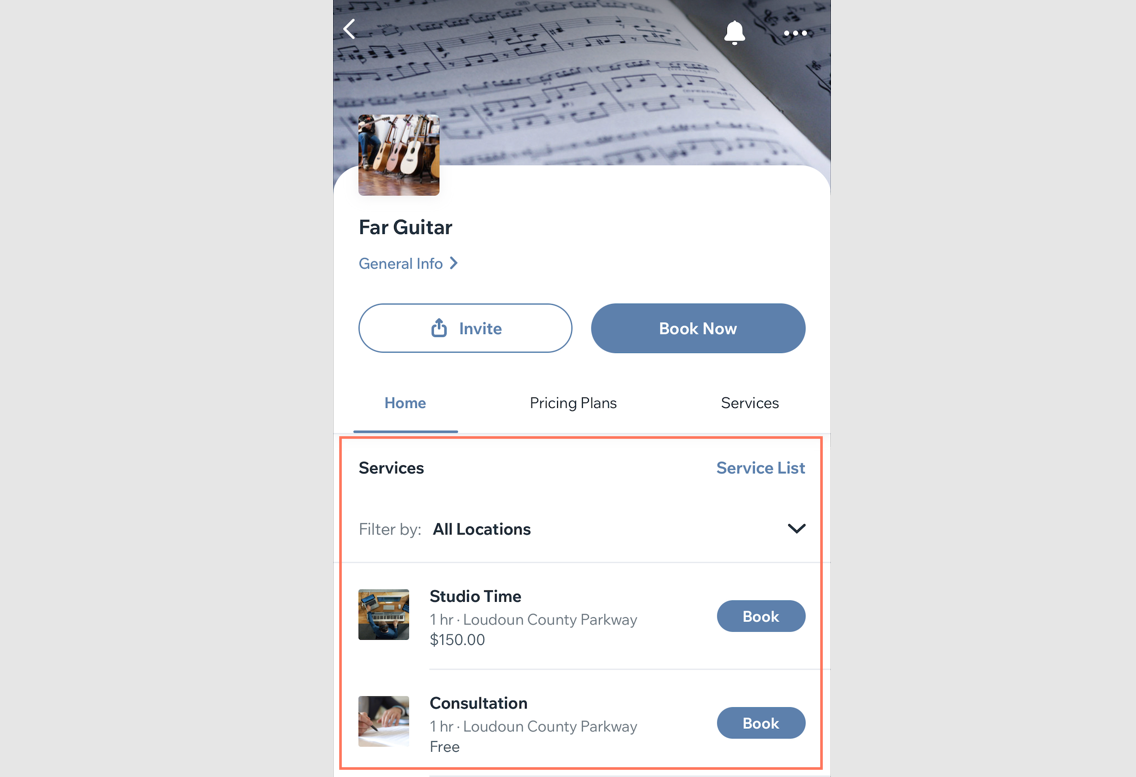
Each screen of your mobile app (e.g. Spaces by Wix, your own native app) contains different elements, similar to the elements on your site pages. You can add the elements that are most relevant to your business. For example, you can add a service element to show a list of all your services and let your app users book them.
Once you've added the elements, arrange them where users can clearly see and interact with them. You can also choose the specific screen where each element appears or remove elements that are no longer necessary.
Adding an element to your mobile apps
Add an element that suits your business and customize it according to your needs. Elements are organized by category so you can quickly find the one you want.
For example, if you have a store and want to add a gallery of all your products, you can add the product gallery element. Select the element and then directly place it onto the screen where you want it displayed.
Dashboard
Wix app
Wix Studio app
- Go to Mobile App in your site's dashboard.
- Click the relevant tab (e.g. Spaces by Wix app, Your own mobile app).
- Click Edit Mobile App.
- Click the Screen drop-down at the top and select the relevant screen.
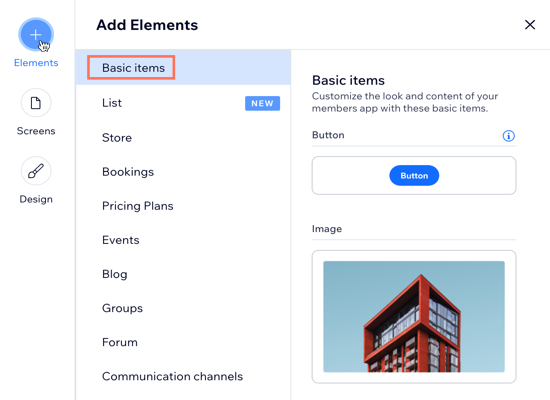
- Click Elements on the left.
- Select a category under Add Elements (e.g. Basic Items, Store, Bookings)
- Choose the element you want to add to your screen. For example, under Basic Items you can add elements to design and organize your app like buttons, media, titles, and paragraphs.
Note: Not all elements can be customized from the web editor. You can update those elements from the Wix app.
Reordering elements on your mobile apps
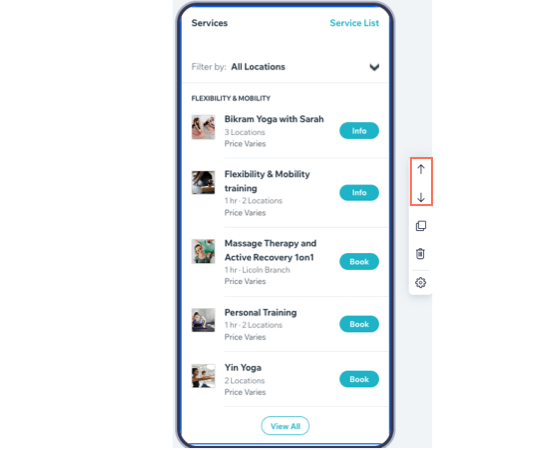
Set up your screen by putting the most important elements at the top of the screen. You can adjust the order by moving them up or down on the screen as needed.
Dashboard
Wix app
Wix Studio app
- Go to Mobile App in your site's dashboard.
- Click the relevant tab (e.g. Spaces by Wix app, Your own mobile app).
- Click Edit Mobile App.
- Click the Screen drop-down at the top and choose the relevant screen.
- Click on the element you want to reorder.
- Choose what you want to do:
- Click the Move up icon
 to move the element up.
 - Click the Move down icon
 move the element down.
- Click the Move up icon
Deleting an element
If you no longer want or need an element on your mobile app, delete it directly from the screen. You can add the same element again later, but any customization you’ve made to the element can’t be restored.
Dashboard
Wix app
Wix Studio app
- Go to Mobile App in your site's dashboard.
- Click the relevant tab (e.g. Spaces by Wix app, Your own mobile app).
- Click Edit Mobile App.
- Click the Screen drop-down at the top and choose the relevant screen.
- Click on the element you want to delete.
- Click the Delete icon
 .
. - Click Delete to confirm.

FAQs
Click below to learn more about managing your app elements.
Can I add the same element to two different screens?
 at the bottom.
 at the top right of the element.
I added an element to the wrong screen, how can I move it to another screen?
How many elements can I add to my app?
Can I customize the look of each element?
Can I restore an element once I delete it?
Can I add customized titles and text to my app?
