

Wix Invoices: Creating and Managing Recurring Invoices
5 min
In this article
- Creating a recurring invoice
- Managing your recurring invoices
- Resolving recurring invoices in grace periods
Recurring invoices enable you to automatically issue invoices to customers on a regular basis. Choose to invoice customers weekly, bi-weekly, monthly or yearly. View and manage your recurring invoices to keep track of payments made.
Before you begin:
In order to accept payments from clients in Wix Invoices, you must set up a payment method. If you've already set up a payment method for Wix Stores, Wix Bookings or Wix Events, you do not need to set one up again.
To set up a payment method, go to Invoices in your site's dashboard, click More Actions at the top right and click Accept payments.
For recurring invoices, you need to use suitable payment providers such as Paypal, Stripe, Wix Payments or Isracard.
Creating a recurring invoice
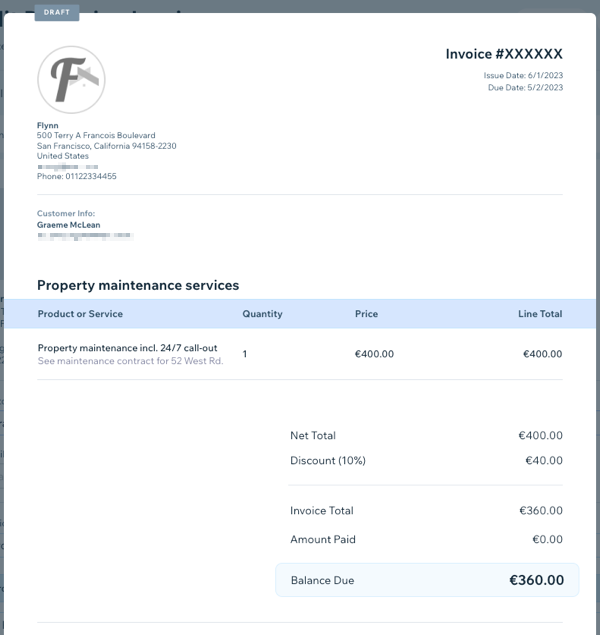
Add all necessary information to your invoice and view a preview to see how it looks before emailing to your customer.
To create a recurring invoice:
- Go to Recurring Invoices in your site's dashboard.
- (First time only) Click Get Started.
- Click + New Recurring Invoice at the top right.
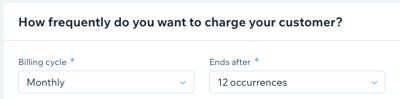
- Choose how frequently and for how long you want to invoice your customer:
- Billing cycle: Choose a frequency from the drop-down list.
- Ends after: Choose to end the recurring invoice after a set or custom number of occurrences, or let it continue on an unlimited basis (i.e. until it is stopped).
- Click Next.
- Enter the general details for this recurring invoice:
- Due Date: Set 7, 14, or 30 days, or a custom due date.
- Customer: Click the drop-down to select a contact from your Contact List.
- Invoice Title: Type a title to clearly summarize the reason for payment.
- Enter the product/service details for this recurring invoice:
- Choose whether this invoice covers an existing or new product or service:
- Existing product or service: Select your product or service from the Add an item drop-down.
- New product or service: Click the Add an item drop-down and click + Add New to enter invoice item details.
- (Optional) Enter a description in the Write a description field.
- (Optional) Click + Add Line Item to add an additional product or service.
- Choose whether this invoice covers an existing or new product or service:

- Enter the cost details for this recurring invoice:
- Quantity: Enter the quantity of the product or service.
- Price: Enter the price per unit.
- (Optional) Click + Add Tax to add tax.
Note: You'll be able to create a new tax rate or add a tax rate you've already created. - (Optional) Click + Add Discount to apply a percentage discount to the total amount.
- (Optional) Enter any notes or terms you'd like your customer to be aware of in the Notes and Terms fields.
- Choose to preview, save or send your invoice:
- Preview: Click Preview at the top right to see the invoice your customer will receive.
- Save: Click Save & Close at the top right to save the invoice to send at a later time.
- Send: Click Send Invoice at the top right to first review or edit the content of the email your customer will receive. Click Send when you're ready to send.
Edit your general invoice information:
Customize the business details that appear across all of your invoices, such as company ID and currency. You can also add your company logo.
Managing your recurring invoices
Send, edit or cancel recurring invoices. You can also view the individual invoices that make up your recurring invoice (e.g. January invoice, February invoice, March invoice).
To manage your recurring invoices:
- Go to Recurring Invoices in your site's dashboard.
- Click the More Actions icon
 next to the relevant recurring invoice.
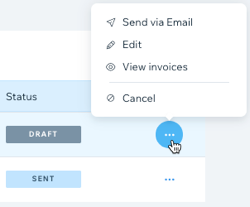
- Choose what you want to do:
- Send or resend: Click Send via Email to send this invoice (or Resend via Email if this invoice has been sent previously). Review or edit the content of the email your customer will receive, and click Send when you're ready to send.
- Edit: Click Edit. Update the invoice as required and click Save & Close or Send Invoice.
Note: You'll only be able to edit an invoice before a payment is made. - View the individual invoices: Click View invoices. You'll be able to view the individual invoices that make up this recurring invoice once a payment has been made.
- Cancel: Click Cancel and then click Yes, Cancel. Any unpaid invoices will be voided and future payments from this customer will be canceled.
Do more with your invoices:
When the individual invoices that make up your recurring invoice (e.g. January invoice, February invoice, March invoice) have been sent, they will also appear in Invoices in your site's dashboard. From there, you can access more invoice actions, including sharing an invoice link and duplicating an invoice.
Resolving recurring invoices in grace periods
You can resolve a customer's recurring invoice that's in a grace period from your site's dashboard. This is useful if your customer meets you in person and wants to update their payment method, either through a card payment or in cash. Learn more about grace periods.
To resolve a recurring invoice in a grace period:
- Go to Recurring Invoices in your site's dashboard.
- Click to select the relevant recurring invoice that's in a grace period.
- Click Collect Payment and choose what you want to do:
Submit payment

