Wix Hotels by HotelRunner: Creating and Managing Your Cancellation and Deposit Policies
5 min
In this article
- Adding your cancellation policies
- Managing your cancellation policies
- Adding your deposit policy
- Managing and disabling your deposit policy
Important:
- This article refers to the latest version of Wix Hotels by HotelRunner. For information on the previous version of Wix Hotels, click here.
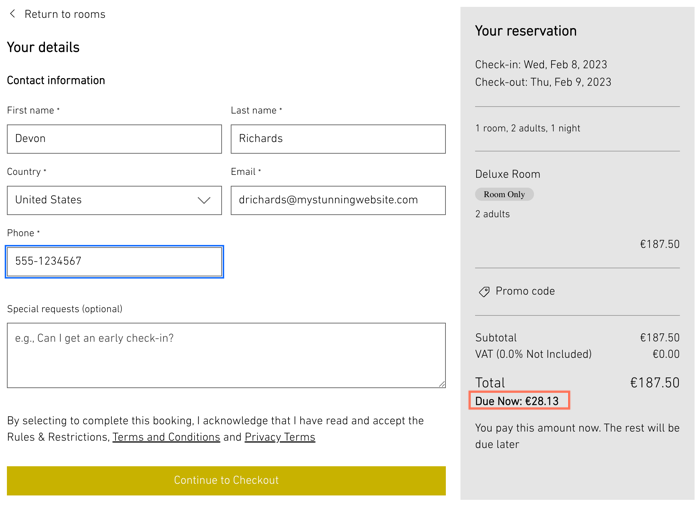
Add your cancellation and deposit policies so your guests can book with confidence and know exactly what to expect. Your deposit policy appears at checkout.
Making your policies clear and easy to understand also helps your customer service staff to resolve issues quickly.
Adding your cancellation policies
A clear cancellation policy is important for keeping your hotel as close to capacity as possible.
Include everything guests need to know about cancellation before they complete their booking. Make clear how much notice guests need to provide before cancelling to receive a full refund. You can also add your fees for last-minute cancellations.
Important:
After you create a cancellation policy, make sure you add it to all relevant Rate Plans for the policy to take effect (see steps 10-13 in the following section).
To add a cancellation policy:
- Go to Property Settings in your site's dashboard.
- Click Manage Policies next to Cancellation and deposit policies.
- Click + Add cancellation policy.
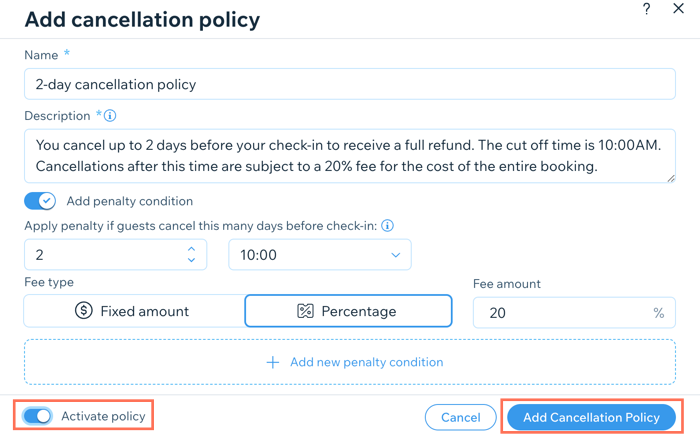
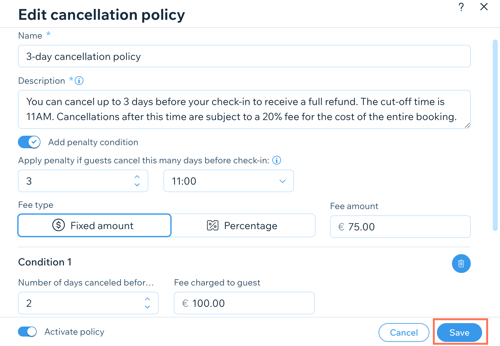
- Enter the policy name.
- Enter a detailed policy description. For example, include the number of days before check-in that you charge a fee for cancellation, the amount due, etc.
- (Optional) Add a penalty to your cancellation policy:
- Enable the Add penalty condition toggle.
- Enter how many days before the check-in the penalty will be applied in the event of a cancellation.
- Choose a cut-off time from the Select time drop-down. For example, 10:00 AM 2 days before check-in.
- Choose the Fee type:
- Fixed amount: Enter the fee you charge if the penalty conditions are met.
- Percentage: Enter the percentage of the room rate you charge if the penalty conditions are met.
- (Optional) Create additional penalty conditions by clicking + Add new penalty condition.
- Enable the Activate policy toggle at the bottom to make this policy active on your site.
- Click Add Cancellation Policy to confirm.
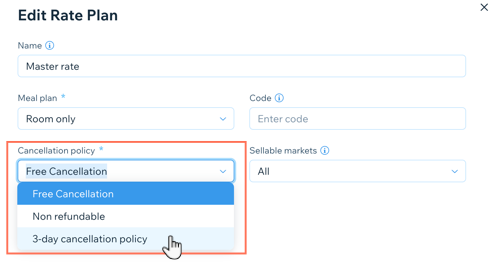
- Go to Rate Plans under Property Setup in your site's dashboard.
- Click Edit next to the relevant Rate Plan you want to add the cancellation policy to.
- Select the relevant cancellation policy from the Cancellation policy drop-down.
- Click Save.
Managing your cancellation policies
You can update or deactivate any of your cancellation policies at any time. This is useful during the off-season when you want to attract more guests. Reactivate your stricter policies during high season to help reduce late cancellations.
To manage your cancellation policies:
- Go to Property Settings in your site's dashboard.
- Click Manage Policies next to Cancellation and deposit policies.
- Click the More Actions icon
 next to the relevant policy.
 - Click Edit.
- Choose what you want to do:
- Update the policy's details: Change the name and / or description of the policy.
- Add a new penalty condition: Create another condition with a different penalty involved.
- Remove a penalty condition: Disable the Add penalty condition toggle so it no longer applies.
Note: If you have multiple conditions, click the Remove condition icon next to the one you want to delete.
 - Deactivate the entire policy: Disable the Activate policy toggle at the bottom. You can reactivate the policy at any time.
- Click Save.
Adding your deposit policy
If you don't want to charge your guests the full reservation fee upfront, you can add a deposit policy. This can help offset potential losses from late cancellations.
To add a deposit policy:
- Go to Property Settings in your site's dashboard.
- Click Manage Policies next to Cancellation and deposit policies.
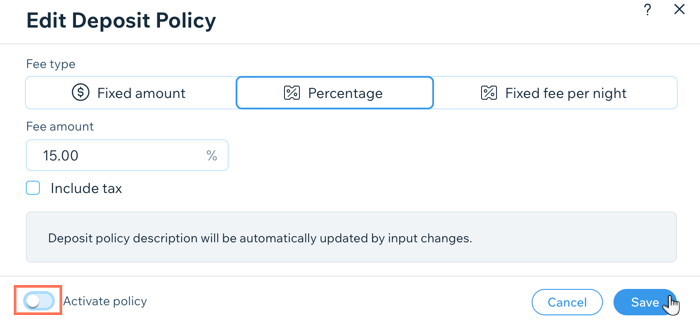
- Click Edit next to Deposit policy.
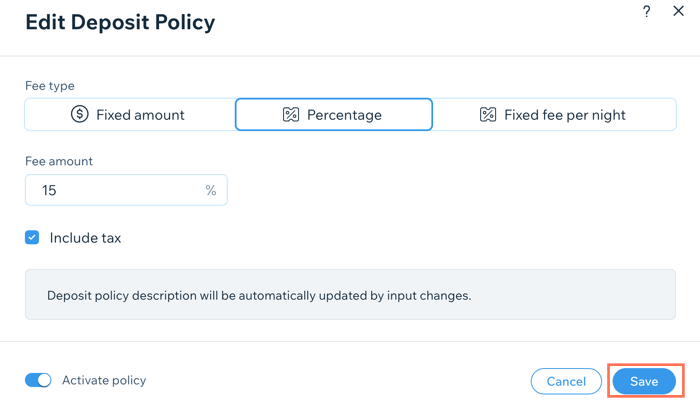
- Select the fee type:
- Fixed amount: Charge a single, fixed deposit per stay.
- Percentage: Charge a percentage fee based on the total cost of your guests' stay.
- Fixed fee per night: Charge a fixed deposit amount for each night.
- Enter the relevant Fee amount based on your choice above.
- (Optional) Select the Include tax checkbox to charge guests tax as part of the deposit.
- Enable the Activate policy toggle to make this policy active on your site.
- Click Save.
Managing and disabling your deposit policy
You can update or deactivate your deposit policy at any time. This is useful during the off-season when you want to attract more guests by not charging a deposit. Reactivate your deposit policy during high season to limit losses from no-shows or late cancellations.
To manage or disable your deposit policy:
- Go to Property Settings in your site's dashboard.
- Click Manage Policies next to Cancellation and deposit policies.
- Click Edit next to your Deposit Policy.
- Choose what you want to do:
- Update the fee type: Change the fee amount and / or type.
- Deactivate the deposit policy: Disable the Activate policy toggle so it's no longer active on your site.
- Add or remove tax: Select or deselect the Include tax checkbox.
- Click Save.