Wix Functions: Adding an Event Badge
3 min
In this article
- Adding a 'number of tickets left' badge
- Adding a custom text badge
Using Wix Functions, you can add event badges (based on the event's data) to highlight urgency, promotions or featured picks to site visitors. For example, show the number of tickets left for limited ticket events to encourage guests to register quickly. Once you activate an event badge function, it automatically reviews each event and adds a badge when your conditions are met.
Choose between our event badge templates 'number of tickets left' or 'custom text'. You can configure the varaibles, conditions, and outputs to personalize the badge and best fit your business needs.
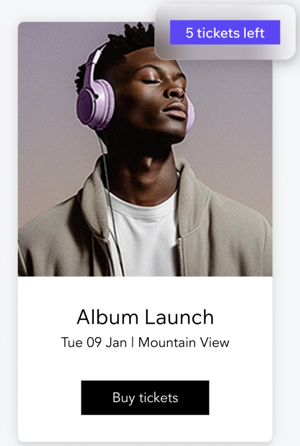
The badge appears on your event lists and event pages and follows your site design (i.e. colors and typography).
Adding a 'number of tickets left' badge
Display how many tickets are still available for your events. This is useful when there are a limited number of tickets to your event and you want guests to register quickly.
To add a 'number of tickets left' badge:
- Go to Functions in your site's dashboard.
- In the Function catalog, click Create Function under Add event badges.
- Select # of tickets left badge and click Use Template.
- (Optional) Select which events the badge will appear on.
- Click the More Actions icon
 at the top right.
 - Select Function configuration.
Note: If you don't select a specific event, the badge will appear on all events.
- Click the More Actions icon
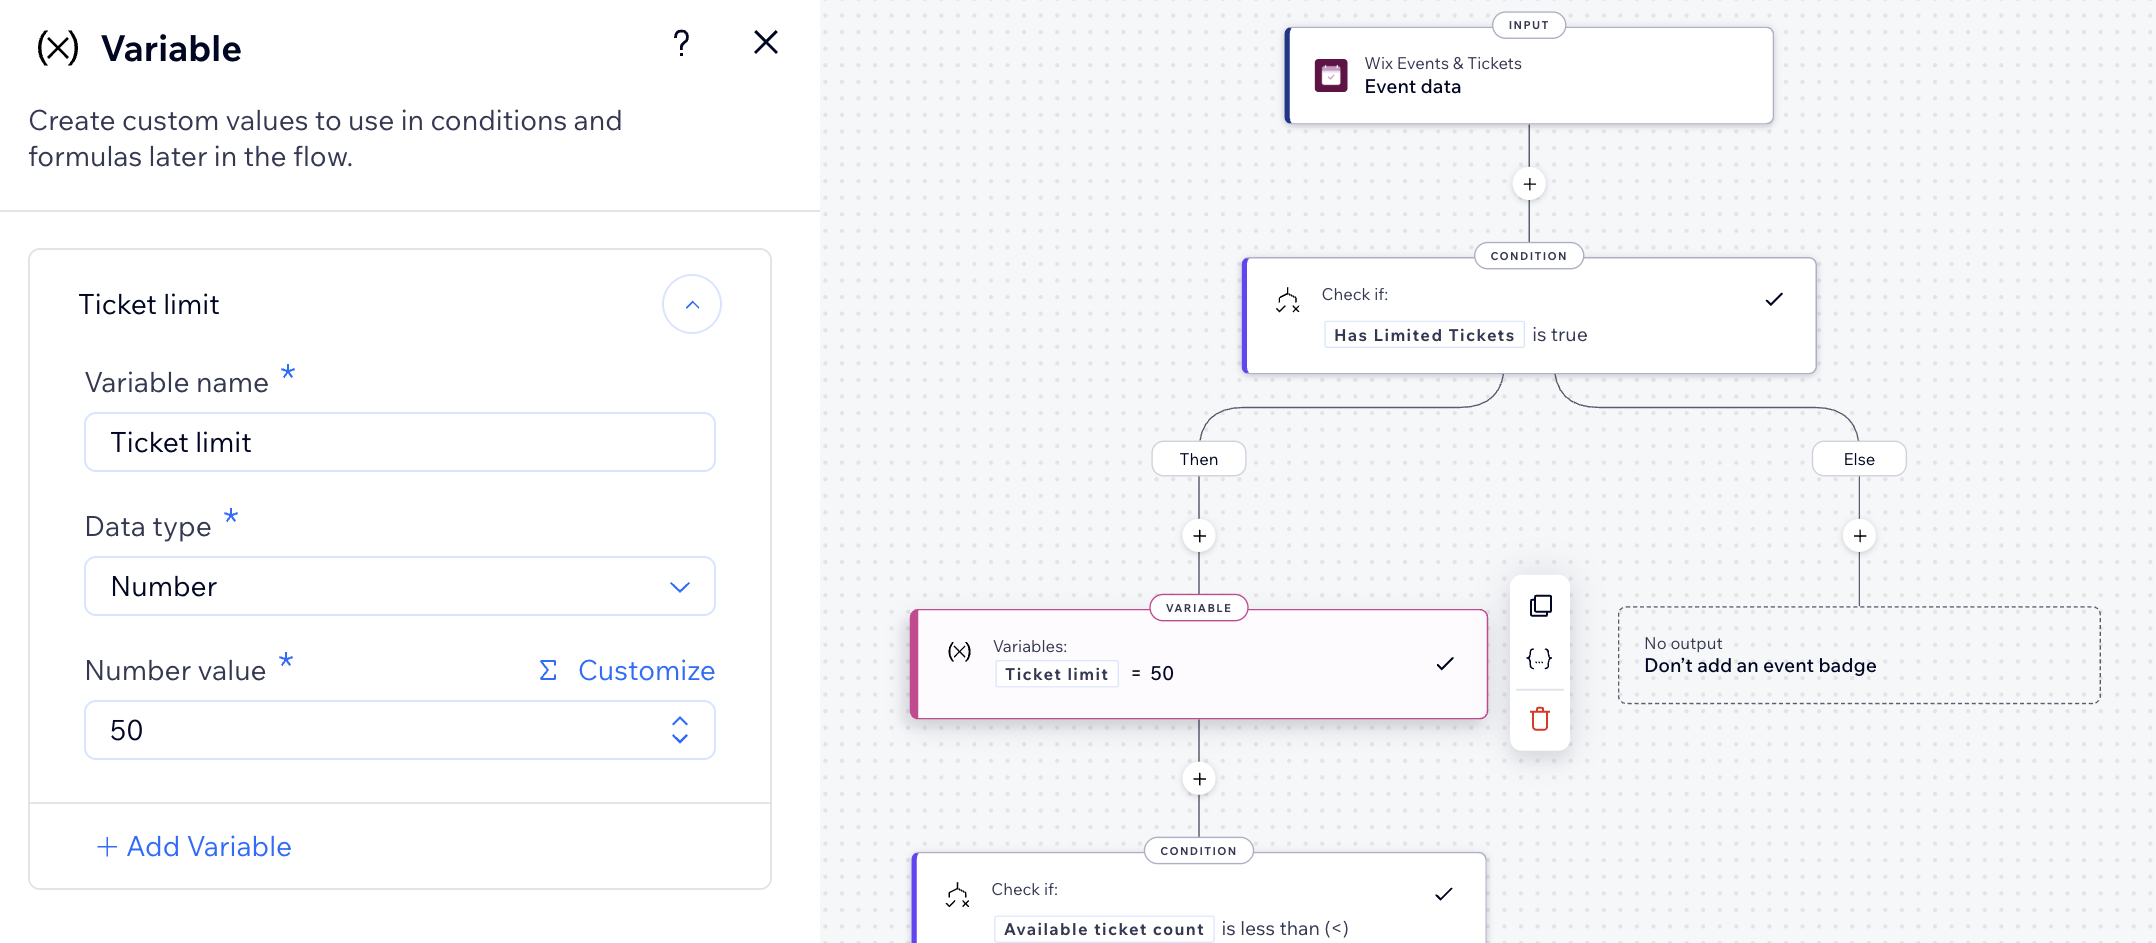
- Update the first variable's logic:
- Click the first Variable step to update its logic.
- Click Number value to update the value to match your business needs (e.g. update the default value to match the number of tickets for your event).
- Click Apply to save the variable.
- Update the second variable's logic:
- Click the second Variable step to update its logic.
- Click Value to update the value to match your business needs (e.g. update the default value to match the number of tickets left for your event).
- Click Apply to save the variable.
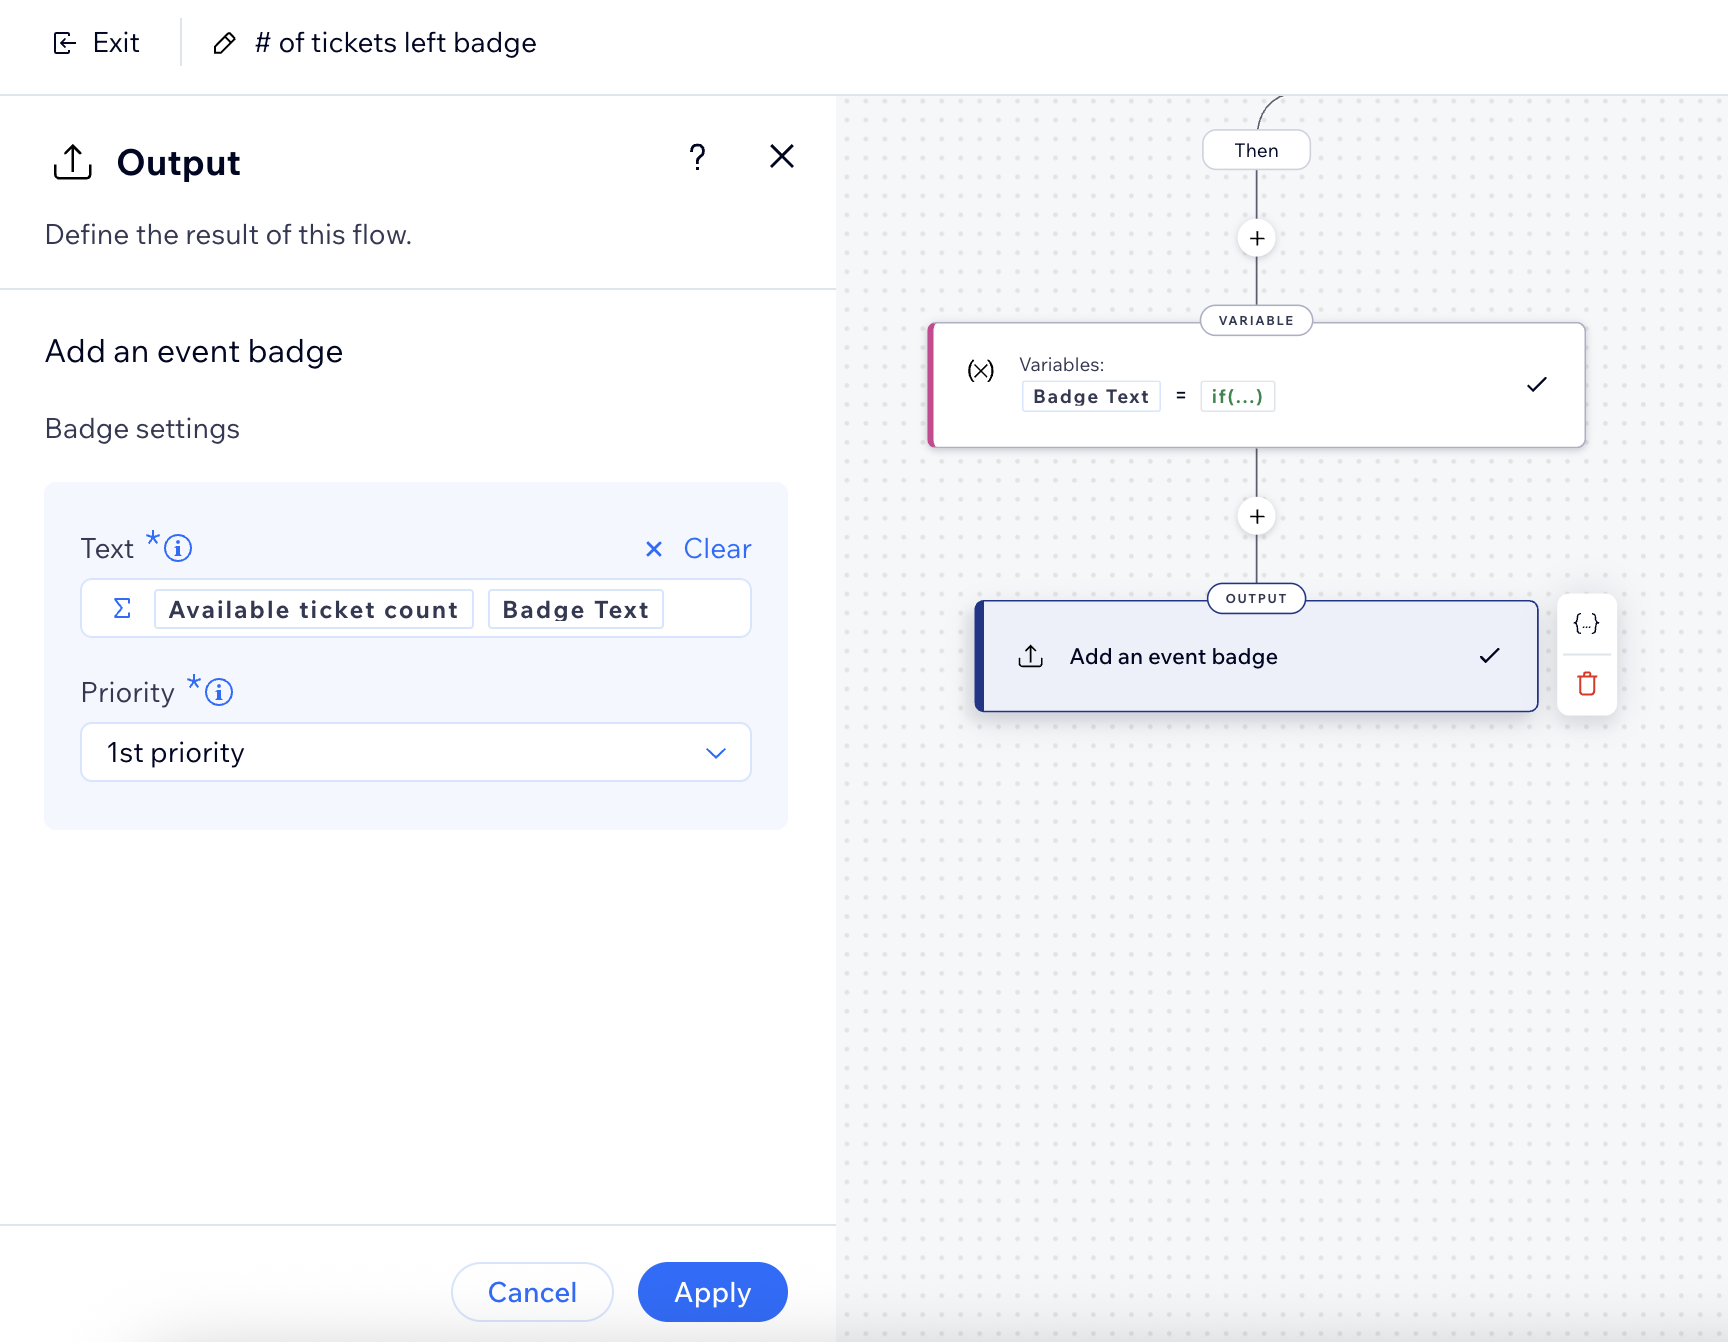
- Click the Output step.
- Set the desired priority for the badge.
Tip: When multiple badges are relevant for the same event, the badge with the highest priority will be displayed. - Click Apply to save the output.
- When ready, click Activate at the top right.
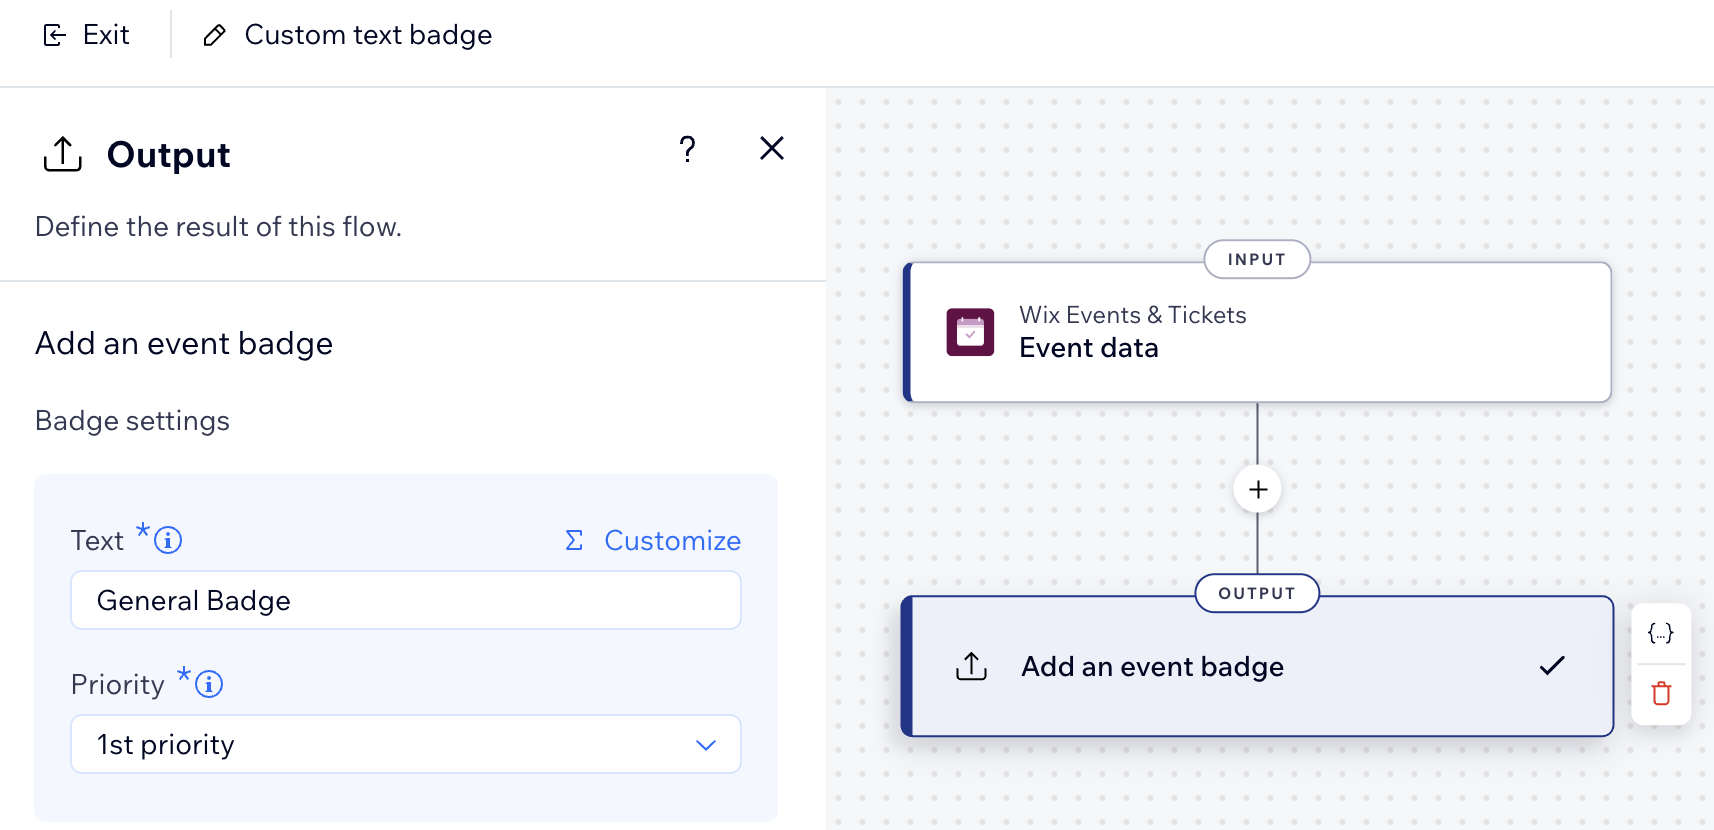
Adding a custom text badge
Display any text you want on a badge for your events. These can display a fixed message like 'Featured', 'Top Pick', or 'Selling Fast'. They're great for highlighting specific events regardless of ticket count.
To add a custom text badge:
- Go to Functions in your site's dashboard.
- In the Function catalog, click Create Function under Add event badges.
- Select Custom text badge and click Use Template.
- (Optional) Select which events the badge will appear on.
- Click the More Actions icon at the top right.
- Select Function configuration.
Note: If you don't select a specific event, the badge will appear on all events.
- Click the More Actions icon
- Click the Output step to update its logic.
- Click Text to update the value to match your business needs (e.g. update the default value to match the name and need of the badge).
- Set the desired priority for the badge.
Tip: When multiple badges are relevant for the same event, the badge with the highest priority will be displayed. - (Optional) Continue building your function as needed.
- When ready, click Activate at the top right.