

Wix Editor: Creating Text Columns
3 min
In this article
- Step 1 | Split your strip into columns
- Step 2 | Resize your columns
- Step 3 | Add text to your columns
Columns are a great way to showcase important site information. You can do this by adding a strip to your site and organizing your text into neat, structured columns. Design your columns to be equal in size, or customize each column's proportions individually.

Step 1 | Split your strip into columns
First, split your strip into the desired amount of columns. You can have up to five columns.
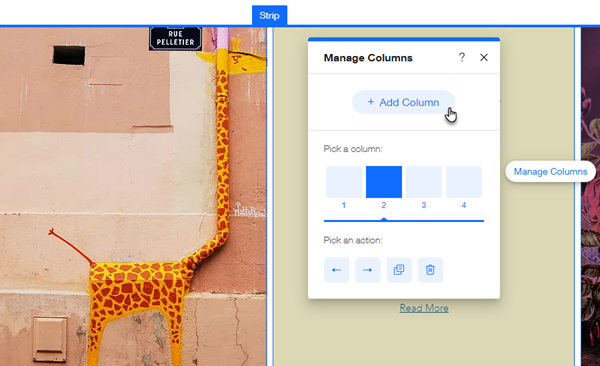
To split your strip into columns:
- Go to your editor.
- Click the relevant strip.
- Click the Layout icon
 .
. - Click Add Column.
- (Optional) Click Manage Columns and then Add Column to add more columns.
Step 2 | Resize your columns
Adjust your column proportions to suit the amount of text you want to display. You can choose from one of our column proportions presets or create a custom layout.
Note:
If you have 5 columns, you cannot customize their proportions. They are always distributed equally.
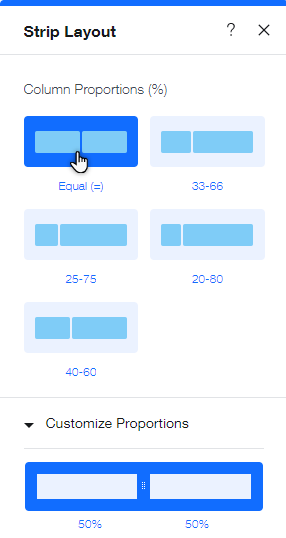
To resize your columns:
- Go to your editor.
- Click the relevant strip.
- Click the Layout icon .
- Click a layout under Column Proportions.
- Click Customize Proportions and customize the layout by dragging the column edges.
Step 3 | Add text to your columns
Next, add a text element to your site. Then, resize the element using the drag handles and drop it in place on your column.

To add text to your columns:
- Add a text element to your site.
- Re-size the text element so that it fits completely inside your column borders.
- Click and drag the text element to your chosen position on the column.
- Drop the text element when you see Attach to Column.
Important:
Make sure that your text is placed in the gridlines of each column to ensure that the text is visible on all devices.
Tip:
If you don't want your strip (behind your columns) to be visible, make it transparent by decreasing the opacity in the background settings.
