Wix Editor: Adding and Setting Up a Twitter Follow Button
2 min
In this article
- Step 1 | Add a Twitter Follow button
- Step 2 | Add your username and language
- Step 3 | Make your X (Twitter) account public
Let your site visitors follow you on X (formerly known as Twitter). Just add your username and get more people following your posts.
Step 1 | Add a Twitter Follow button
Start by adding a Twitter Follow button to your site. You can add this directly from your editor.
To add a Twitter Follow button:
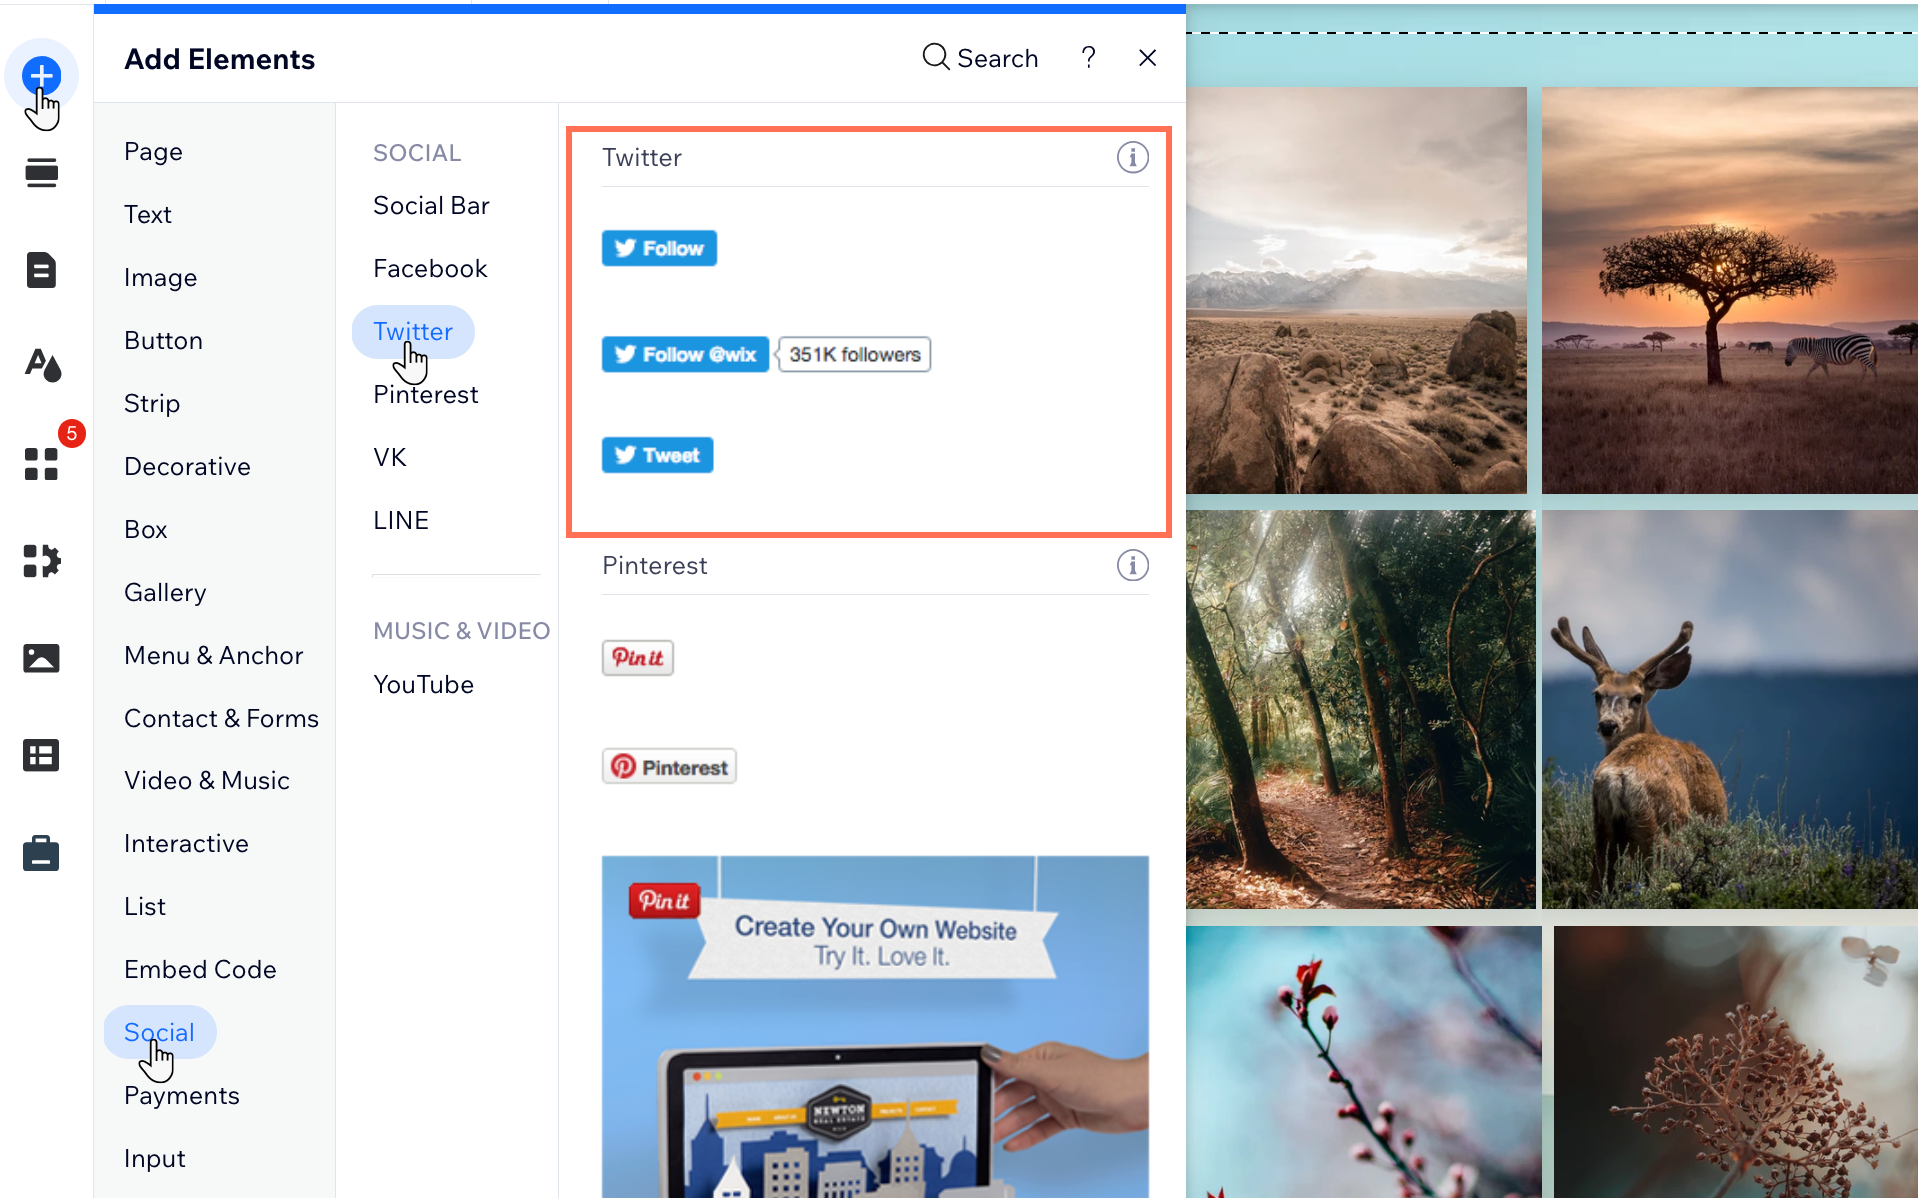
- Click Add Elements
 on the left side of the editor.
 - Click Social.
- Click the Twitter Follow button under Twitter, or drag the button to the relevant location.

Step 2 | Add your username and language
Once you've added your Twitter Follow button, you can add your username and select your preferred language.
To add your username and language:
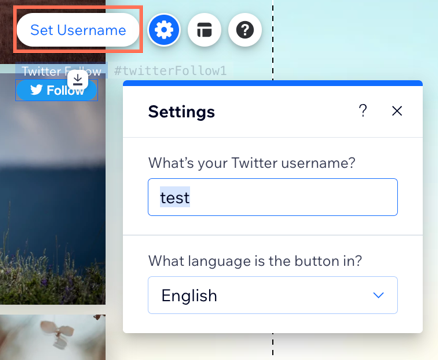
- Click the button in your editor.
- Click Set Username.
- Enter your X (Twitter) username.
- Press Enter on your keyboard.
- Select the relevant language from the What language is your button in? drop-down.

Step 3 | Make your X (Twitter) account public
In order for your posts on X (Twitter) to appear on your site, you need to ensure your account is public.
To make your account public:
- Go to your X (Twitter) account and log in.
- Click More on the left.
- Select Settings and privacy.
- Click Privacy and safety.
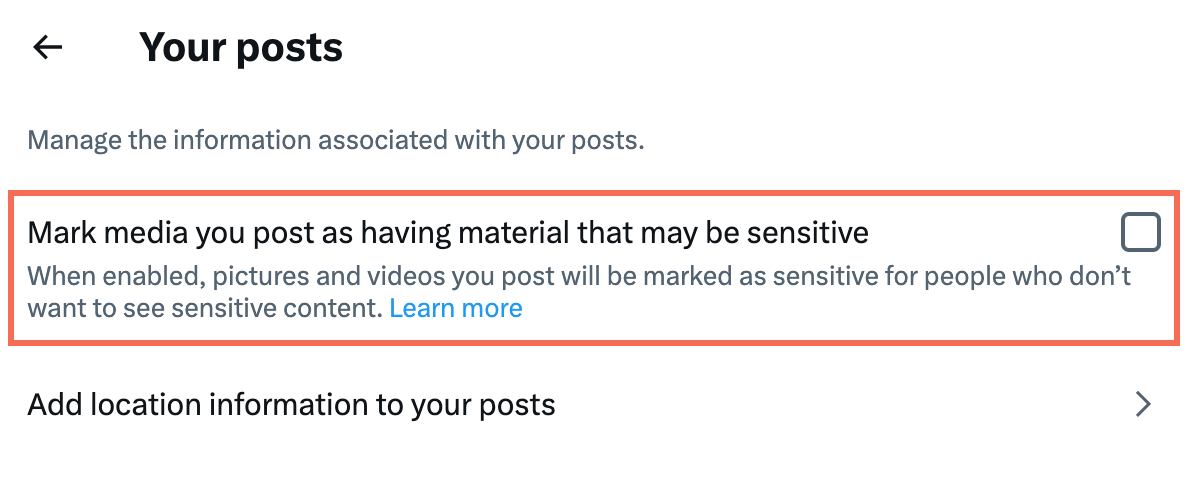
- Click Your posts.
- Deselect the checkbox next to Mark media you post as having material that may be sensitive.


