

Wix Bookings: Adding a Time Buffer After Appointments
3 min
In this article
- Setting a time buffer
- How buffer time affects your calendar
- FAQs
Add buffer to automatically block time after each appointment to give yourself or your staff time to wrap up, reset, or travel before the next session—especially when working from multiple locations.
For example, if you add a 15-minute buffer to a 1-hour service that ends at 3:00 PM, the next available time will be 3:15 PM.
Note:
Adding a buffer reduces your availability for appointments. Learn what affects your availability.
Setting a time buffer
- Go to Booking Services in your site's dashboard.
- Hover over the relevant appointment and click Edit.
- Scroll down to the Service details section.
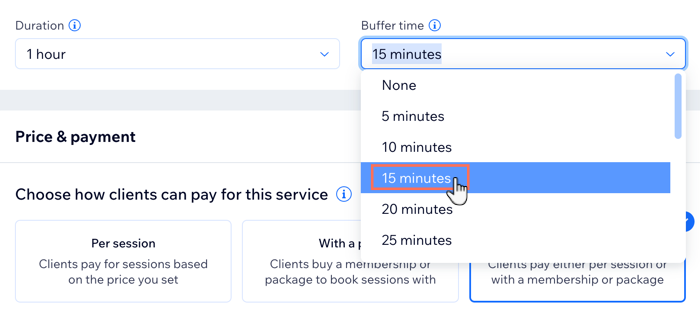
- Click the Duration drop-down and choose your service length.
Tip: Select Custom to enter a specific duration. - Click the Buffer Time drop-down to choose the length of the break after appointments.
Tip: Choose Custom to enter your own time. - Click Save.
Notes:
- Buffer time only applies to services with a fixed duration (not group sessions or classes).
- You can only add buffer time after appointments. To block time before, add it to your calendar.
How buffer time affects your calendar
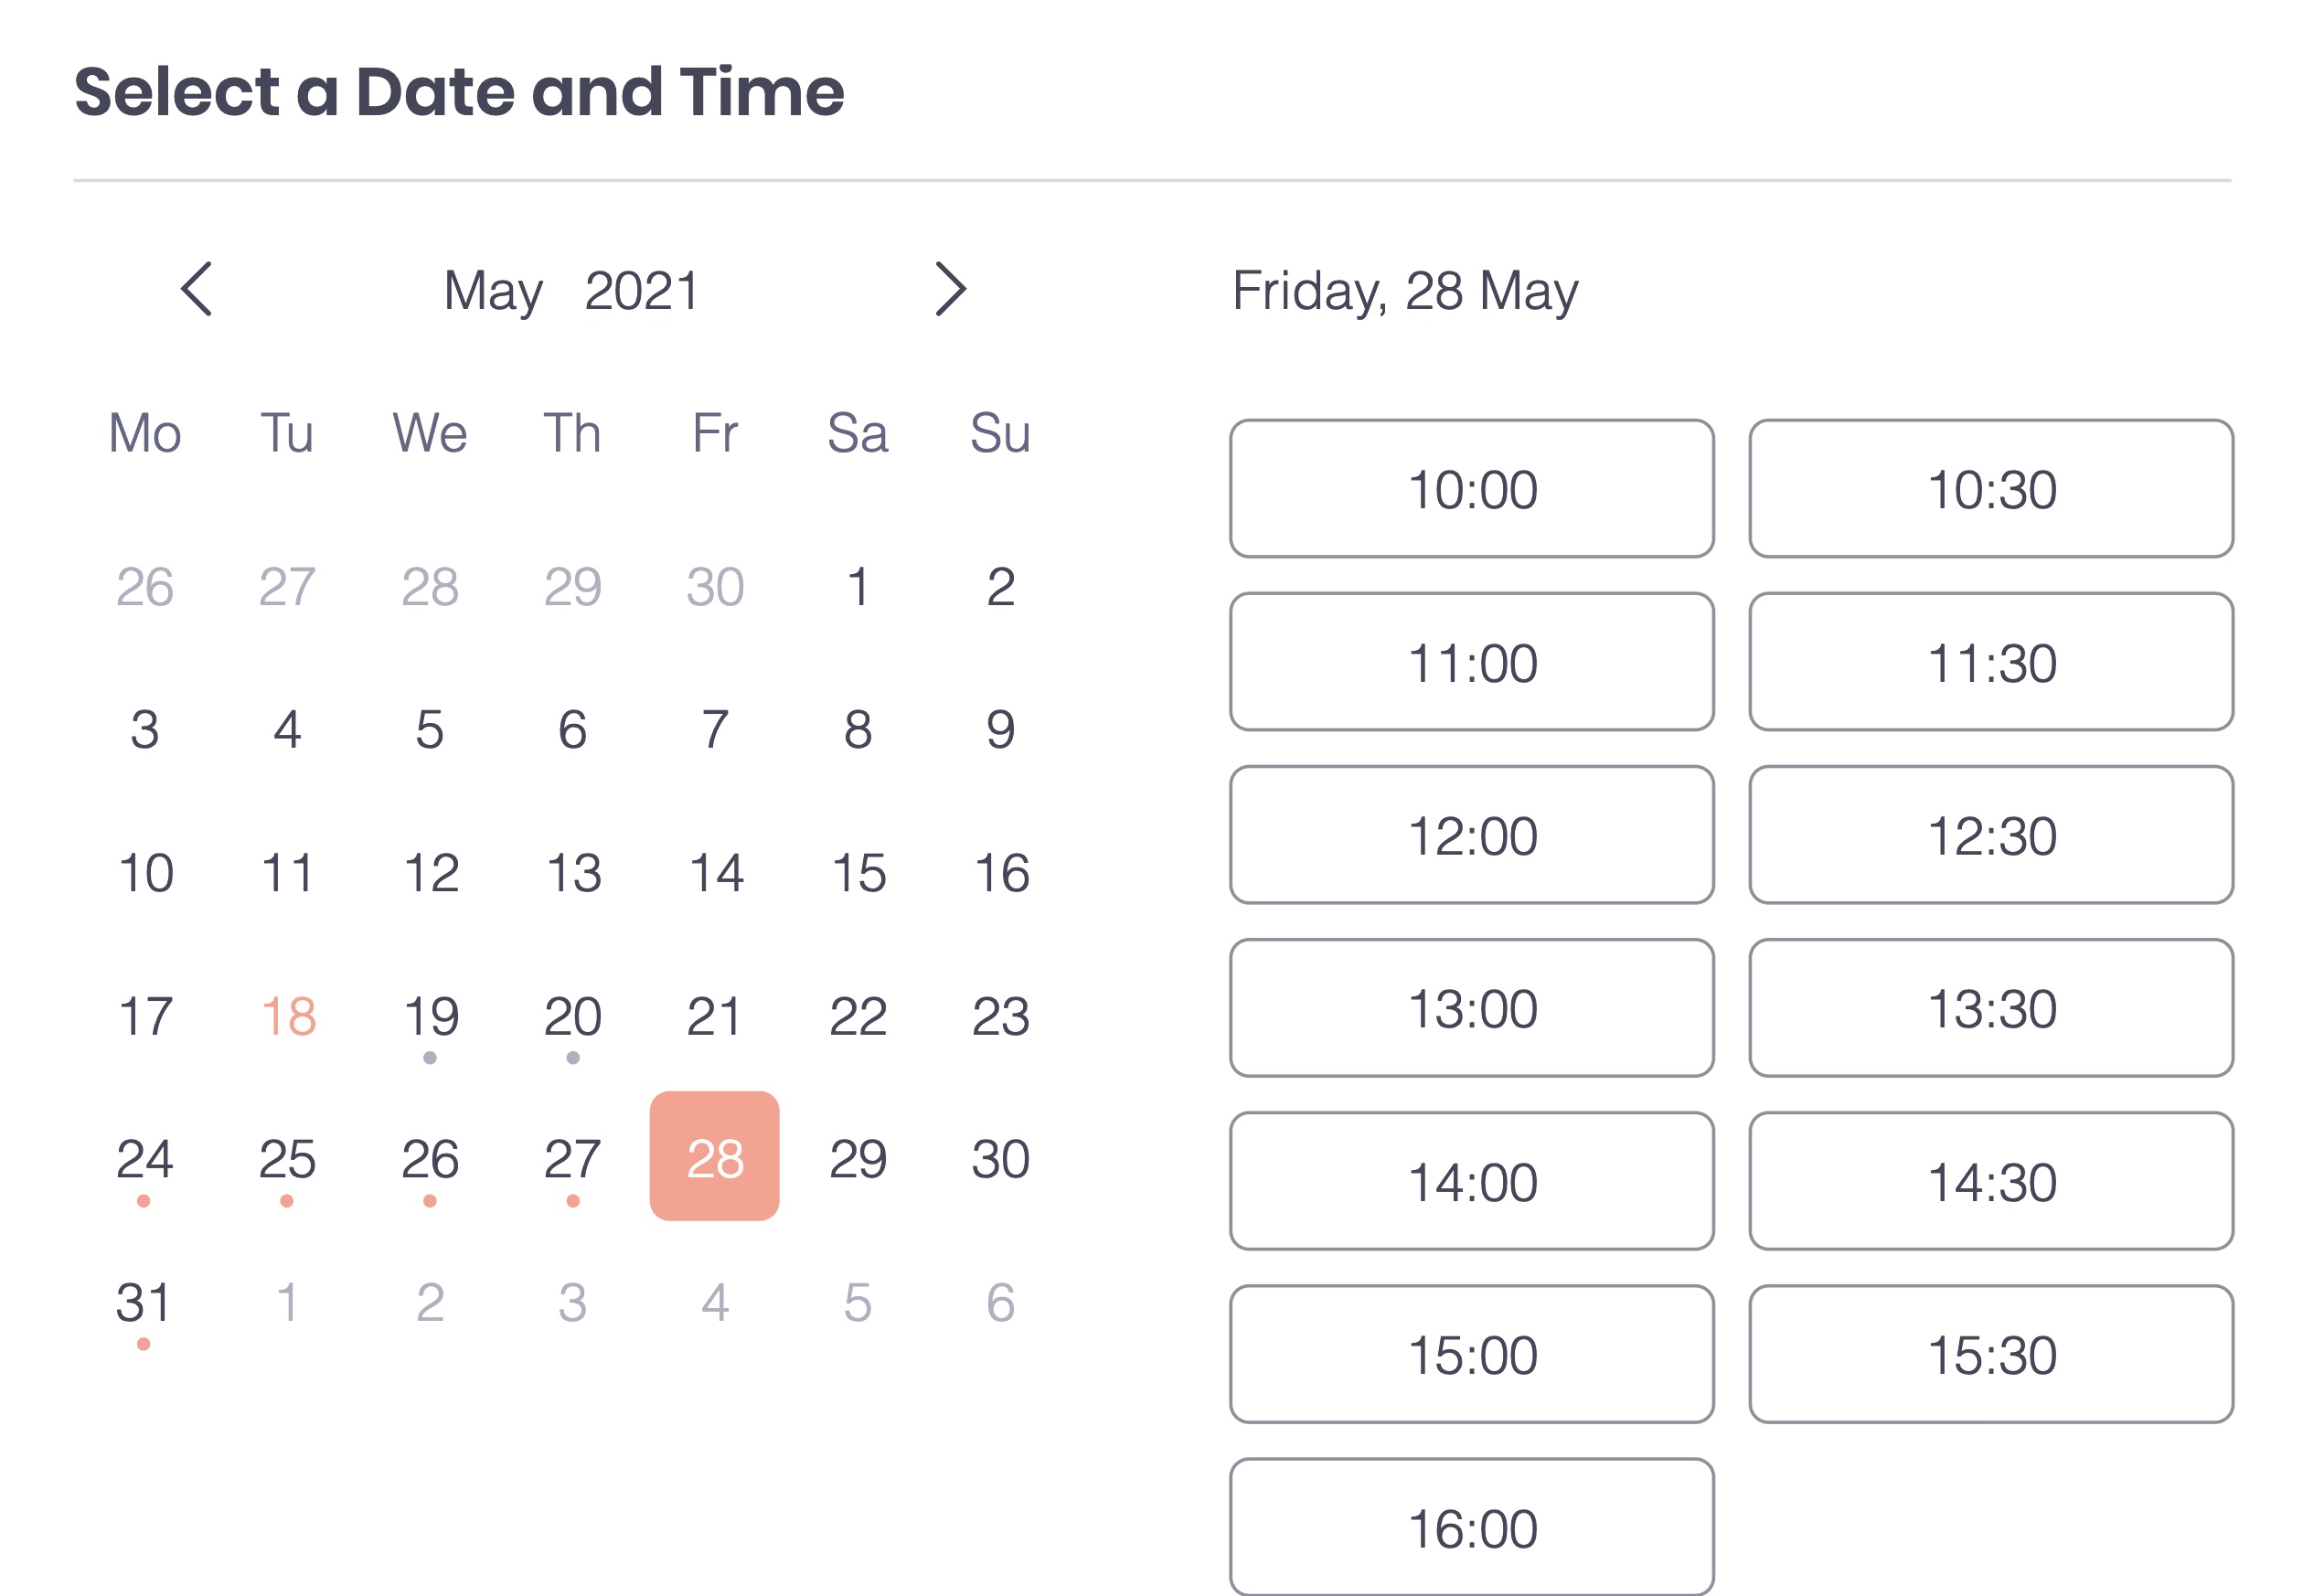
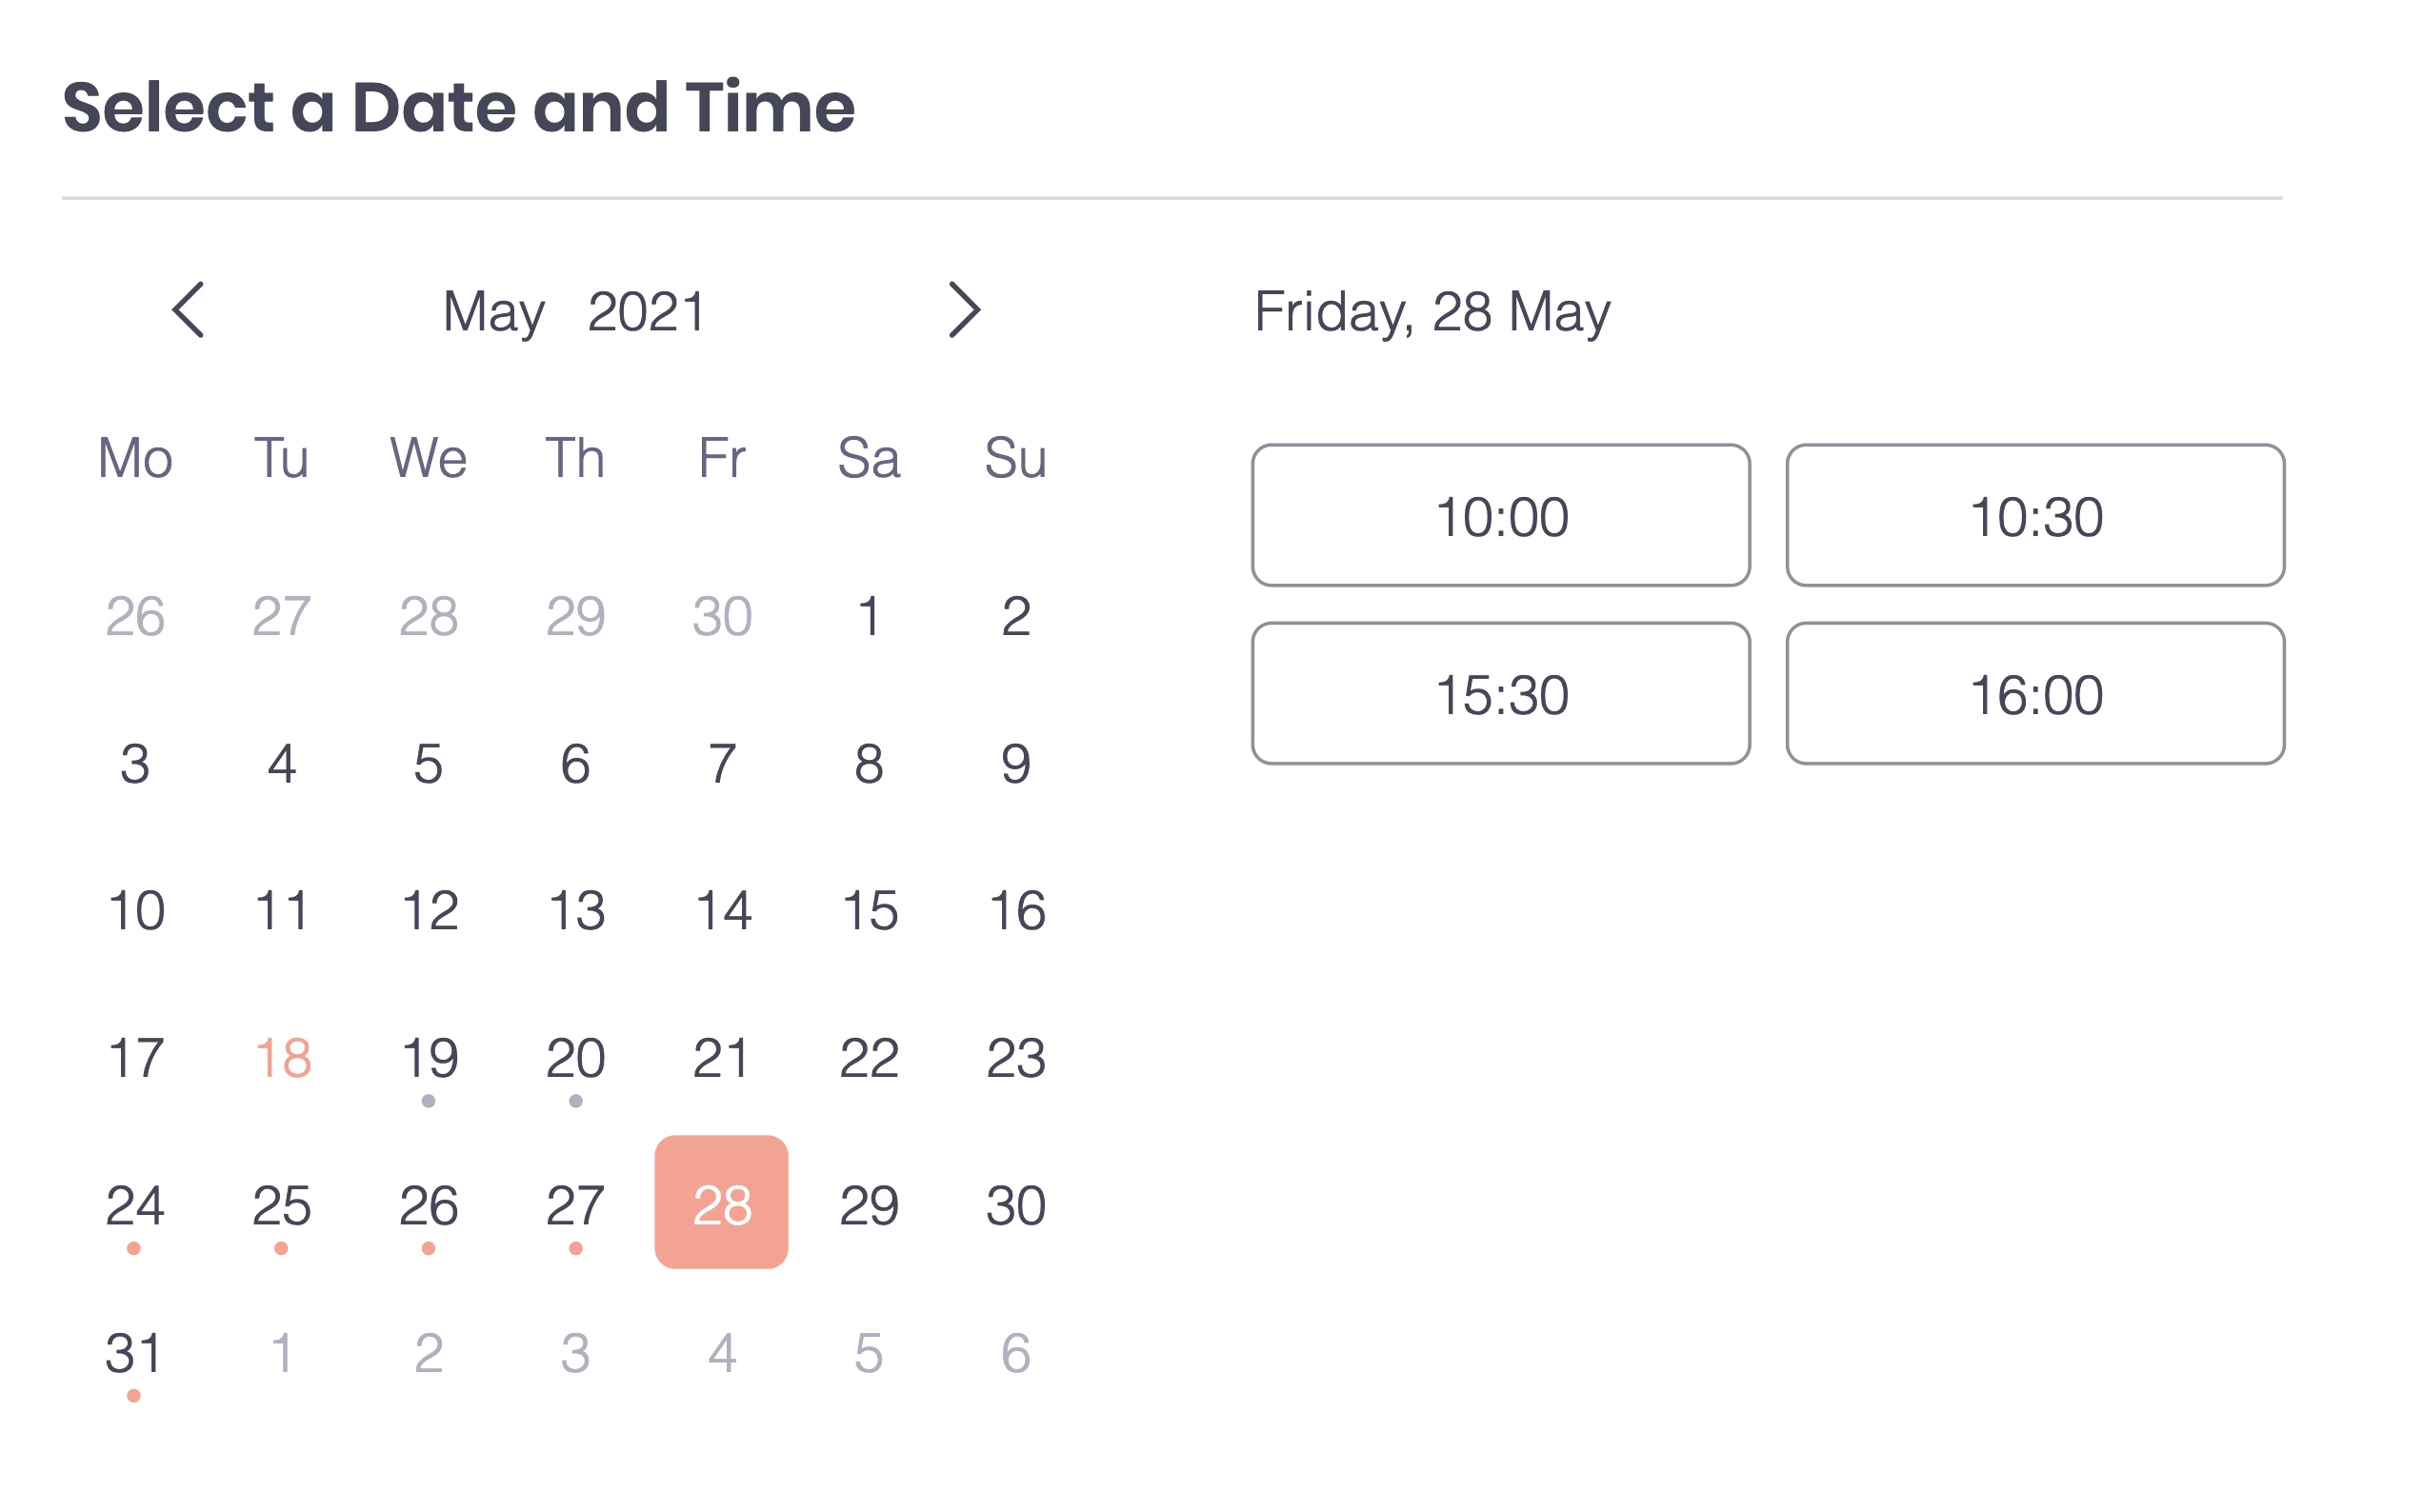
Let’s say Holly is a photographer who offers 2-hour photo shoots. Her business hours are 10:00 AM to 6:00 PM and her appointment slots are set to 30-minute increments. She adds a 30-minute buffer after each booking.
Before any appointments:
Her calendar shows all available time slots based on business hours and service duration.
After a client books 1:00–3:00 PM:
- The next available time is 3:30 PM, due to the 30-minute buffer.
- Clients can’t book at 11:00 AM, because that session would end at 1:00 PM—right before the 1:00–3:00 appointment.
- Clients can book at 10:30 AM, because that appointment ends at 12:30 PM—leaving a full 30-minute gap before the next session.
Note:
Buffer time doesn’t appear as a “busy” slot in your synced calendars (like Google Calendar). If you need extra time, you can manually block it by adding an event.
FAQs
Click on a question below to learn more about adding a time buffer.
Can clients see buffer time?
Can I add different buffer times for different appointment services?
Can I add buffer time before appointments?
