Wix Blog: Featuring Posts in Wix Blog
5 min
In this article
- Step 1 | Set some blog posts as featured
- Step 2 | Add the post list element to your site
- Step 3 | Set your post list to display featured posts
- FAQs
Hand pick specific blog posts that you want to feature. You can display featured posts anywhere on your site using a post list. You choose where you want it to appear, how it looks and which posts to feature.

Step 1 | Set some blog posts as featured
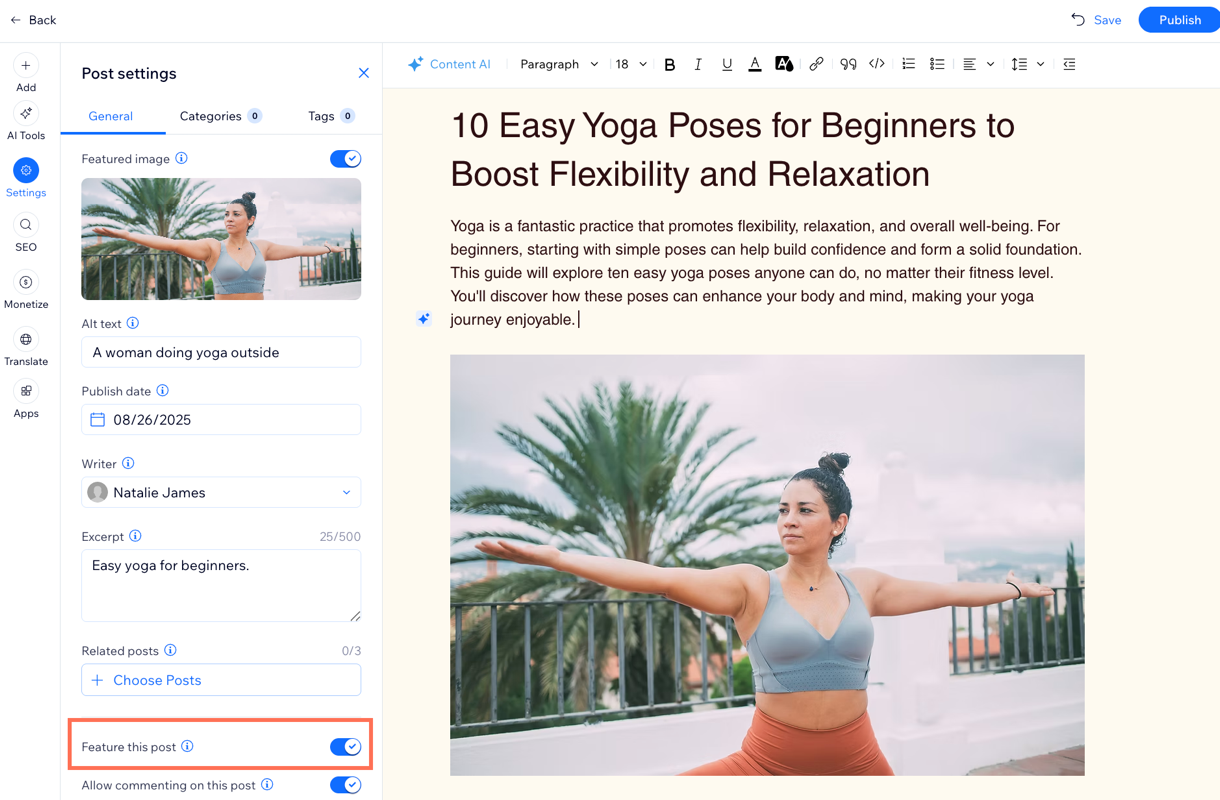
To display featured posts in your post list, mark the ones you want as ‘featured.’ You can do this while editing a post in your site’s dashboard or directly from the Wix app.
Dashboard
Wix app
- Go to Blog in your site's dashboard.
- Click +Create New Post or hover over an existing post and click Edit.
- Click the Settings tab in the panel on the left.
- Enable the Feature this post toggle.
- Click Publish at the top right.

Step 2 | Add the post list element to your site
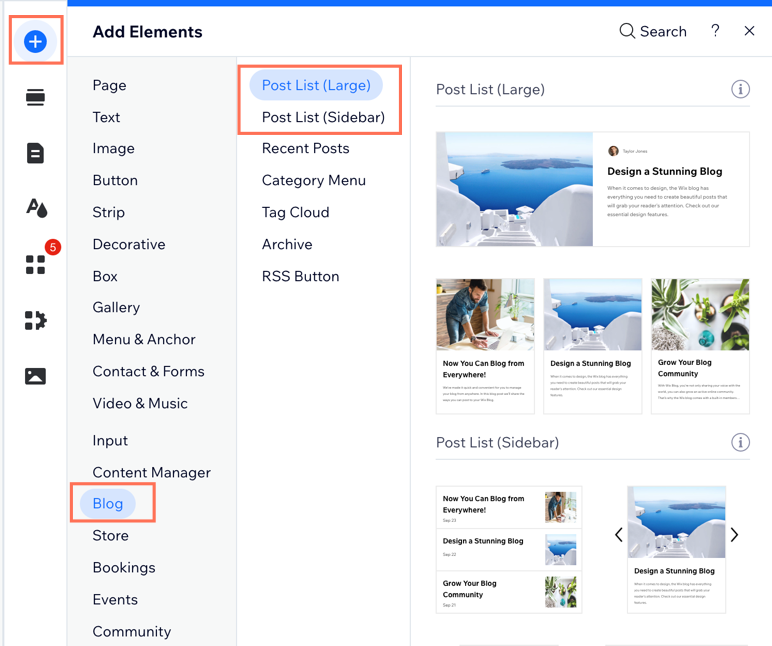
A post list is a blog element that displays a selected group of posts, such as featured posts, on any page of your site. Choose the page where you want your featured posts to appear, then add the post list element from the Add Elements tab in your editor.
Wix Editor
Studio Editor
Wix Harmony Editor
- Go to your editor.
- Click Add Elements
 on the left side of the editor.
 - Click Blog.
- Click the post list you want to use, or drag it to position it on the page.

Step 3 | Set your post list to display featured posts
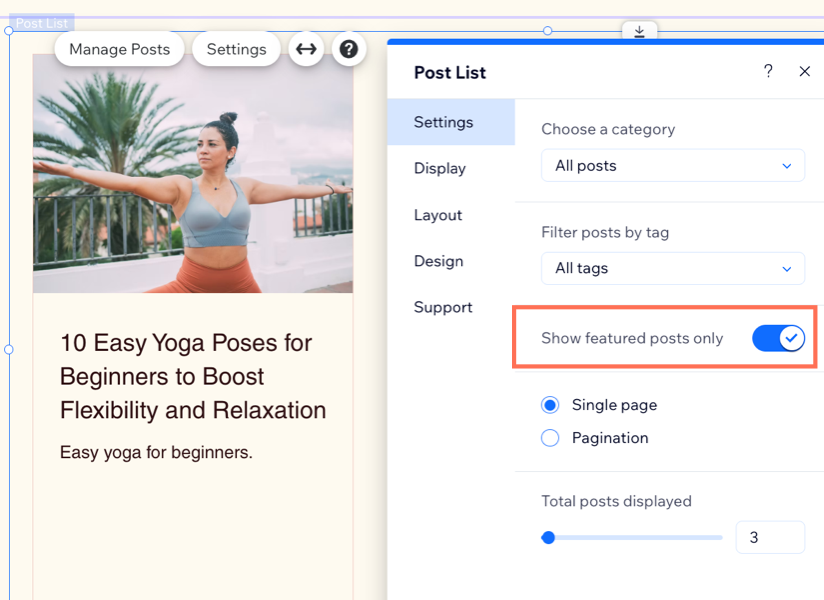
Once you've added your post list, you can set the post list to display any posts you want. To display featured posts only, select this option in the post list settings.
To set the post list to display featured posts:
- Click the post list in your editor.
- Click Settings.
- Click the Settings tab.
- Enable the Show featured posts only toggle.

FAQs
Click a question below to learn more about featuring blog posts.
What’s the difference between featured posts and pinned posts?
Can I feature posts from a specific category or tag?
Can I customize how the post list looks on my site?


