

Wix Blog: Adding Tables and Polls to a Blog Post
7 min
In this article
- Adding a poll to a blog post
- Adding a table to a blog post
Enhance your Wix Blog posts by adding tables and polls. Tables help you organize information clearly, making it easier for readers to digest complex data. Polls engage your audience by inviting them to share their opinions, increasing interaction on your site.
Adding a poll to a blog post
You can create a poll for your post in the Blog section of your site's dashboard or from the Wix app.
To add a poll to a blog post
Dashboard
Wix app
- Go to Blog in your site's dashboard.
- Hover over the relevant post and click Edit.
- Click the area of the post that you want to add the poll to and click the Add icon
 .
.

- Select Poll under Elements.
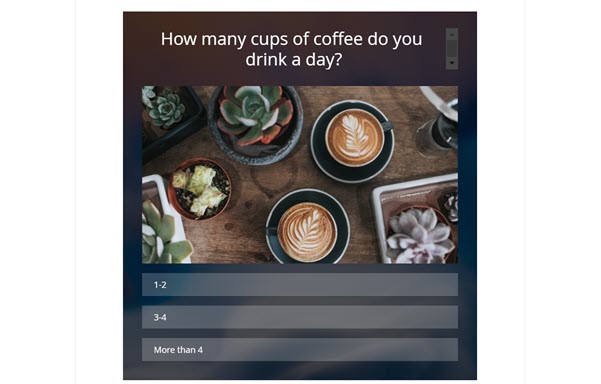
- Select the type of poll that you want to create:
- Simple list: Creates a poll with a question and a list of clickable answers.
- Image and list: Creates a poll with a question, an image, and a list of clickable answers.
- Images grid: Creates a poll with a question and a list of clickable images with answers written below them.
- Click the fields on the poll element to customize the question and answers.
- (Optional) Customize the layout, design, and settings of your poll using the available options.
Layout

Design
 .
.
Settings
 .
. 8. Click Save.
Adding a table to a blog post
Add a table to blog posts to help provide more structure to your content, especially if the post has a lot of important information. You can change the text and color of your entire table or customize individual cells depending on your needs.
Note:
It is not possible to add a table to a blog post using the Wix app.
To add a table:
- Go to Blog in your site's dashboard.
- Click + Create New Post or click an existing post.
- Click the area of the post that you want to add the table to and click the Add icon .

- Click Table.
- Enter the number of columns and rows you want in your table.
- Click Add.
- Add the relevant content to each section of the table.
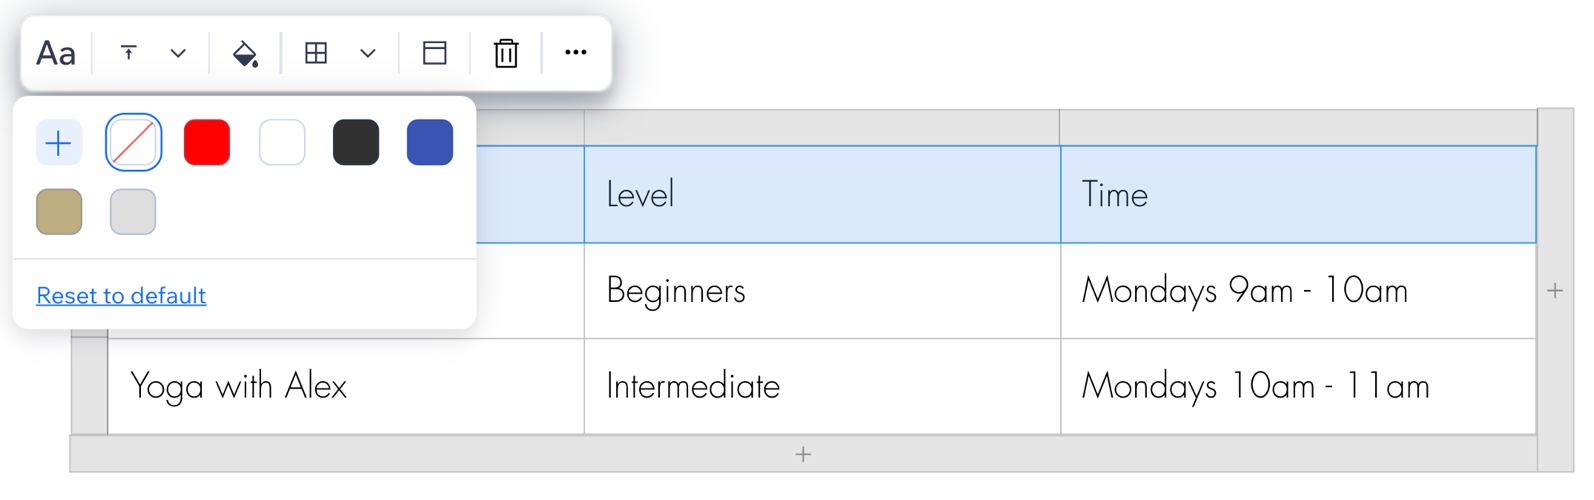
Tip: Click the More actions icon to select a specific row or column.
 - Customize the look of the table and the text:
- Text style: Click the Text style icon
 to customize the text that appears in the table.
 - Vertical alignment: Click the Vertical alignment icon
 to choose how you want the text to align.
 - Background color: Click the Background color icon
 to change the background color of the table.
 - Border: Click the Border icon
 to change the color of the table border.
 - Set as header: Click the Set as header icon
 to set a header for your table. Your header can be horizontal or vertical.
- Text style: Click the Text style icon
- Click Publish.
Hire a Professional WriterGet the content you need for your website. Hire a writer from the Wix Marketplace to create text that fits your message and brand.
