Site Members: Automatically Assigning Badges to Site Members
2 min read
Automations allow you to focus on the bigger picture by taking care of smaller tasks for you. Using Wix Automations, you can automatically assign badges to your members when a certain event takes place.
For example, you could automatically assign a "Certified Superstar" badge to a member who has completed an online program.
Badges are a great way to encourage member participation as you reward members for reaching certain milestones.
Before you begin:
To automatically assign a badge to someone, they must be a member of your site before the automation trigger (e.g. the completion of an online program) takes place.
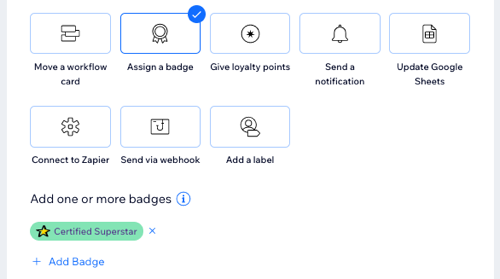
To automatically assign badges:
- Go to Automations in your site's dashboard.
- Click + New Automation.
- Click + Start from Scratch.
- Click the title to give your automation a name.
- Click the app you'd like to base your trigger on in the Trigger section.
- Select your chosen trigger from the available options.
- Click Assign a badge in the Action section.
- Click + Add Badge and choose what you want to do:
- Select existing badge(s): Select the checkbox next to the badge(s) you want to automatically assign.
- Create new badge(s): Click + New Badge and provide some information to create a new badge:
- Badge name: Enter a name for your badge.
- Description: Enter some text to explain to members why/when this badge is awarded.
- Background color: Use the drop-down to select your preferred background color.
- Text color: Use the drop-down to select your preferred text color.
- Icon: Click + to choose an icon to appear on your badge.
- Click Save.
- Click the Timing section to expand it.
- Click the Choose a time to send this action drop-down to select when the action should be carried out:
- Immediately: The action is performed as soon as the trigger occurs.
- Set custom time: The action is performed after the trigger, at a time set by you. Click the up and down arrows to set the number and click the drop-down to choose between days, hours and minutes.
- Click the Limit frequency to drop-down to set trigger frequency:
- Don't limit (trigger every time): Your action will take place every time it is triggered by a visitor.
- Once per contact: Your action will take place only once per contact.
- Once per contact every 24hrs: Your action will take place only once per contact in any 24hr period.
- (Optional) Click + Add an Action at the bottom to set up a multi-action automation.
- Click Activate to save and activate your new automation.
