

Updating Inventory Levels Using a CSV File
2 min
In this article
- Step 1 | Export a file with current inventory levels
- Step 2 | Enter updated inventory levels
- Step 3 | Import the updated file
You can quickly make changes to inventory levels by exporting a list of the relevant products to a CSV file, entering the new inventory amounts, and importing the file.
Step 1 | Export a file with current inventory levels
Start by exporting a CSV file containing a list of the products whose inventory levels you want to update.
Tip:
You can use a filter to select a group of relevant products, such as a brand or a category.
To export a CSV inventory file:
- Go to Inventory in your site's dashboard.
- Select the products you want to export:
- Selected products: Select the checkboxes next to the relevant products.
- Filtered products: Click Filter at the top and select one or more filters.
- All products and variants: No need to make any selections.
- Click the More Actions icon
 at the top right.
 - Select Export to CSV.
- Select the products you want to include.
Tip: You'll be able to select Current selection or Filtered if you selected these options in step 2 above.
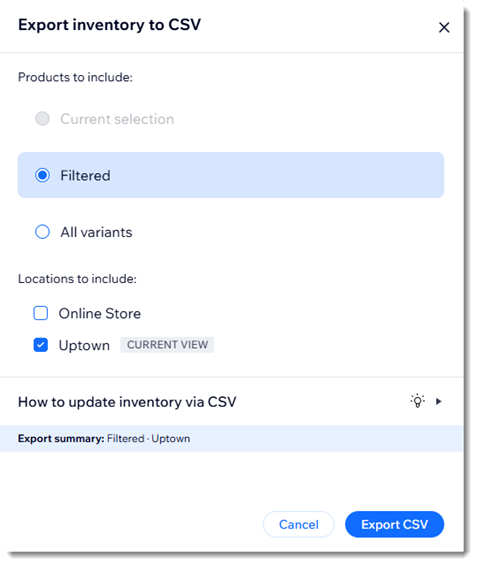
- If you have more than one location, select the relevant location(s).
- Click Export CSV to download the file.
- Open the CSV file.
- Save the file in CSV (Comma delimited) format.
Step 2 | Enter updated inventory levels
You should now have a file listing all product variants, along with their SKUs, barcodes, locations, and current inventory levels. You'll be able to enter new inventory levels to override the old information.
Tip:
You can only make changes to the onHandNew column. Changes to any other columns won't affect inventory or your product catalog.
To enter updated inventory levels:
- Open the inventory file you saved.
- In the onHandNew column, enter the new inventory amount for each variant.
- Save your changes to the file.
Step 3 | Import the updated file
Now that the file is ready, you can go back to your site's dashboard and import it.
To import your inventory file:
- Go to Inventory in your site's dashboard.
- Click the More Actions icon at the top right.
- Select Import from CSV.
- Click Continue.
- Click Upload File.
- Select the file you prepared.
- Click Import.
FAQs
Can I create new products or variants using this method?
I have multiple locations. Can I make changes to locations when updating inventory?
