


Wix Automations: Sending Data to Google Sheets
In this article
- Step 1 | Create a new automation and connect your Google account
- Step 2 | Connect a spreadsheet to your automation
- Step 3 | Match trigger data to the spreadsheet
- FAQs
Create an automation that sends data to Google Sheets, such as form submissions or invoice details. This allows you to collaborate with people using Google Sheets without giving them access to your site's dashboard.
Step 1 | Create a new automation and connect your Google account
To begin, create a new automation and add the action
Update Google Sheets. Then connect your Google account so the automation can access the spreadsheet.
To create a new automation and connect your Google account:
- Go to Automations in your site's dashboard.
- Click + Create Automation at the top right.
- Click + Start from Scratch.
- Give your automation a title and choose a trigger.
- Click the Add Step icon
 and add an Action.
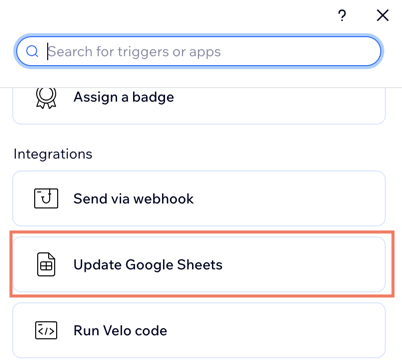
 - Select Update Google Sheets under Integrations on the left.
- Click Connect Google Account.
- Select the relevant Google account.
- Click Allow.
Important:
When connecting your Google account, you are providing permissions for Wix to access your spreadsheet data. You can
remove permissions at any time from your Google account.
If you remove Wix permissions, any automations that use Google Sheets will become disconnected and stop working. You can reset your Google permissions in an automation, but note that the trigger can't work retroactively or add any information that was "skipped" while the automation was disconnected.
Step 2 | Connect a spreadsheet to your automation
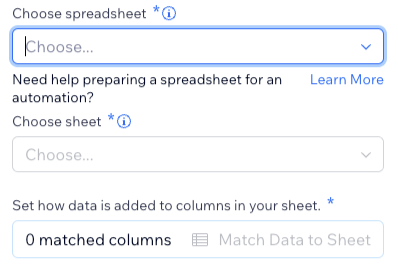
Next, connect the relevant spreadsheet to your automation. All spreadsheets in your connected Google account can be used in your automations. You can create new spreadsheets within Google Sheets and use these too.
Choose what you want to do:
Connect an existing spreadsheet to the automation
Create a new spreadsheet in Google Sheets and connect it


Step 3 | Match trigger data to the spreadsheet
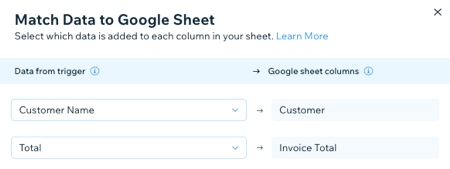
Next, match the data from your chosen trigger to the correct columns in your spreadsheet. For example, if your trigger data includes customer and invoice total fields, you need to match that data to the "Customer" and "Invoice Total" spreadsheet columns.
To match your trigger data:
- Click Match Data to Sheet.

- Click the drop-downs under Data from trigger to match them to the Google sheet columns.
Note: If you need to make edits to column titles, do so within your Google spreadsheet and click Refresh Data at the bottom left to see these changes reflected. - Click Save.
Tip:
The data you send to a spreadsheet is different depending on the app. For example, Wix Forms sends form submission data like Name and Email fields, and Wix Stores sends data like recent store orders.
FAQs
Here are some common questions about Google Sheets automations:
I've edited the columns in my Google Sheet - how do I rematch the data?
 .
.
What happens if I edit my Google Sheets permissions?

Why does my automation not show data from Google Sheets immediately after setup?
Tip:
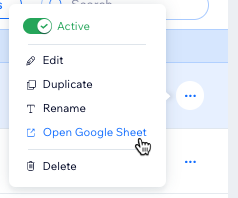
To quickly view the Google spreadsheet, click the
More Actions icon
 next to an existing automation in the Automations dashboard and click
Open Google Sheet.
next to an existing automation in the Automations dashboard and click
Open Google Sheet.
next to an existing automation in the Automations dashboard and click
Open Google Sheet.