
Studio Two Editor: Adjusting Position and Spacing
This article refers to the new Studio Two Editor, released in November 2026. If you're unsure whether you’re using the Studio Editor or the Studio Two Editor, view more information here.
Adjust the way elements sit inside a section or container with vertical spacing, docking, and margins. Set spacing to automatic to keep elements clear of each other across breakpoints, or switch to manual for exact control over docking and margins.
Then, choose how an element behaves as visitors scroll the page: keep its default position, make it stick to the viewport, or pin it in place.
Working with automatic and manual vertical spacing
In Studio Two Editor, sections and containers include a vertical spacing setting that helps keep the elements inside them in place across breakpoints. You can choose whether vertical spacing is set automatically or manually.
By default, vertical spacing is set to Automatic, so the editor handles the vertical spacing for you. This saves you from docking each child element to the top or bottom, and from adjusting top and bottom margins on every breakpoint to maintain the layout.
- Vertical spacing is only available for single-cell sections and containers. If you apply a grid layout to a section, or edit a container’s CSS grid manually, the grid handles the spacing for you.
- You can only change vertical spacing on the largest breakpoint (desktop). On smaller breakpoints, the setting is disabled.
To set the vertical spacing for a section or container:
Click the Desktop icon at the top.
Select the relevant parent element (i.e. section, container).
Click the Open Inspector icon at the top right of the editor.
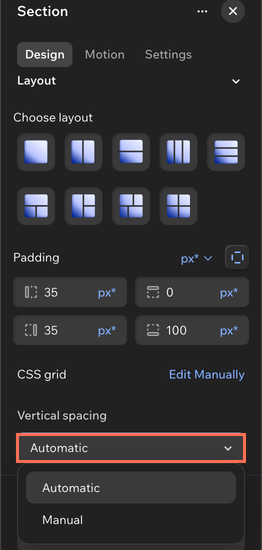
(In the Inspector) Scroll down to Vertical spacing under Layout.
Select the relevant option from the Vertical spacing dropdown:
Automatic: The vertical spacing between elements in the section / container is automatically preserved across all screen sizes.
Manual: You set the exact docking and margins of each element in the section / container to ensure they're spaced out correctly across all screen sizes.
 at the top.
 at the top right of the editor.
Stack related elements together to move, resize, and space them. This is useful when you're adding or removing elements and don't want to rebuild the layout each time.
Adjusting docking and margins
When you add new elements to the page, they're set to automatically dock to the nearest corners. This means you can drag elements around the canvas without worrying about redocking them. However, you can always switch to manual docking if you want full control over their docking points.
After deciding on the docking, add margins to control the space around an element and keep a consistent distance from the edges of its parent.
To adjust an element's docking and margins:
Select the relevant element.
Click the Open Inspector icon at the top right of the editor.
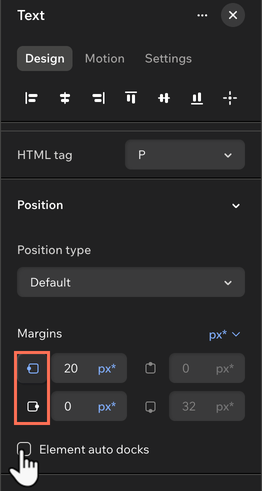
(If not already open) Click the Design tab and scroll down to Position.
Choose how to set the element's docking:
Automatically: Keep the checkbox next to Element auto docks selected.
Manually: De-select the checkbox next to Element auto docks. Then, click the relevant docking point to dock or undock the element: Left
 , Right
 , Top
 or Bottom

(Optional) Enter a value for margins where the element is docked (left, right, top or bottom).
Note: The top and bottom margins are disabled if the element's parent (i.e. container, cell) has vertical spacing set to automatic. This means the element's vertical margins depend on the element's position on the canvas.
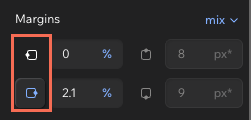
Clicking one of the docking points also turns off automatic docking.
The color of the docking points indicates whether or not the element is docked. When the element is already docked, the icon appears in blue.
Choosing the position type
Choose how an element or section behaves as visitors scroll up and down the page. You can keep it in its regular position, pin it to the viewport, or make it stick while visitors move through the page.
To set the element's position type:
- Go to your editor.
- Select the relevant element or section.
- Click the All design options icon on the action bar.
- (In the Inspector) Select the Position type from the dropdown and set it up:
 icon on the action bar.
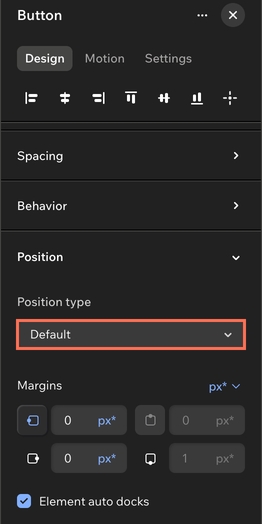
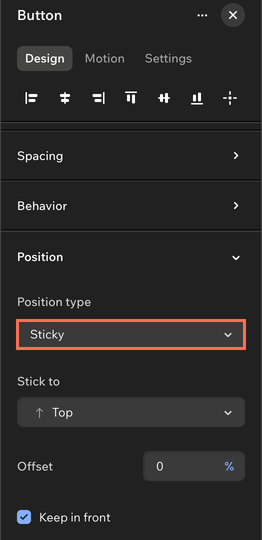
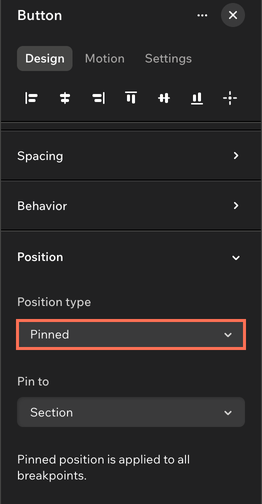
The header has unique scroll settings, also available in the Inspector panel. Select the header and look for Scroll effect under Header settings in the Inspector. The Freeze effect keeps the header in place as visitors scroll down the page.
FAQs
Click a question below to learn more.