Decide how the header behaves as visitors move down a page. Freeze it so navigation stays within reach, let it disappear or fade to give the content the full screen, then fine-tune the direction, distance and timing.
Adding and setting up a header scroll effect
Match the header's behavior to the page. Keep it in place when visitors need the menu at every point, or clear it off the screen when the content should carry the page on its own.
To add a scroll effect to the header:
Go to your editor.
Click the header.
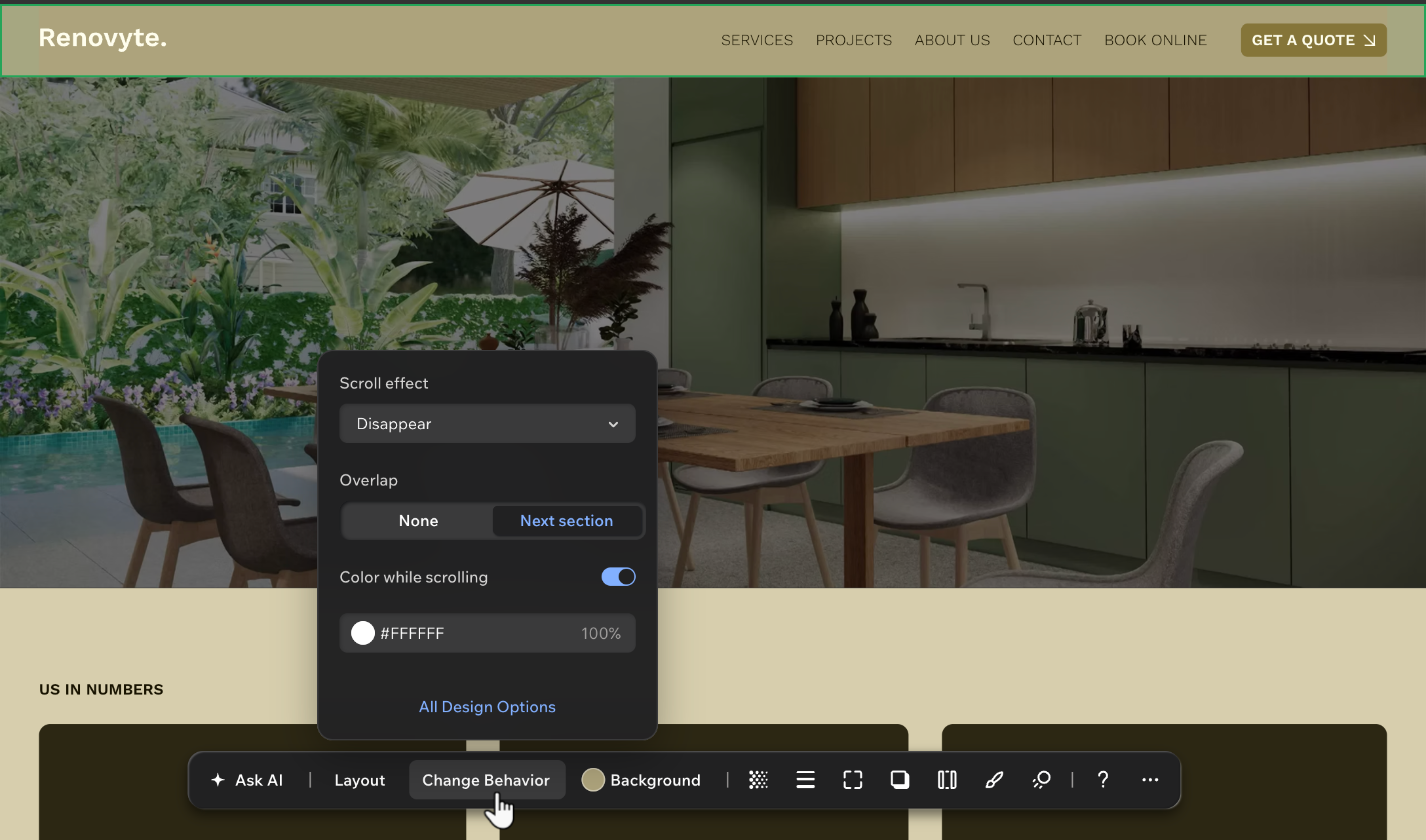
Click Change Behavior on the action bar.
Select a Scroll effect.
Click All design options to set up the effect in the Inspector panel.
(In the Inspector) Click Header settings to expand the section.
Set up the scroll effect you chose:
The header scrolls away with the rest of the page. This is the default behavior, and it has no further settings.
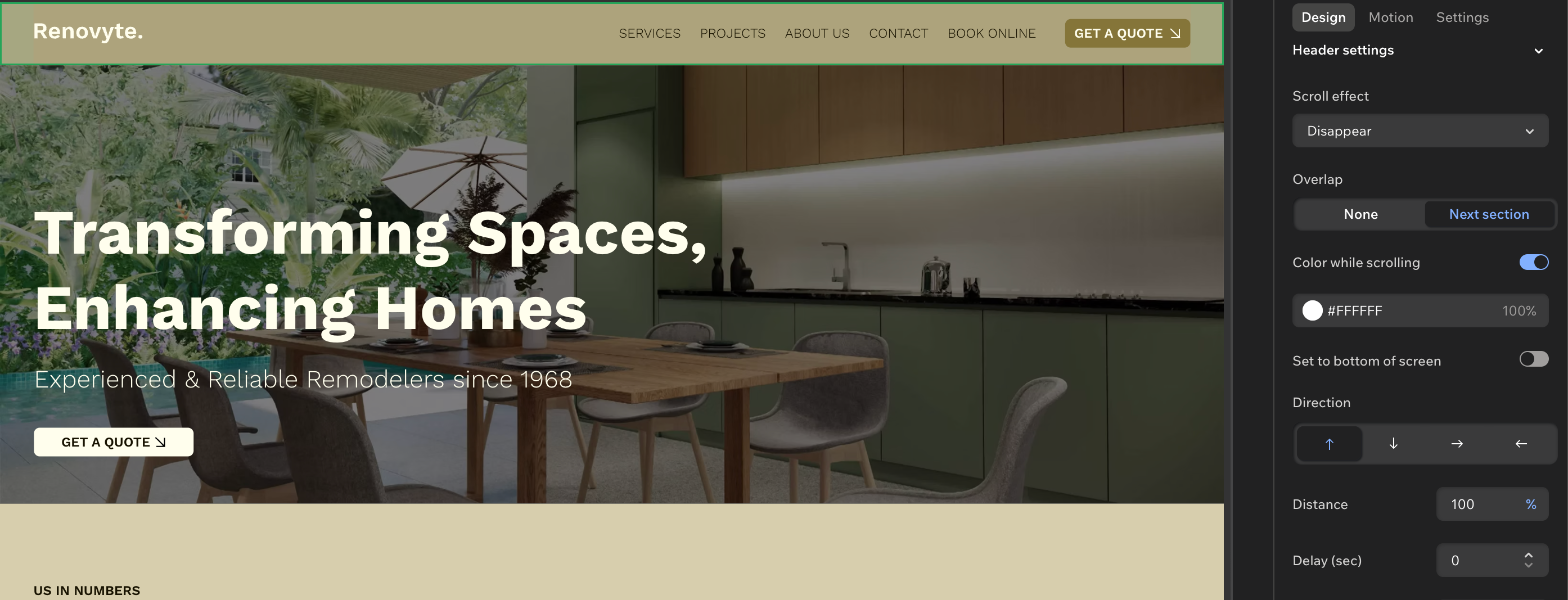
The header moves out of view as visitors scroll down.
Overlap: Choose whether the header sits over the section below it.
None: The header keeps its own space at the top of the page. Set a Top offset (%) to add distance between the header and the top of the page.
Next section: The header sits over the next section while visitors scroll. You can enable the Set to bottom of screen toggle to move the header to the bottom instead.
Color while scrolling: Enable the toggle to change the header's background color while visitors scroll, then choose a color and set its opacity.
Direction: Choose where the header goes as it leaves the screen.
Distance: Set how much of the header moves away. At 100% it leaves the screen completely.
Delay (sec): Set how long to wait before the effect starts.
Duration (sec): Set how long the effect takes.
Ease: Select how the animation speeds up and slows down (e.g. Linear (none), In sine, Out cubic).
The header stays in place as visitors scroll, so it's always visible.
Overlap: Choose whether the header sits over the section below it.
None: The header keeps its own space at the top of the page. Set a Top offset (%) to add distance between the header and the top of the page.
Next section: The header sits over the next section while visitors scroll. You can enable the Set to bottom of screen toggle to move the header to the bottom instead.
Color while scrolling: Enable the toggle to change the header's background color while visitors scroll, then choose a color and set its opacity.
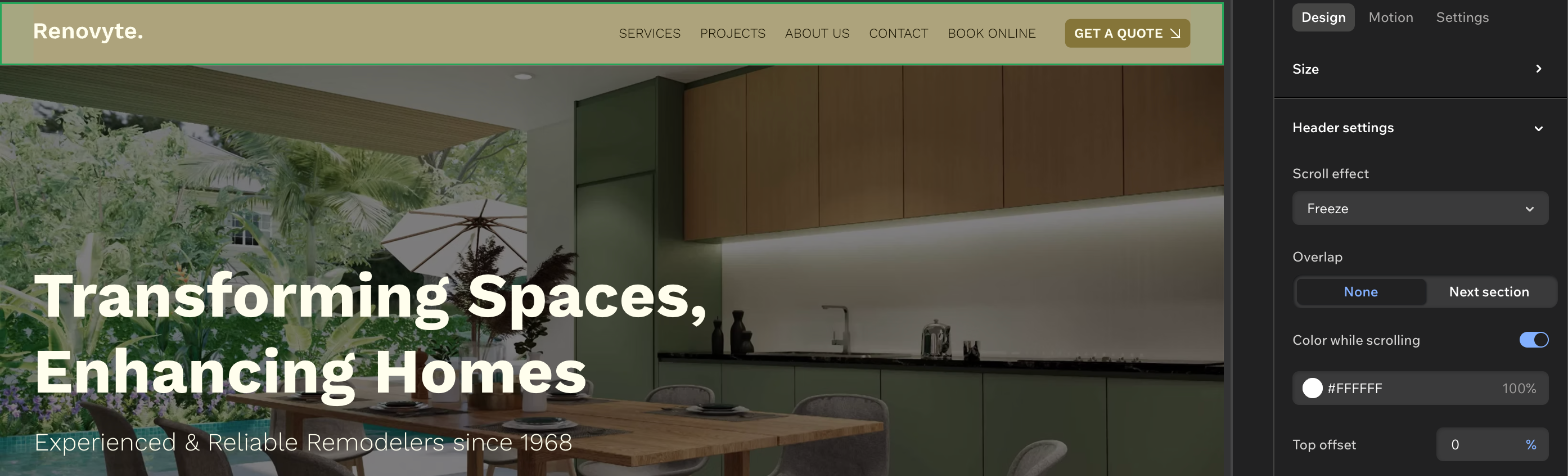
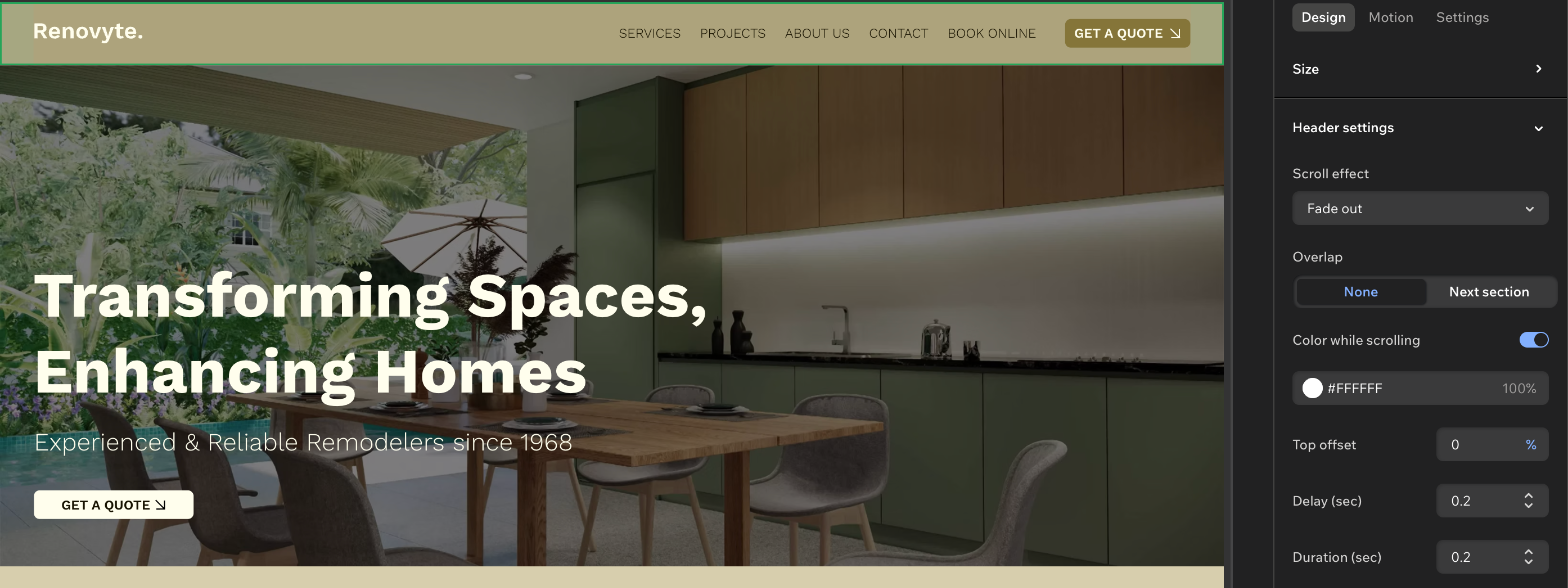
The header fades out of view as visitors scroll down.
Overlap: Choose whether the header sits over the section below it.
None: The header keeps its own space at the top of the page. Set a Top offset (%) to add distance between the header and the top of the page.
Next section: The header sits over the next section while visitors scroll. You can enable the Set to bottom of screen toggle to move the header to the bottom instead.
Color while scrolling: Enable the toggle to change the header's background color while visitors scroll, then choose a color and set its opacity.
Delay (sec): Set how long to wait before the effect starts.
Duration (sec): Set how long the effect takes.
Removing the scroll effect
Take the effect off when you want the header to move with the page again. The header keeps its design, and only its scroll behavior changes.
To remove the scroll effect:
- Go to your editor.
- Click the header.
- Click Change Behavior on the action bar.
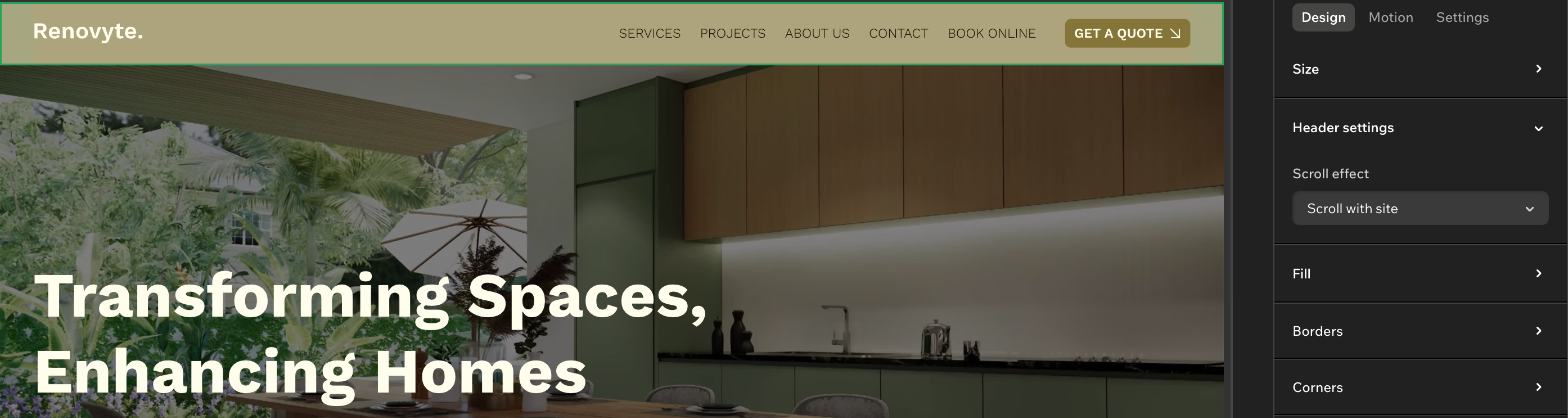
- Select Scroll with site from the Scroll effect dropdown.
Build the header's behavior yourself. Enable advanced settings to separate where the header sits from how it moves. For example, this lets you stick the header to the bottom of the screen, or set your own timing and easing.
To work with advanced header settings:
Go to your editor.
Click the header.
Click Change Behavior on the action bar.
Click All design options.
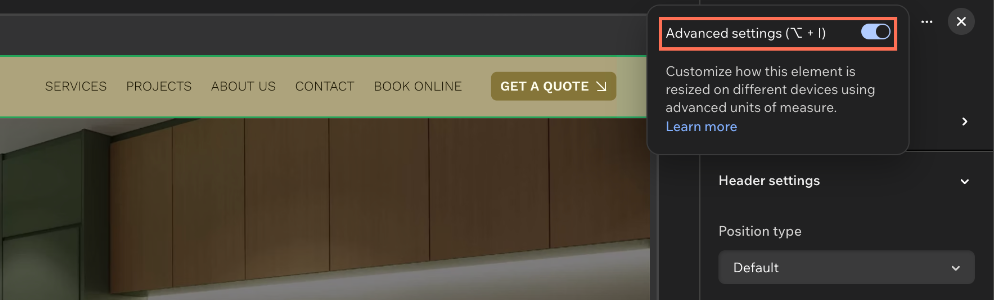
Click the More Actions icon  at the top of the Inspector panel and enable the Advanced settings toggle.
Click Header settings to expand the section.
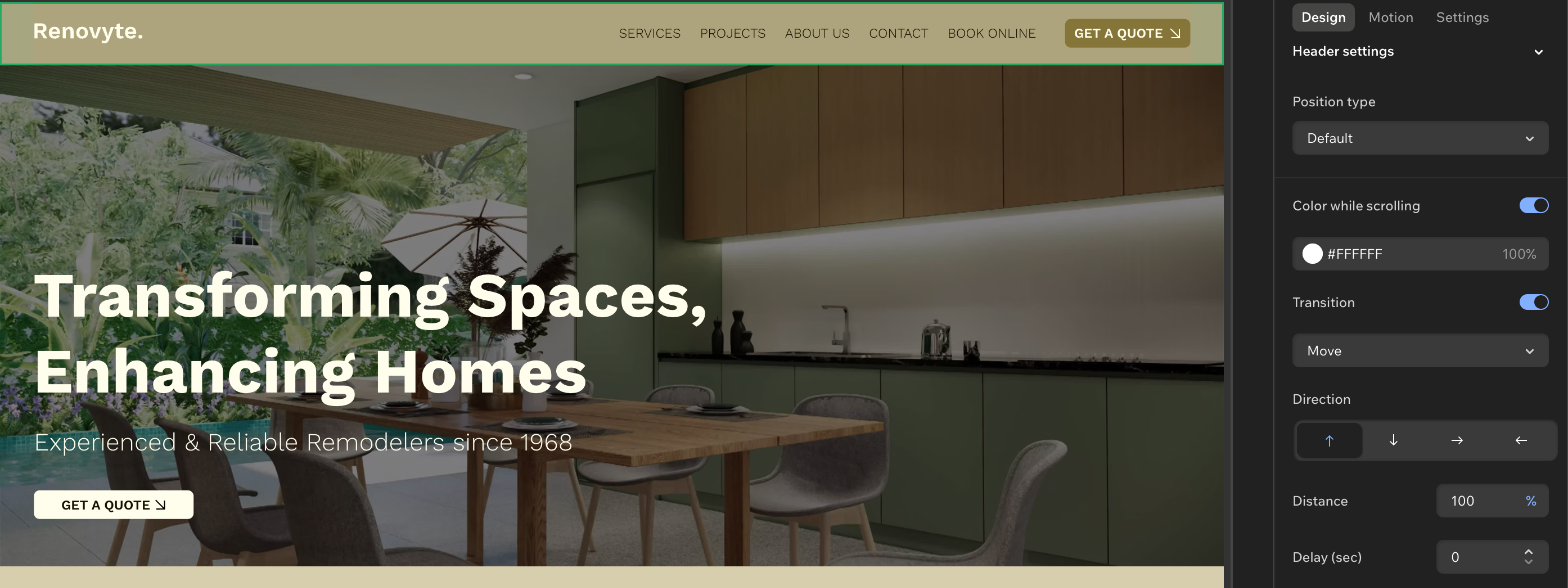
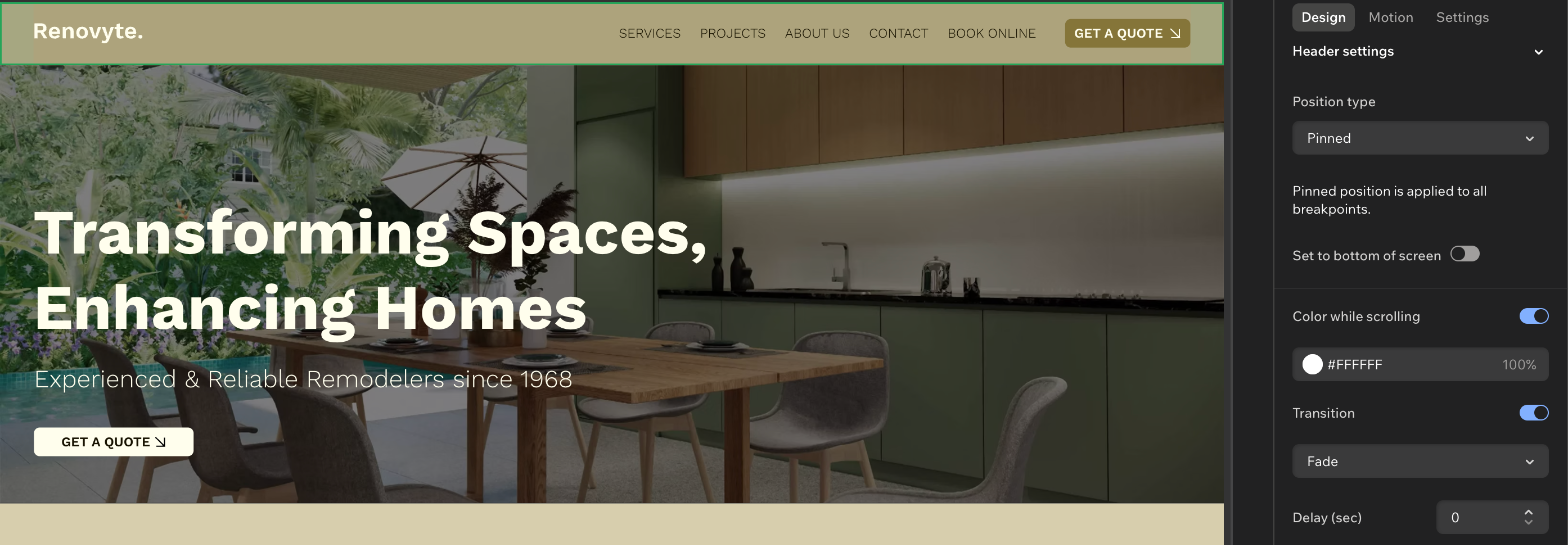
Select a Position type:
Default: The header has no fixed position, and scrolls away with the rest of the page.
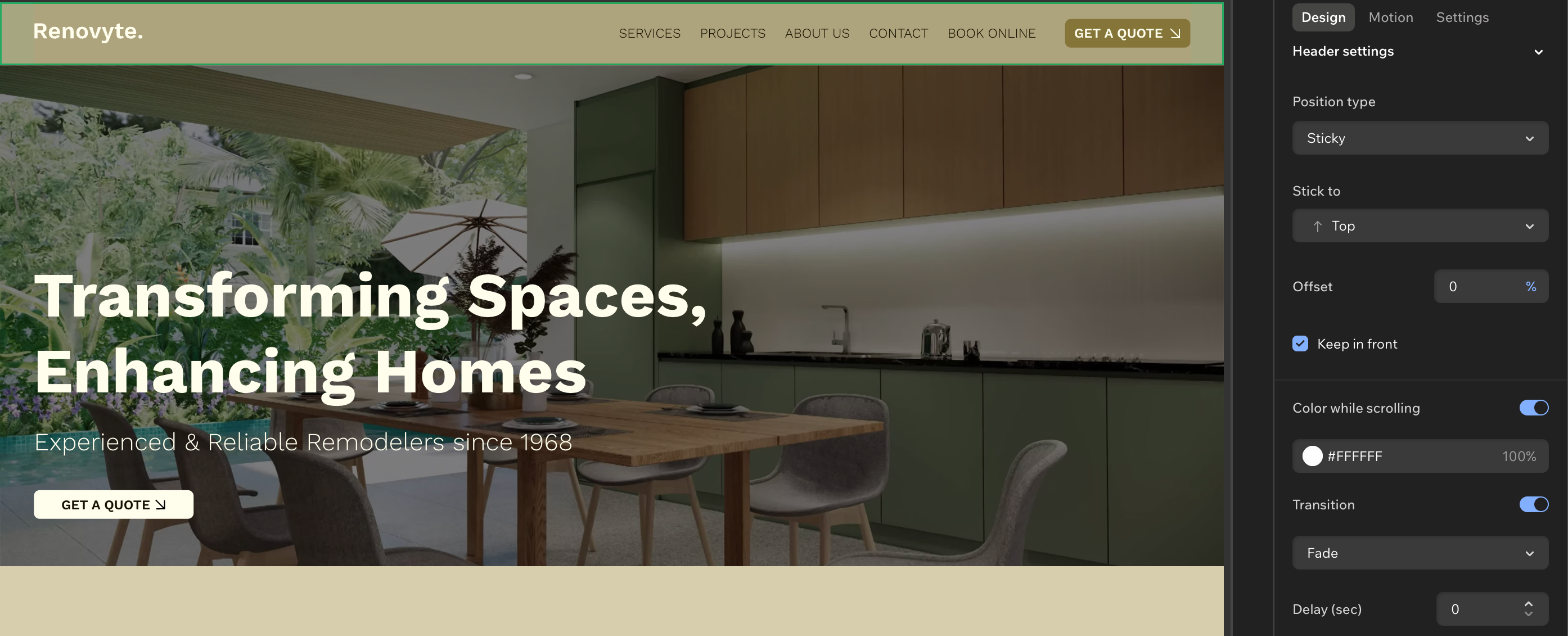
Sticky: The header sticks to an edge of the screen as visitors scroll.
Pinned: The header is fixed to the screen, over the page's content.
Set up the position type you chose:
Choose whether or not to add the following to the header:
Color while scrolling: Enable the toggle to change the header's background color while visitors scroll, then choose a color and set its opacity.
Transition: Enable the toggle to add an animation that visitors see when they scroll back up to the header.
Select Move or Fade.
Set up the animation:
Direction: Choose where the header moves.
Distance: Set how far the header moves (%).
Ease: Select how the animation speeds up and slows down (e.g. Linear (none), In sine, Out cubic).
Delay (sec) and Duration (sec): Set the timing of the animation.
Note:
The available settings depend on the transition you choose (Move or Fade).
Stick to: Select which edge the header sticks to - Top, Bottom or Bottom and top.
Offset: Set the distance (%) between the header and that edge.
Keep in front: Select the checkbox to keep the header above the page's other content.
Color while scrolling: Enable the toggle to change the header's background color while visitors scroll, then choose a color and set its opacity.
Transition: Enable the toggle to add an effect when visitors scroll up and down.
Select Move or Fade.
Set up the animation:
Direction: Choose where the header moves.
Distance: Set how far the header moves (%).
Ease: Select how the animation speeds up and slows down (e.g. Linear (none), In sine, Out cubic).
Delay (sec) and Duration (sec): Set the timing of the animation.
Note:
The available settings depend on the transition you choose (Move or Fade).
Set to bottom of screen: Enable the toggle to fix the header to the bottom of the screen instead of the top.
Color while scrolling: Enable the toggle to change the header's background color while visitors scroll, then choose a color and set its opacity.
Transition: Enable the toggle to add an effect when visitors scroll up and down.
Select Move or Fade.
Set up the animation:
Direction: Choose where the header moves.
Distance: Set how far the header moves (%).
Ease: Select how the animation speeds up and slows down (e.g. Linear (none), In sine, Out cubic).
Delay (sec) and Duration (sec): Set the timing of the animation.
Notes:
FAQs
Click a question below to learn more about header scroll effects.
Why can't I see the 'Scroll effect' dropdown any more?
This option is available when advanced settings are off. If you can't see it, you may have turned the advanced settings toggle on for the header.
Press Option + I or Alt + I to switch back.
What's the difference between a scroll effect and the animations in the Motion tab?
A scroll effect controls how the header itself behaves as the page scrolls, and you set it under Header settings in the Inspector panel.
The Motion tab in the Inspector panel adds another layer of movement to the header. For example, you can apply a hover or a click animation to keep visitors engaged with the header.