Studio Editor: Managing Breakpoints
4 min
In this article
- Viewing site breakpoints
- Adding a new breakpoint
- Editing existing breakpoints
- Deleting a breakpoint
The Studio Editor allows you to create fully-responsive sites that adapt to different breakpoints. Breakpoints are the points at which the design is adjusted - so visitors always see the best possible version of your client's site, from any device.
Define the relevant breakpoints for every page and global section, and customize the design accordingly.
Want to know more?
Learn about designing across breakpoints.
Viewing site breakpoints
By default, the Studio Editor comes with the most common breakpoints based on user traffic (mobile, tablet and desktop). Our featured breakpoints cover a wide range of screen sizes - but you can define and customize them as needed.
You can see 3 default breakpoints at the top of your editor. Click the breakpoints to enter the view and start customizing the page or global section.

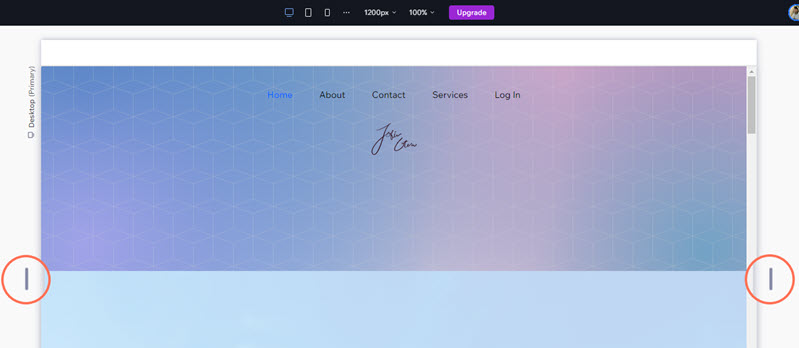
You can also move between breakpoints by dragging the handles on the left and right sides of the canvas:

Tip:
Quickly navigate to the max value of a specific breakpoint by double-clicking the handles.
Adding a new breakpoint
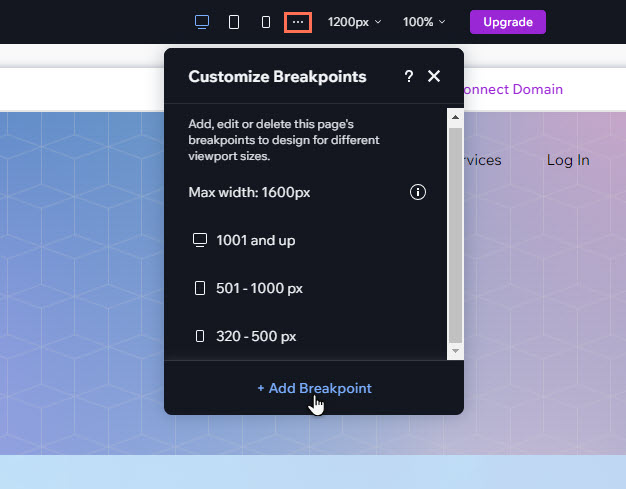
You may want to design a page for a specific size that isn't included in the default breakpoints. You can add a breakpoint with a custom size from the panel.
To add a new breakpoint:
- Select the page or global section you're working on.
- Click the Customize Breakpoints
icon next to the breakpoints on the top bar of the editor.
- Click Add Breakpoint.
- Enter the pixels for your breakpoint.
- Click Done.
Note:
You can define up to 6 different breakpoints for each page / master section on your site.

Editing existing breakpoints
Change the size of the existing breakpoints in your editor to tailor your client's site needs.
To edit a breakpoint:
- Select the page or global section you're working on.
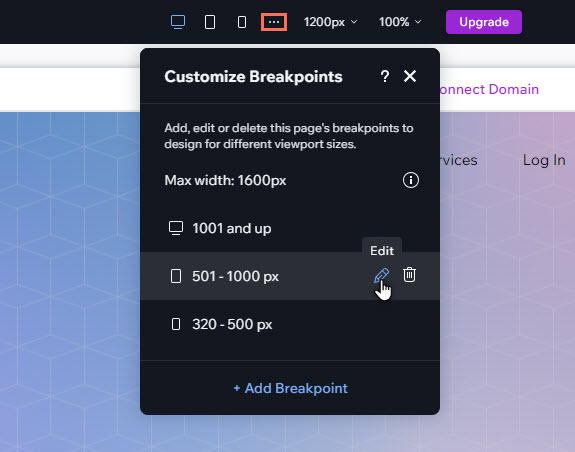
- Click the Customize Breakpoints
icon next to the breakpoints on the top bar of the editor.
- Hover over the relevant breakpoint and click the Edit icon
.
- Enter the pixels of your breakpoint.
- Click Done.

Deleting a breakpoint
Your client may not want their site designed for a certain screen size. If that's the case, you can delete the relevant breakpoint as needed. This also deletes any layout and design properties for the breakpoint.
Important:
When removing a breakpoint, it changes the px range of the other breakpoints to complete the gap. This might make your design less responsive to different viewports.
To delete a breakpoint:
- Select the page or global section you're working on.
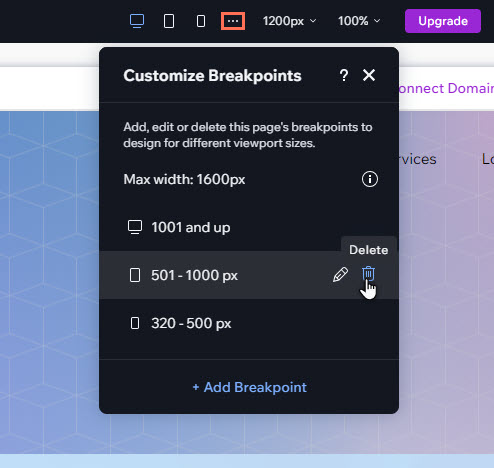
- Click the Customize Breakpoints
icon next to the breakpoints on the top bar of the editor.
- Hover over the relevant breakpoint.
- Click the Delete icon
.
Note:
The site must have at least one breakpoint. For this reason, it is not possible to remove the top breakpoint from the list.


