It's so important to add those special touches and show off your images, videos and text in a way that's right for you!
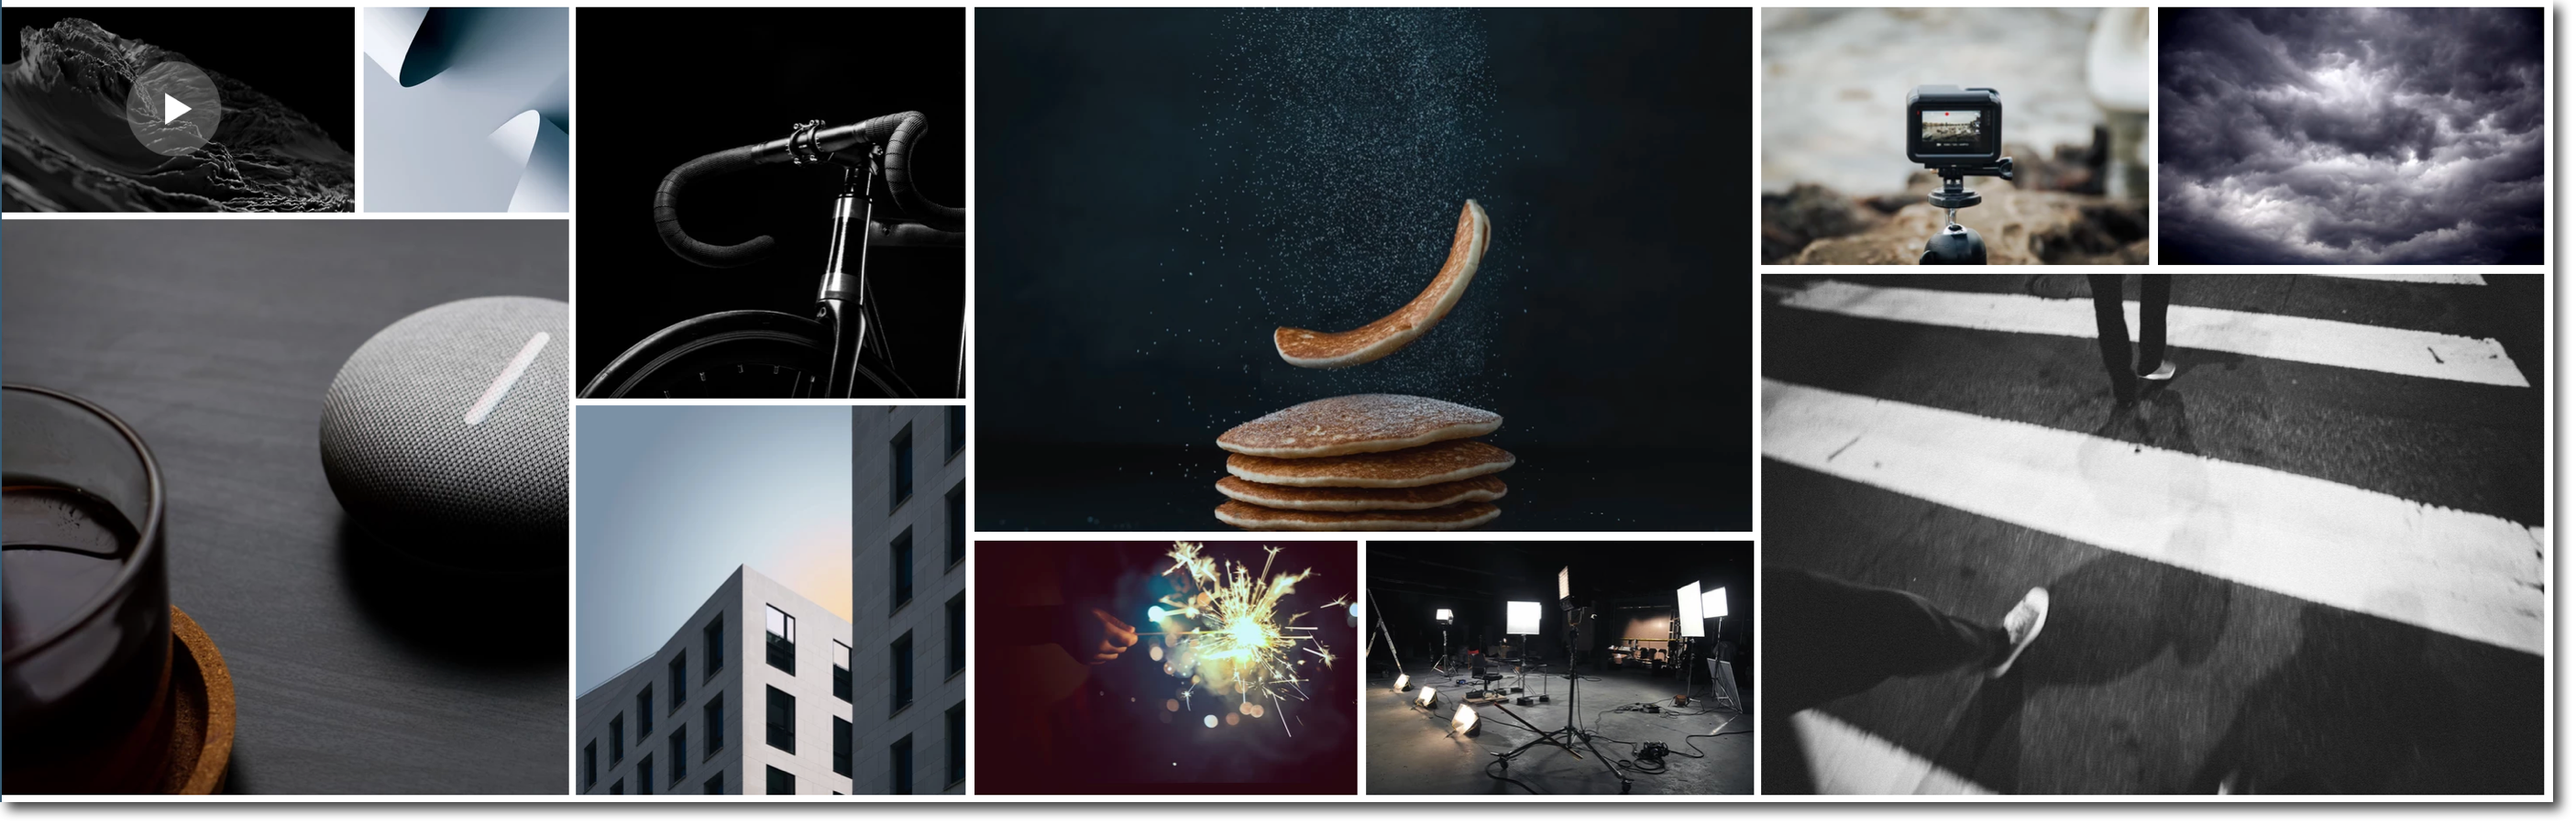
The pro gallery is a professional solution that offers a wealth of customization options, from layout, design, and style there's so much to explore. So whether you're a food blogger, photographer, or professional agency, the pro gallery offers you the tools you need to wow your clients.
Adding the pro gallery
There's so much you can do with a pro gallery, it offers tons of customization options and it's a great way to really showcase your style and work.
What features does it offer?
- Can be stretched to full width to be used as a background.
- Displays different types of media in one gallery (photo, video, and text items).
- Customize how your pro gallery resizes across all breakpoints.
- Wide range of layouts with unique settings and customization options per layout.
- Offers separate layouts and design for the mobile breakpoint.
- Allow your media items to be expanded or open in full screen with a click.
- Customize the layout and design of the expanded view.
- Share, Like and Download icons on each gallery item.
- Connect it to collection databases using the CMS (Content Management System).
To add a pro gallery to your site:
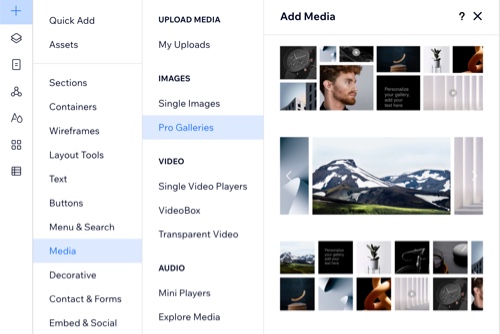
- Click Add Elements
 on the left side of the editor.
 - Click Media.
- Click Pro Galleries.
- Choose a pro gallery design and drag it onto the page.
Customizing the pro gallery settings
You can customize every individual part of the gallery to get the look and feeling you want.
To customize the pro gallery settings:
- Click the pro gallery in the editor.
- Click Settings.
- Choose what you want to customize:
Choose a layout from the options available. Presets are fixed layout templates created by Wix. With these layouts, the bulk of the work is done for you, meaning the layout itself is not customizable.
If you selected an option from the Custom tab, you can click Customize Layout to adjust it further:
- Scroll direction: Choose if you want your gallery to scroll vertical or horizontal.
- Gallery orientation: Choose how you want your gallery to be orientated.
- Info to display: Choose what item information displayed when visitors hover over your gallery items.
- Thumbnail size: Drag the slider to adjust the size of the gallery thumbnails.
- Spacing: Drag the slider to adjust the spacing between your pro gallery files.
- Collage Density: Drag the slider to increase or decrease the density (number and size) of the files in your gallery.
Note: A higher density displays more files of smaller sizes. A lower density displays fewer files of larger sizes. - Gallery direction: Choose if you want to have your gallery go from left to right or from right to left.
Tip: Set the direction to "Right to Left" for the text in Arabic and Hebrew languages to be shown correctly.
Notes:
- The layout customization options vary per layout, and some options are only available on specific layouts.
- It is not possible to adjust your gallery's height in the Inspector panel when:
- Your gallery is set to scroll vertically.
- Your gallery is horizontal with a fixed ratio.
Customize the following:
- When clicking on an item: Click the drop-down icon
 to control what happens when your site visitors click a gallery item.
 - Download: Click this toggle to show or hide a download icon for your visitors to download your images and videos.
- Social sharing: Click this toggle to show or hide social icons so your visitors can easily share your gallery items.
- Heart icon: Click the toggle to show or hide a heart icon for your visitors to show they like a gallery item.
You can design every individual part of the gallery:
- Overlay & Icons: Customize the color overlay and icons that appear when visitors hover over the gallery.
- Texts: Display an item's title, description, or both when visitors hover it. Refine the text's design including the style, color and alignment.
- Buttons: Add buttons to encourage visitors to click on gallery items. Customize the buttons including the text and color.
- Navigation arrows: Customize the arrows visitors use to browse the gallery.
- Item Style: Customize the way gallery items look. Adjust the border, create shadows and add effects. You can also control how they load.
- Scroll Animations: Choose how your gallery items appear when your visitors scroll through the gallery.
- Expand Mode: Design the expand mode of your gallery items. Decide what information is displayed, customize the text style and refine the icon and background color.
Note: The available options depend on the gallery layout you chose.
Customize the following:
Image Settings:
- Image quality: Drag the slider to adjust the image quality.
- Image sharpening: Click the Image sharpening toggle to sharpen the images in your pro gallery.
Video Settings:
- Play videos: Click the drop-down icon
 to choose how you want the videos in your pro gallery to play.
 - Play with sound: Click the Play with sound toggle to enable or disable the sound while your videos are playing in your pro gallery.
- Playback speed: Click the drop-down icon to choose your pro gallery videos playback speed.
- Loop videos: Click the Loop videos toggle to enable or disable looping on your pro gallery videos.
- Show play button: Click the Show play button toggle to show or hide the play button on your pro gallery videos.
Enabling and customizing the Expand Mode
When visitors click gallery items, you can set them to open in Expand Mode. This makes the gallery item open in a fully customizable expand window.
To enable and customize the Expand Mode:
- Click the pro gallery in the editor.
- Click Settings.
- Click the Settings tab on the left.
- Select Open in Expand Mode from the When clicking on an item drop-down.
- Click the Design tab on the left.
- Click Expand Mode.
- Click Customize Expand Mode.
- Customize the following settings on the right side of the pop-up:
Choose how the image title and description appear in expand mode:
- What info is shown?: Select the checkboxes next to the info you want to display - title, description and link.
- Where does it appear?: Choose where the info should appear - to the right of the image or under it.
- When does it show?: Choose to keep the info next to the image or hidden in a 'Show Info' icon.
Choose how visitors view the images:
- Allow Full Screen: Let visitors view full screen images from expand mode.
- Magnifying Glass: Let visitors zoom in on images (works best for high resolution images).
- Loop Images: Enable the toggle to set continuous scrolling.
Customize the background, colors and fonts used in expand mode:
- Background Design: Set a color or a gradient as the background.
- Background Filters: Set a blurry filter to appear under the expand mode background. This helps visitors focus even more on the image.
- Text & Icon Design: Change the icon color, choose a different font for the image title and description, and more.