Studio Editor: Adding and Customizing Text Particles
5 min
In this article
- Adding and setting up the text particles element
- Designing the text particles element
- Formatting the text
Use the text particles element to create dynamic headings. Designed for expressive typography, text particles let you add playful or bold effects that help clients stand out—whether for branding, promotions, or interactive experiences.
Adding and setting up the text particles element
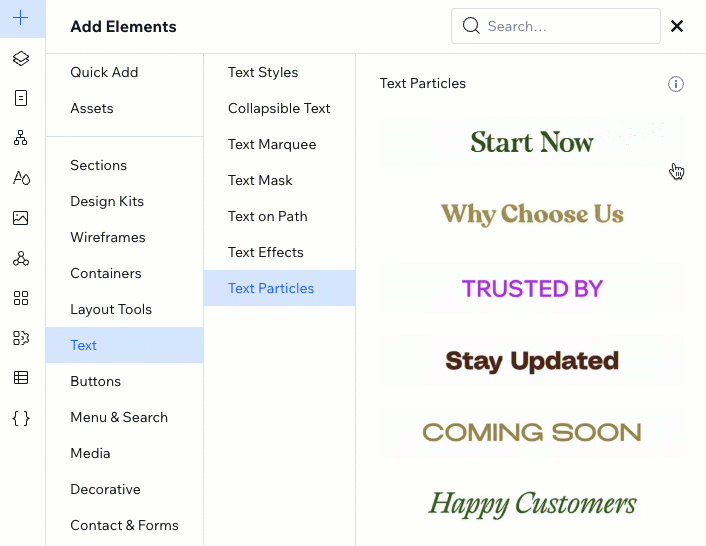
Head over to the Add Elements panel to add text particles to the page. Pick a design you like, drag it onto the canvas and enter the text you want to show.
To add and set up the text particles:
- Click Add Elements
 on the left side of the editor.
 - Click Text.
- Click Text Particles.
- Drag your chosen text particles design onto the page.
Tip: Hover over the designs to preview the animation. - Write your text:
- Click the text particles element.
- Click Change text.
- Enter your text.
Designing the text particles element
Fine-tune the look and movement of text particles to fit your client's brand, tone, and animation needs. You have complete control over the particle size, colors, typography, speed, direction and many more settings.
To design the text particles:
- Select the text particles element.
- Click the Open Inspector icon
 at the top right of the editor.

- Choose the animation style under Design:
- Choose the relevant style:
- Wave: The text swirls in a wavy motion.
- Reveal: The particles fly horizontally while revealing the text.
- Swarm: The particles "explode" outward in a chaotic motion, quickly dispersing to reveal the text.
- Choose a Pattern for the particles from the dropdown.
- Choose the relevant style:
- Depending on the style you chose, use the available settings to customize the animation:
Wave
Reveal
Swarm
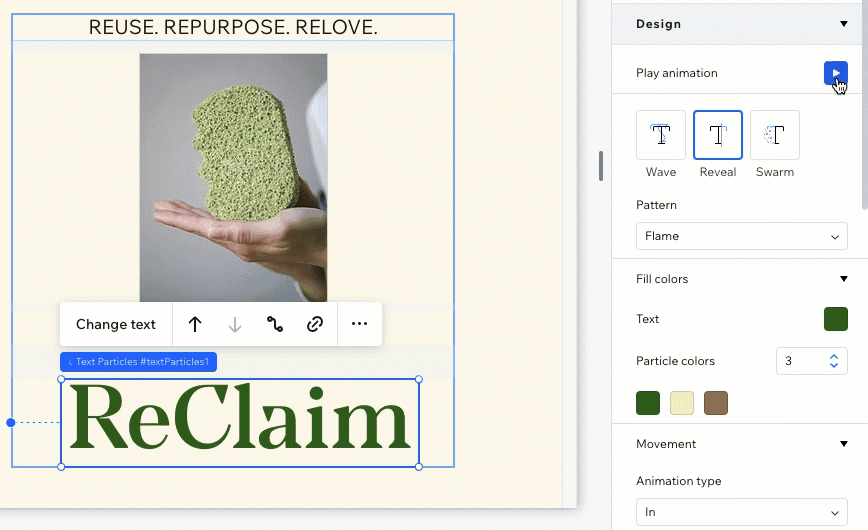
Preview your design:
Click the Play button  in the Inspector panel to see your animation as you're working on it.
in the Inspector panel to see your animation as you're working on it.Formatting the text
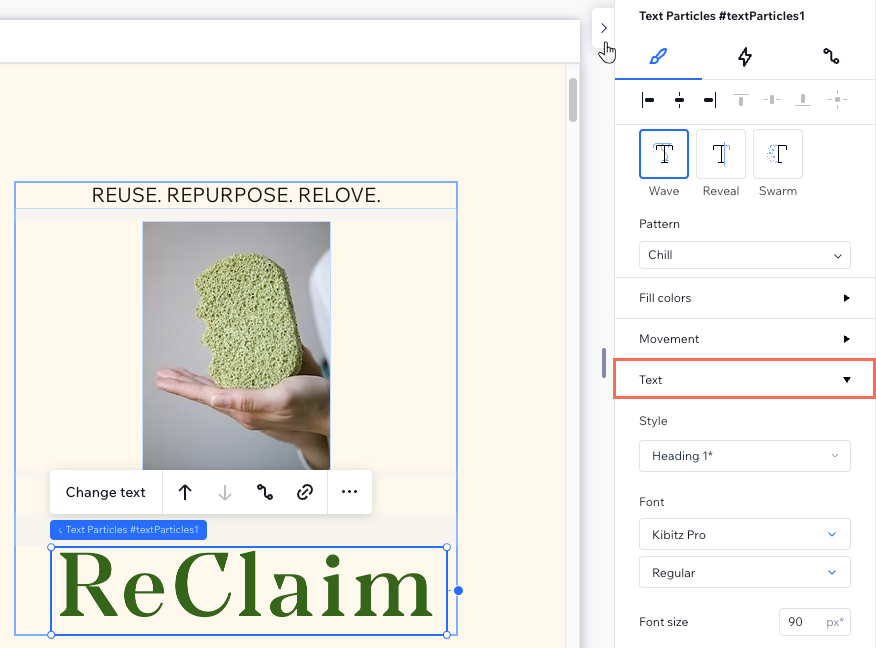
Format your text to get just the right look and feel for your design. Adjust details like typography styles, spacing, and capitalization to create polished, on-brand content.
To format the text:
- Select the text particles element.
- Click the Open Inspector icon at the top right of the editor.
- Scroll down the Design section and click Text.
- Adjust the available formatting settings:
- Attach this text element to an existing typography style.
- Change the font and font size.
- Adjust the horizontal character spacing.
- Make the text bold or italics.
- Change the capitalization (e.g. make the text all lowercase).
- Set the HTML tag (e.g. H2, div, P, etc).
Accessibility tip:
If this text particles element is purely decorative, meaning it does not include important information for screen readers, select the checkbox next to This text is only decorative.