

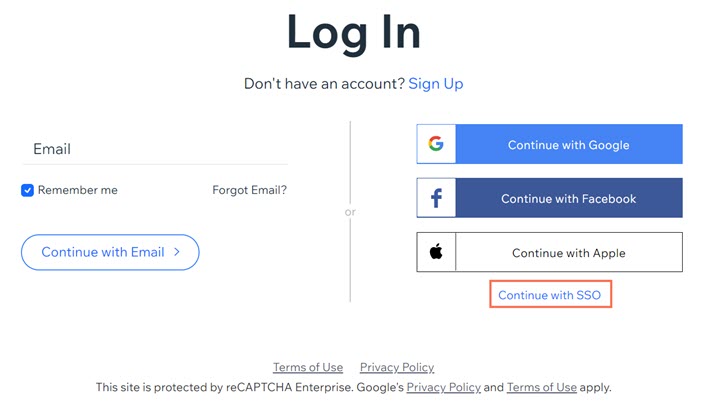
SSO: Setting Up Single Sign-On (SSO) Login for Your Organization
7 min
In this article
- Step 1 | Find your Identity Provider (IdP) settings
- Azure
- Okta
- Step 2 | Go to your account's SSO Settings
- Step 3 | Select the type of SSO login you want to allow
- Step 3 | Add your IdP information in SSO Settings
- Step 4 | Copy the callback URL for your IdP
- Step 5 | Enable SSO login and set as required if needed
- Step 6 | Copy your SSO login page info
- Step 7 | Copy the SSO ID (SSO for clients only)
- (Optional) Step 8 | Customize the Advanced settings
Before you begin:
- SSO login is only available with Wix Studio enterprise solution and Wix Channels.
- Wix currently supports only the Open ID Connect protocol. This is a standard protocol for SSO.
Single Sign-On (SSO) is an authentication method that lets users in an organization sign in to their Wix account using their organizational profile login details.
Step 1 | Find your Identity Provider (IdP) settings
Important:
Make sure to set the SSO configuration in your IdP settings to allow the admin to ask for consent on behalf of all users.
To set up SSO login for your organization, Wix needs some information from the settings of your Identity Provider (IdP). The information that you need to find is the Client ID, Client Secret, and the Config URL.
You can use any IdP that supports the Open ID Connect protocol. Some IdPs use different terminology for the settings information that Wix needs. Check below for some helpful info about the most common IdPs and the terminology that they use.
Azure
You can find the information you need on the App Registration page that you created for Wix on your Azure Portal. Learn more about registering an app
You need to have one of the following roles in Azure to view this information: Global Administrator, Cloud Application Administrator, Application Administrator, or owner of the service principal.
Wix name | Azure name | Where to find it |
|---|---|---|
Client ID | Application (client) ID | Under Essentials on the Overview tab |
Client Secret | Client secret | Click the link under Client Credentials on the Overview tab |
Config URL | OpenID Connect metadata document | Select Endpoints on the Overview tab |

Important:
We recommend reading Microsoft's documentation on how to configure Open ID Connect.
Okta
You can find the information you need on the OIDC app page in your Okta account. Learn more about managing your OIDC app
Wix name | Okta name | Where to find it |
|---|---|---|
Client ID | Client ID | In the Client Credentials section of the General tab |
Client Secret | Client secret | In the Client Credentials section of the General tab |
Config URL | Open ID Server Discovery Endpoint | This is not found in your Okta account. You need to create this URL yourself. Use the format "https://${yourOktaOrg}/.well-known/openid-configuration", where ${yourOktaOrg} is your Okta domain. |
Important:
We recommend reading Okta's documentation on how to configure Open ID Connect.
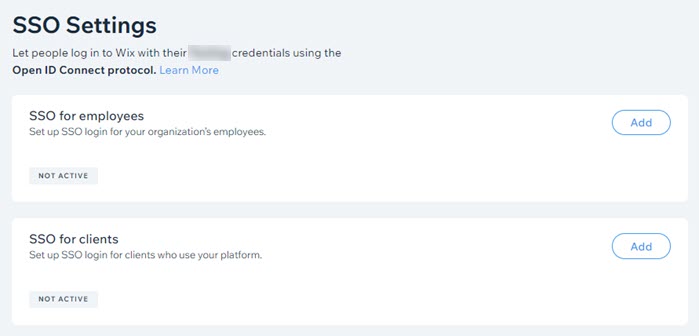
Step 2 | Go to your account's SSO Settings
Next, you need to go to your the SSO Settings section of your account's dashboard.
To go to your SSO Settings:
- Sign in to your Wix account.
- Click Security.
- Click SSO & SCIM Settings.
Step 3 | Select the type of SSO login you want to allow
Wix provides two types of SSO login: SSO for employees and SSO for clients. Depending on how your account is set up for your organization, you may see one or both of these options. You can select the type of SSO login you want to set up in the SSO Settings of your dashboard.
Click Add next to the type of SSO login you want to allow:
- SSO for employees: Allow SSO login for your organization’s employees.
- SSO for clients: Allow SSO login for clients who use your platform.
Tip:
Your account owner and any account admins (co-owners) can access your SSO Settings. You can also create a new role with the Manage SSO permission to grant access to other users in your organization.
Step 3 | Add your IdP information in SSO Settings
Next, you need to add the settings information from your Identity Provider in your Wix account's SSO Settings. This will let your Identity Provider communicate with Wix using the OpenID Connect protocol.
To add your IdP information:
- Enter the Client ID from your IdP in the Client ID field.
- Enter the Client Secret from your IdP in the Client Secret field.
- Select the Config URL option that you want to use:
Standard Config URL setup
Override well-known config
4. (Optional) Copy the Logout URL value from the Logout URL field. This is a read-only URL that Wix generates based on the values you provided in the previous steps and the Open ID Connect protocol.
5. Click Save Changes.
Step 4 | Copy the callback URL for your IdP
When a user successfully authenticates themselves using an SSO service, the SSO service redirects to a predefined URL. This URL is known as a callback URL (sometimes called a redirect URL or a reply URL).
Wix automatically generates two callback URLs based on the information that you added in the Information from your IdP section of your SSO Settings.
The two callback URLs are:
- Web logins URL: For users who log in using a computer
- Mobile app logins URL: For users who log in using a mobile device
Note:
It is not possible to edit these URLs.
The callback URLs are based on the Open ID Connect protocol. You will need to provide a callback URL to your IdP. Click the Copy icon  next to the relevant URL to copy it.
next to the relevant URL to copy it.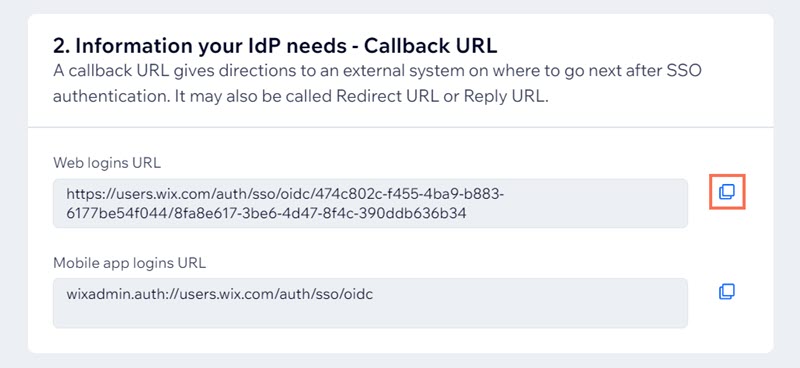
Step 5 | Enable SSO login and set as required if needed
After you've added your IdP's information, you can enable SSO login to let your users sign in using SSO. You can also choose to require your users to sign in using SSO and disable all other methods for signing in.
To enable SSO login and set as required:
- Click the Enable SSO toggle to enable or disable SSO login:
- Enabled: Your users can sign in to their Wix account using SSO or other methods such as an email address and password.
- Disabled: Your users cannot sign in using SSO. They can still sign in using other methods.
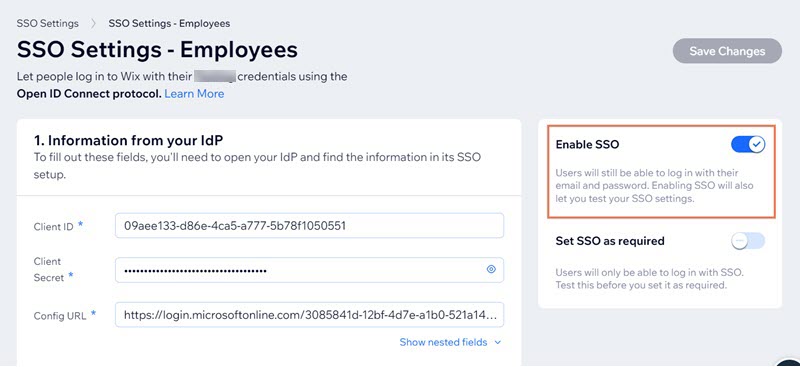
- Click the Set SSO as required toggle to choose whether or not you want to require your users to sign in by SSO.
- Enabled: Users can only sign in with SSO. They cannot sign in using other methods such as an email and password. Account owners can still sign in using other methods.
- Disabled: Users can sign in using SSO or other methods.
Important:
Wix recommends that you manually test your SSO settings before setting SSO as required.
3. Click Save Changes.
Step 6 | Copy your SSO login page info
Wix generates a login page URL after you add your IdP details to the Information from your IdP section and save them. Your users can log in with SSO using this login page URL. You can also use it to test settings.
Select the login page URL and copy it to share it with your users.
Step 7 | Copy the SSO ID (SSO for clients only)
Note:
This step is only relevant if you chose SSO for Clients in Step 2.
When you choose to set up SSO for your clients, Wix generates an SSO ID after you add your IdP details to the Information from your IdP section and save them.
This SSO ID is not part of the Open ID Connect protocol. Wix uses this ID as an identifier when we create accounts for new users who use SSO for their first sign-in.
Click the Copy icon next to the SSO ID if you need to copy it.
next to the SSO ID if you need to copy it.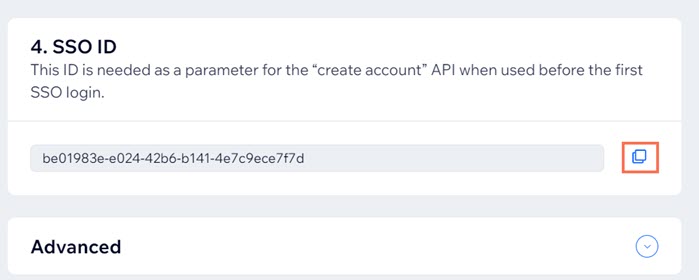
(Optional) Step 8 | Customize the Advanced settings
You can use the Advanced settings to override certain fields in your IdP's settings. This is useful when the default fields in your IdP are not defined by the Open ID Connect protocol.
To set claims override mapping:
- Enter the user ID you want to use in the IdP User ID field.
- Enter the email address you want to use in the Email field.
- Enter a name the First Name field.
- Enter a name in the Last Name field.
- Enter a URL for the image you want to use for profiles in the Profile image field.
- Enable the JIT-Provisioning toggle if you want to create a new account when a user signs in for the first time.
- Click Save Changes.
Need more help?
Read more about SSO in our troubleshooting and error codes article.
