

Wix Apps: Sharing Files on Multiple Site Pages
3 min
In this article
- Step 1 | Add the Shared Folder Add-On
- Step 2 | Choose a folder to display
- Step 3 | Customize what is displayed on the app
- Step 4 | Customize the design of your folder
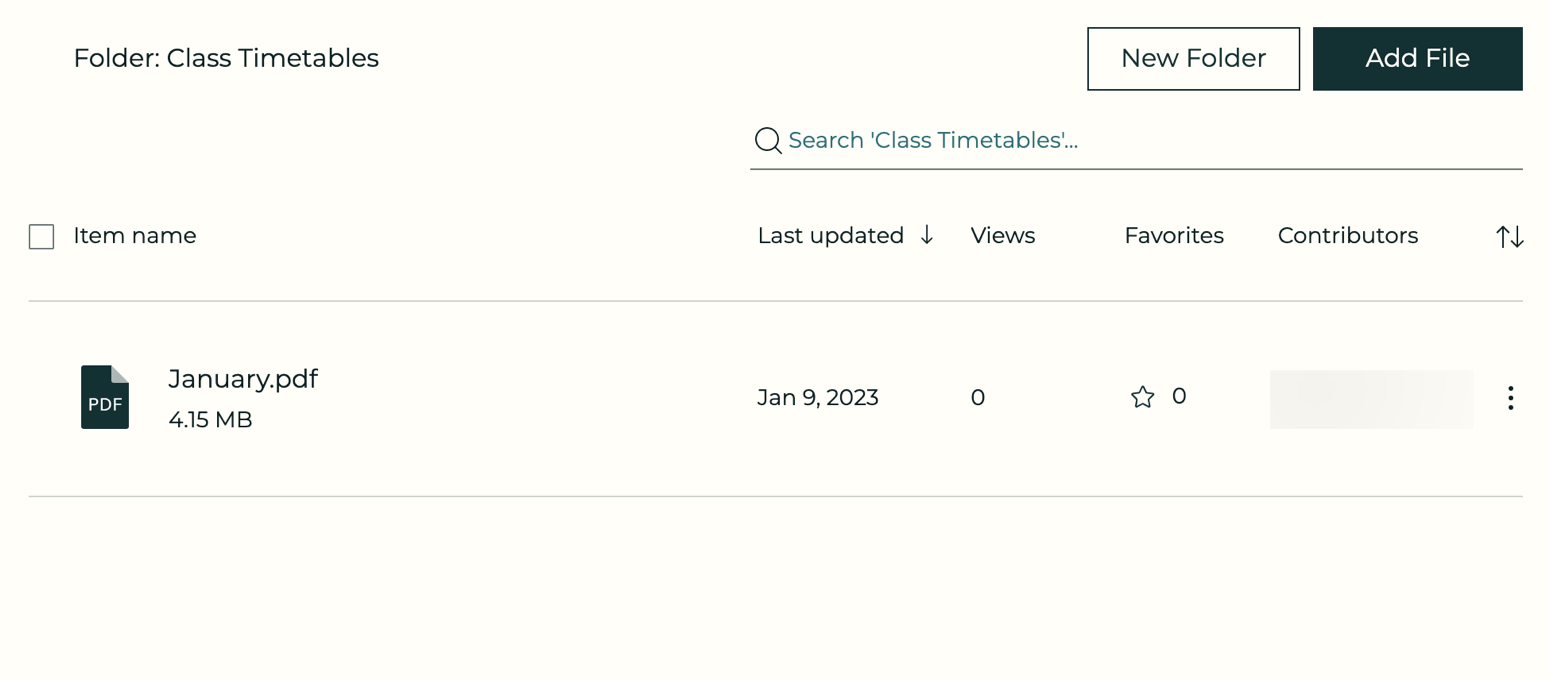
When you add the Wix File Share app, it adds a dedicated File Share page to your site. If you also add the Shared Folder Add-On to your site, you can display your folders on any page on your site, not just the File Share page.
Before you begin:
Make sure to add the Wix File Share app to your site.
Step 1 | Add the Shared Folder Add-On
Once you've added the Wix File Share app to your site, you can then go and add the Shared Folder app as an "Add-On". Both apps work together to enable you to share your files/folders on multiple site pages.
To add the app:
- Click the File Share app in your editor.
- Click Settings.
- Click Add-Ons.
- Click Choose Add-On.
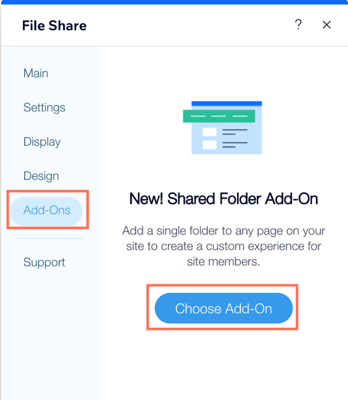
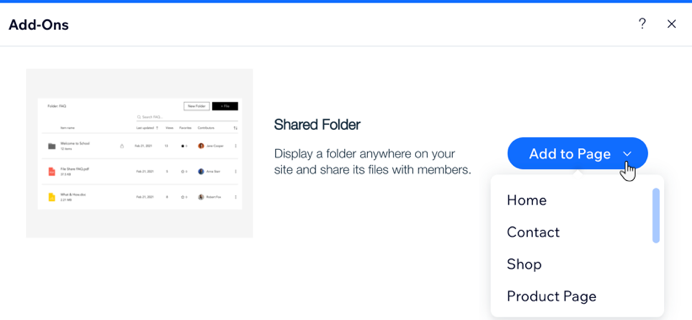
- Click the Add to Page drop-down and select the page you want to add the app to.
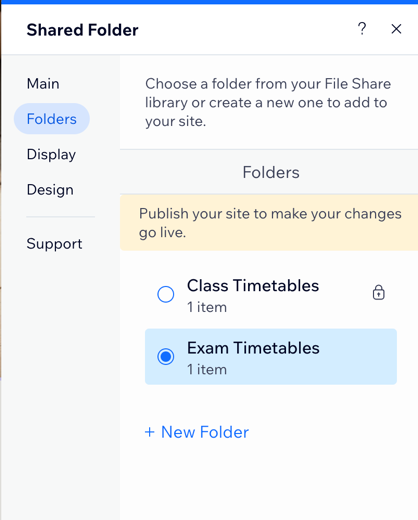
Step 2 | Choose a folder to display
Choose the folder you want to display in the file. This folder appears on the page you selected as part of step 1. You can select an existing folder or make a new folder.
To add a folder:
- Click the Shared Folder app in your editor.
- Click Settings.
- Click Select Folder.
- Select an existing folder or click + New Folder to add a new folder.
Step 3 | Customize what is displayed on the app
Choose the elements you want to display on your app and customize how the files are sorted in the folder.
To customize the display:
- Click the Shared Folder app in your editor.
- Click Settings.
- Click the Display tab.
- Select the checkboxes next to the elements you want to display.
- Click the Sort folder items by drop-down and choose how you want to sort the items in your folder:
- Last updated: Sort the items by when they were last updated.
- Item name A-Z: Sort the items alphabetically from A-Z.
- Item name Z-A: Sort the items alphabetically from Z-A.
- Most views: Sort the items by most views.
- Most favorites: Sort the items by the files that are the most popular.
- Item type: Sort the items by type.
- Item size: Sort the items by size.
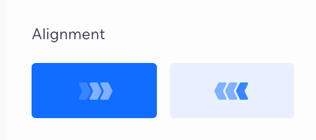
- Choose an alignment for the display: Left or Right.
Step 4 | Customize the design of your folder
Change the design to match the look and feel of your site.
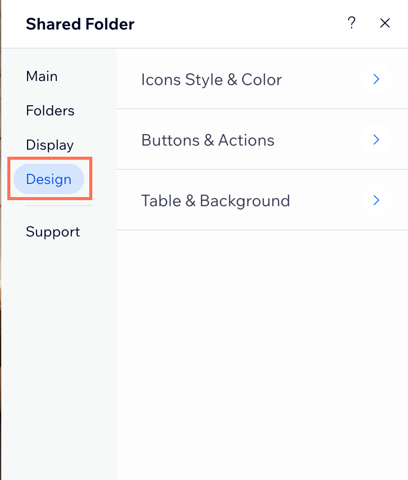
To customize the design:
- Click the Shared Folder app in your editor.
- Click Settings.
- Click the Design tab.
- Choose what you want to customize:
- Icons, Style & Color: Choose a style for your icons and customize the color.
- Buttons & Actions: Choose the button style and color.
- Table & Background: Customize the table content and colors, adjust the divider line, and change the background color.
Tip:
Publish your site to view the changes.
