

Purchasing and Managing Additional Google Workspace Business Emails
5 min
In this article
- Purchasing additional Google Workspace business emails with Wix
- Adding a user
- Renaming a user
- Deleting a user
- Resetting a user's password
- FAQs
Build your growing business and organize the inquiries you're getting by setting up additional business emails. These email addresses are associated to the same domain, which allows you to create separate inboxes for different departments or team members.
Before you begin:
You need to purchase a primary ('admin') Google Workspace business email before you can add additional emails to your account.
Purchasing additional Google Workspace business emails with Wix
Purchase additional business emails for each member of your team, or create emails for each department, e.g. sales@mywebsite.com, enquiries@mywebsite.com. This can help organize your business according to your customers' needs.
To purchase additional business emails:
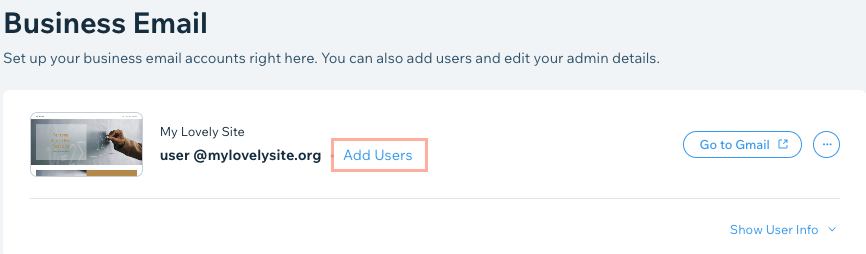
- Go to Business Email in your Wix account.
- Click Add Users next to the relevant business email.
- Select the number of additional business emails you want to purchase.
- Choose your saved payment method or click Other Payment Methods to pay using another card or with PayPal.
- Click Submit Purchase.
What's next?
Set up the additional email addresses in your Google Workspace console. See the next section (Adding a user) for more details.
Adding a user
After purchasing additional business emails, set them up from your Google Workspace Admin console.
To set up additional google workspace business emails:
- Go to Business Email in your Wix account.
- Scroll down to the relevant business email.
- Click the More Actions icon
 next to the business email you want to set up.
 - Click Manage at Google.
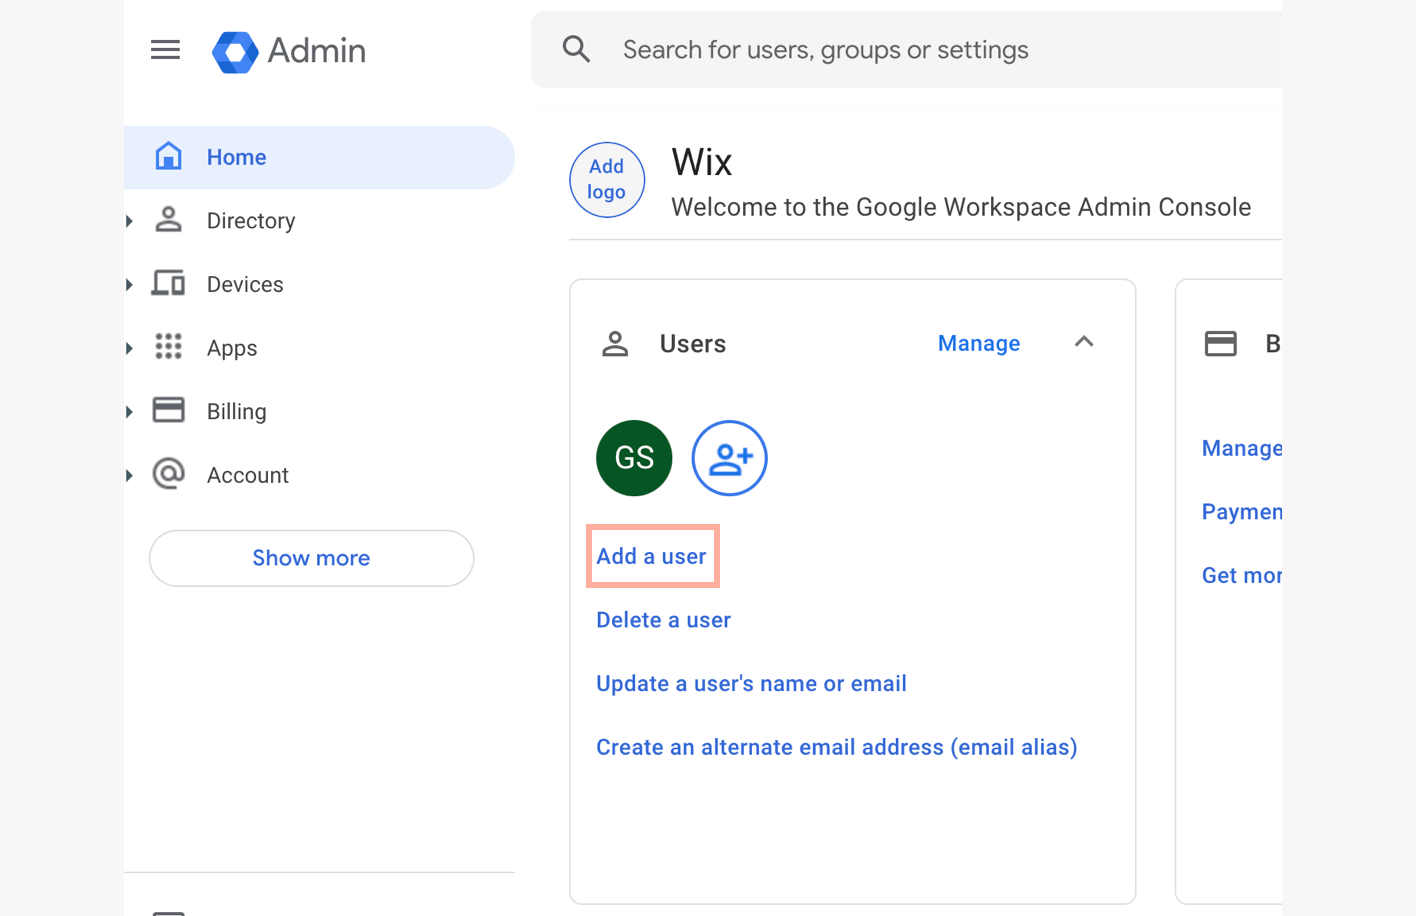
Note: If you're not signed in to your business email, do so now. - (In your Google Workspace Admin console) Click Add a user under Users.
- Add the user's first name, last name and primary email address in the pop-up.
- Click Add New User.
- Click Done.
- Repeat steps 3-8 for any other business emails you need to set up.
Renaming a user
Once you've created a new user, you can customize their display name or the username from the Google Workspace Admin console.
Important:
Before renaming a user (display name or username), make sure that the user is not signed in to their business email.
To rename a user:
- Go to Business Email in your Wix account.
- Click the More Actions icon next to the email you want to rename.
- Click Manage at Google.
- (In the Google login page) Check that the email address is correct, then click Next.
Tip: If another email appears, select the relevant account or click Use another account. - Enter your password and click Next.
Note: If you have already signed in to your business email and saved the password in your browser, you are automatically logged in to your Google Workspace Admin console. - Click Update a user's name or email under Users.
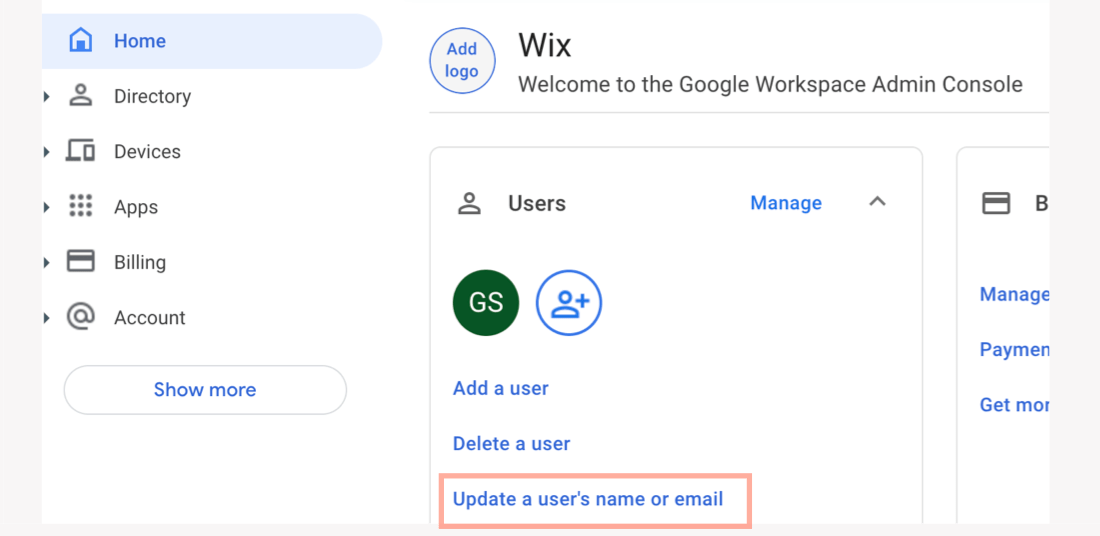
- Go to the relevant user listed and click Rename user.
- Edit the user's first name, last name and/or primary email address.
- Click Rename.
What's next?
After changing these details:
- The rename process can take up to 10 minutes. This means the new name might not be available for up to 10 minutes.
- All contacts in the user's Hangouts chat list will be removed. In addition, the user might not be able to use chat for up to 3 days.
- The user's current address will become an alias to ensure email delivery.
Deleting a user
You can always remove a user you've previously created, directly from the Google Workspace Admin console.
To delete a user:
- Open your Google Workspace Admin console.
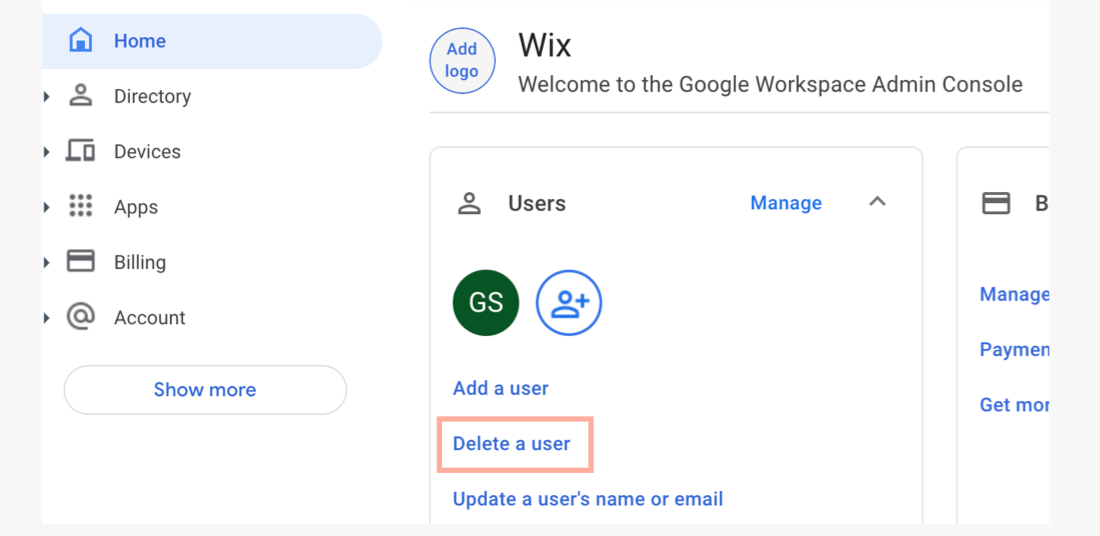
- Click Delete a User under Users.
- Choose the user you want to delete from the list.
- (Optional) Transfer data from this user to another user:
- Select the checkbox(es) next to the data you want to transfer to another user.
- Search for the relevant user in the Transfer to section.
- Click Delete.
- Click Done.
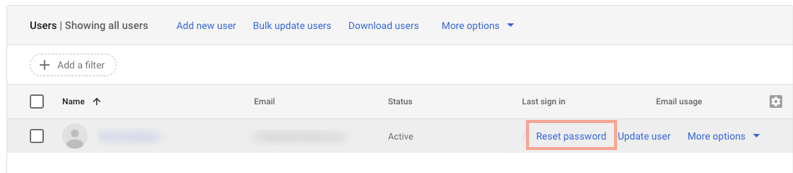
Resetting a user's password
You may need to reset someone's password after creating a user. You can do so from the Google Workspace Admin console, and choose whether to enter a password manually or generate a new one automatically.
To reset a user's password:
- Open your Google Workspace Admin console.
- Click Users.
- Hover over the relevant user and click Reset password.
- (Optional) Choose a new password manually, instead of generating one automatically:
- Disable the Automatically generate a password toggle.
- Enter the new password.
- Click Reset.
- (Optional) Select Click to copy password to copy the new password.
- (Optional) Send an email with the new password:
- Click Email Password.
- Enter an email address to send the password to.
- Click Send.
- Click Done.
FAQs
We are here to help with all your questions. Click a question below to learn more.
How am I charged for my additional business emails?
Where can I find information about my Google Workspace subscription?
Can I change my primary domain from Google Workspace in my Wix account?
