

Manually Adding Additional Columns or Rows to Your Table Master App
2 min
In this article
- Adding additional columns to your table
- Adding additional rows to your table
The Table Master app lets you easily create tables on your Wix site. You can upload Google spreadsheets or manually insert table data yourself.
When you insert your table data manually, you can add more columns or rows at any time if needed.
Tip:
You can also create a table using Velo by Wix.
Adding additional columns to your table
By default, each new table you create with the Table Master app displays 4 columns. You can add additional columns to your table in the Layout tab of the app's Settings panel.
To add additional columns:
- Go to your editor.
- Click your table in your editor.
- Click Settings.
- Click the Layout tab.
- Drag the slider under Maximum columns to show, or enter the amount of columns you want to display in the field next to it.

Adding additional rows to your table
By default, each new table you create with the Table Master app displays 4 rows. You can manually add more rows to your table in the Main tab of the app's Settings panel in your site's editor.
To add additional rows:
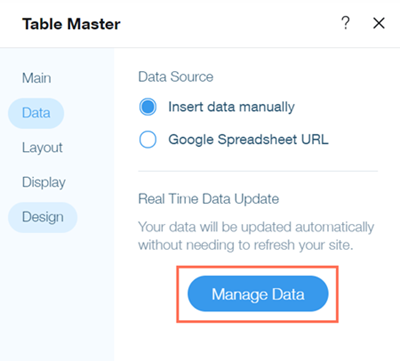
- Go to your editor.
- Click your table in your editor.
- Click Settings.
- Click the Data tab.
- Click Manage Data.
- Add your new data to your table under the existing rows.
- Click Save & Close. Your table will automatically update with the new number of rows.
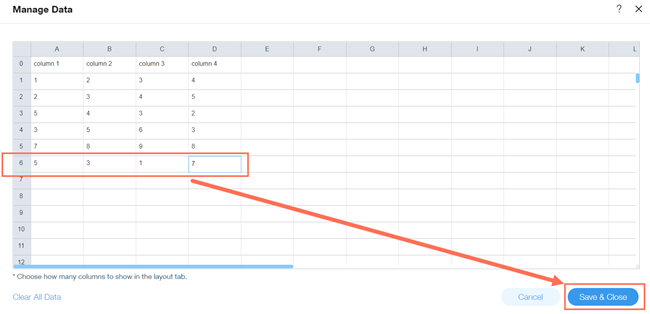
Note:
You can only add rows to the end of your table. Currently, it is not possible to add rows in the middle of the table. Vote for this feature
