

Wix Stores: Printing Shipping Labels with Wix Shipping
8 min
In this article
- Setting up Wix Shipping
- Purchasing and printing a single shipping label
- Purchasing and printing multiple labels at once
- Creating a custom package size
- Customizing your settings
- FAQs
Streamline your fulfillment process by purchasing shipping labels right in your site's dashboard. Wix has partnered with Shippo to provide you reduced rates via local carriers. Shipping to international destinations is available from most countries.
Wix Shipping is currently available for merchants in the following locations:
- Canada
- France
- Germany
- Spain
- UK
- US
Which carriers are available for my country?

Setting up Wix Shipping
To get started, select an order and click Print Shipping Label. The first time you do this, you'll set up Wix Shipping. The next time you click there, you'll go straight to purchasing and printing the shipping label.
Before you begin:
Make sure you've entered your business address in the Business Info page.
To set up Wix Shipping:
- Go to Orders in your site's dashboard.
- Select an unfulfilled order that's set to be delivered domestically.
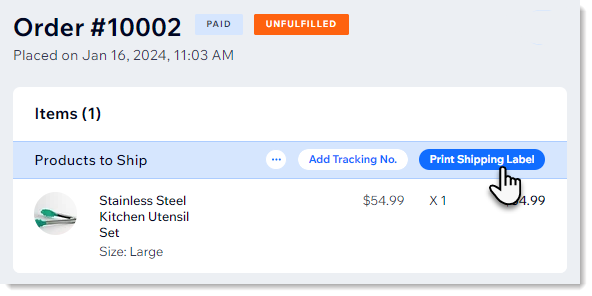
- Click Print Shipping Label.
- Integrate with Shippo:
- If you previously added and set up Shippo on this site: Click Buy Shipping Label.
Note: For Wix Shipping, you can connect one Shippo account to one site. - If your site is new to Shippo:
- Click Get Started.
- Click Add to Site.
- Review the permissions and click Agree & Add.
- Create a new Shippo account or log into your existing account.
- If you previously added and set up Shippo on this site: Click Buy Shipping Label.
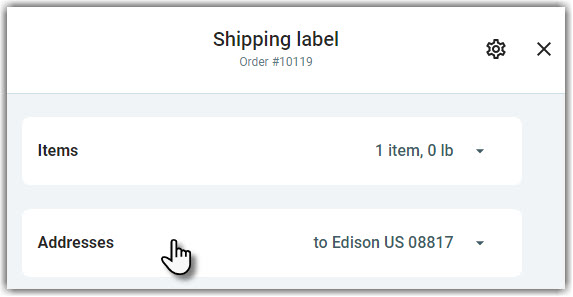
- Make sure your sender address is accurate:
- Click Addresses.
- Click Sender.
- If necessary, update your details.
Purchasing and printing a single shipping label
When you go to print a label for an order, you'll see that the items and addresses have already been entered, along with the default settings. Make any changes you need before purchasing and printing the label.
Tip:
The first time you purchase a label, you'll be asked to add a payment method.
To print a shipping label:
- Go to Orders in your site's dashboard.
- Select an unfulfilled order that's set to be delivered domestically.
- Click Print Shipping Label.
- (Optional) Update details (e.g. change the package type, select a different carrier, or carrier rate).
- Click Buy label and complete the purchase.
- Print the shipping label.
Purchasing and printing multiple labels at once
Streamline your workflow by printing shipping labels in bulk. You can select unfulfilled orders to process fulfillment or fulfilled orders to reprint shipping labels or packing slips.
To print multiple labels:
- Go to Orders in your site's dashboard.
- Select the relevant orders.
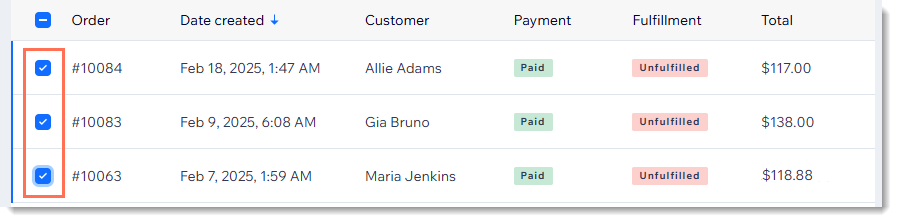
- Click Print Shipping Label.
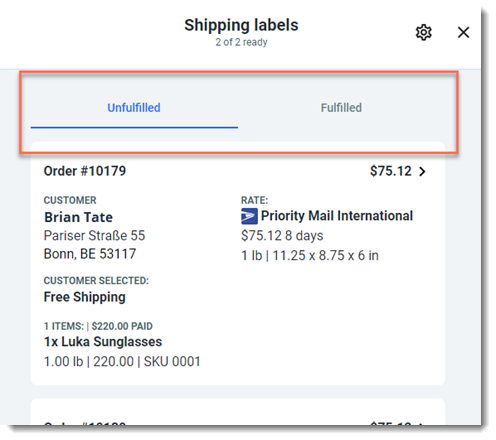
Tip: If you selected both unfulfilled and fulfilled orders, they are displayed in 2 separate tabs.
- (Optional) Click the price to update the details of any of the orders (e.g. change the package type, select a different carrier, or carrier rate).
- Click Next.
- Review what you're set to purchase and click Buy labels.
- Complete the purchase.
- Print the shipping labels.
Tip: If you have this option set up, you can print both shipping labels and packing slips. Learn how to customize your settings.
Creating a custom package size
When you purchase a label, you have the option of selecting standard packages offered by your carrier, packages you used recently, or custom package sizes you created and saved.
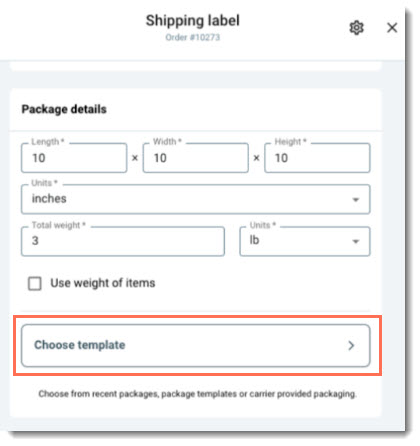
To create and save custom package templates:
- Go to Orders in your site's dashboard.
- Select an order.
- Click Print Shipping Label.
- Click Choose template.
- Click + New Template.
- Enter the package details and click Save.
Customizing your settings
Customize your details and default settings to save time when purchasing labels. You can change your company info and select default label sizes, carriers, insurance and more.
To customize your settings:
- Go to Orders in your site's dashboard.
- Select an order.
- Click Print Shipping Label.
- Click the Settings icon
 .
. - Choose what you want to customize:
- Enter your company information:
- Select Company.
- Enter your details and click Save.
- Select label defaults:
- Select Labels & Packing slips.
- Select default label sizes, carriers, etc. and click Save.
Note: When printing any specific label, you can override these defaults.
- Select an insurance default:
- Select Insurance.
- Select a default setting and click Save.
- Enter your company information:
FAQs
Click a question below to learn more about Wix Shipping.
Can I print a label more than once?

How can I customize and print packing slips?

 at the top of an order and selecting Print Packing Slip.
Can I void a shipping label?
 next to the tracking number.
How do I file an insurance claim?
What is the Tax ID type field?
Which carriers and services are available for merchants shipping from Canada?
Which carriers and services are available for merchants shipping from France?
Which carriers and services are available for merchants shipping from Germany?
Which carriers and services are available for merchants shipping from Spain?
Which carriers and services are available for merchants shipping from the UK?
Which carriers and services are available for merchants shipping from the US?
