

Wix Stores: Fulfilling Orders with the ShipBob Fulfillment Service
4 min
In this article
- Step 1 | Add the ShipBob app
- Step 2 | Sync store products with ShipBob
- Step 3 | Complete account setup
- Step 4 | Set how often you want to sync with ShipBob
- Step 5 | Send inventory to ShipBob
- Step 6 | Sync store orders with ShipBob
- Step 7 | Set a date for ShipBob to start fulfilling orders
ShipBob is a fulfillment service that stores your products in their warehouses and then packs and ships products to your customers whenever an order comes in.
After setup, the fulfillment process runs automatically:
- Orders are forwarded from Wix to ShipBob
- ShipBob fulfills the order and creates a tracking number
- The tracking number is added to the order
- Customers automatically receive shipping confirmation sent from your store
Step 1 | Add the ShipBob app
To get started, go to the Wix App Market and add the ShipBob app.
Wix Editor
Studio Editor
Dashboard
- Go to your editor.
- Click Add Apps
 on the left side of the editor.
 - Search for the ShipBob app in the search bar.
- Click Add to Site.
Step 2 | Sync store products with ShipBob
After adding the ShipBob app, sync your products from the Wix dashboard. You have the option to sync products, orders, and tracking information at this stage, but we recommend that you start by syncing your products.
Before you begin:
If you created product options, make sure to enable the Manage pricing and inventory for variants toggle and track variant inventory amounts so that ShipBob can fulfill orders with variants accurately. Note that ShipBob assigns a unique identifier to each variant.
To sync products with ShipBob:
- If you closed the Wix dashboard tab, reopen it:
- Go to Manage Apps in your site's dashboard.
- Click Go to Dashboard next to the ShipBob app.
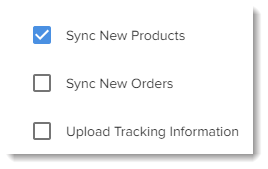
- Select the Sync New Products checkbox and click Save.
Step 3 | Complete account setup
When you're ready, complete the setup process in your ShipBob account. This includes deleting the demo data (found in the ShipBob dashboard), connecting a credit card, and adding some details to your products. Learn more about completing account setup.
Step 4 | Set how often you want to sync with ShipBob
After the initial connection with ShipBob is established, you'll need to sync regularly so that when you add new products or get new orders, ShipBob is informed about the changes. You can set how often you want to sync. If for some reason, you want to stop syncing for a time, you can select the Pause option. Note that you can also sync manually at any time.
Tip:
When ShipBob receives orders with products that are not synced to their dashboard, a new product is automatically created.
To set sync frequency:
- Go to Manage Apps in your site's dashboard.
- Click Go to Dashboard next to the ShipBob app.

- Click Sync Schedule.
- Select a sync frequency from the drop-down.
- Click Save.
Tip:
To sync manually, go to the Manage Apps tab and click Go to Dashboard next to the ShipBob app, then click Sync Now at the top right.
Step 5 | Send inventory to ShipBob
Next, your store products must be sent to a ShipBob warehouse. Start by selecting which ShipBob warehouse you want to work with - ideally the one closest to your customer base.
To learn how to ship your merchandise to ShipBob, check out these resources:
Note:
Before ShipBob can start fulfilling orders, your products need to physically arrive at one of their warehouses. When you know how and when your products will arrive, you can sync your orders with ShipBob and set a date when they will start fulfilling orders.
Step 6 | Sync store orders with ShipBob
After shipping your products to ShipBob (or at least planning how to do so), you should have some idea of when they can start fulfilling your orders.
In order for ShipBob to fulfill your orders, they need to start receiving your store orders. ShipBob offers the option of syncing orders automatically as they come in, or sending them manually. Learn how to sync store orders with ShipBob.
Tip:
Don't forget to set a start date when ShipBob will start fulfilling orders (Step 7 below).
Step 7 | Set a date for ShipBob to start fulfilling orders
To make sure orders aren't fulfilled twice (once by you and once by ShipBob) set the date ShipBob will start fulfilling relevant store orders.
To set when orders are fulfilled:
- Go to Manage Apps in your site's dashboard.
- Click Go to Dashboard next to the ShipBob app.
- Click Connection Settings.
- Click the Date icon
 .
.
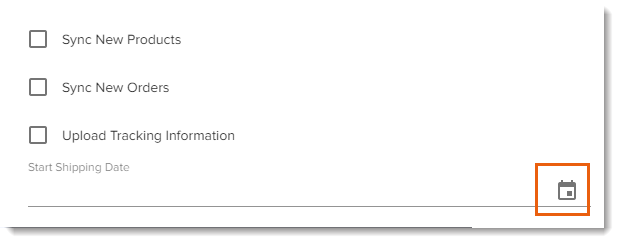
- Select a date.
- Click OK.
- Click Save
