Email Marketing: Troubleshooting the Authentication Process of Your Domain
3 min
In this article
- Step 1 | Open and copy your DNS records
- Step 2 | Add the copied CNAME(s) to your DNS records
Sending email campaigns from an authenticated domain enhances your credibility with providers like Google and Outlook, reducing the risk of being marked as spam. This improves deliverability and fosters trust with your audience.
The authentication process should happen automatically if you've purchased a domain through Wix or connected a domain to our name servers. If it didn't, follow the steps in this article to manually authenticate your domain.
Another scenario where you need to manually authenticate your domain is if you've used it in your sender details before connecting it to Wix.
Connected your domain via pointing?
Your domain's DNS records stay with your domain's host. Contact the domain host if you're experiencing any authentication issues.
Step 1 | Open and copy your DNS records
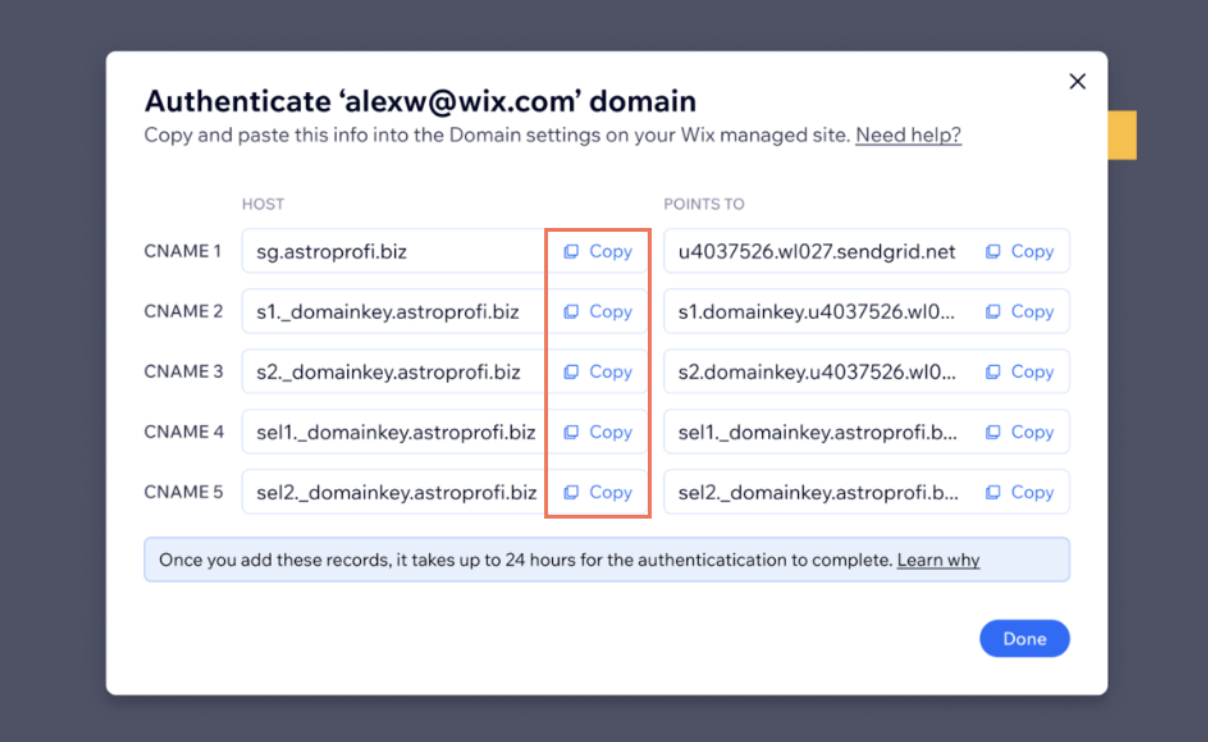
First, copy your DNS records from your site's email marketing dashboard. You'll need to paste them later.
To copy your DNS records:
- Go to Email Marketing in your site's dashboard.
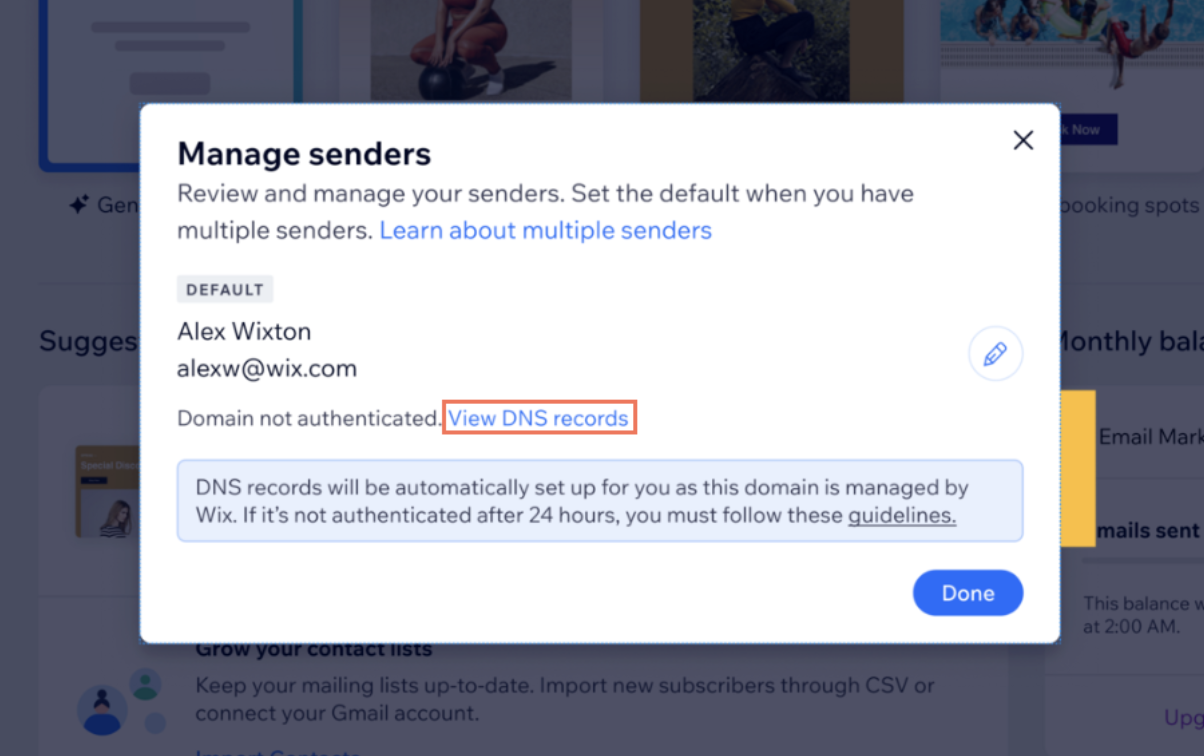
- Click Manage Senders under Sender details on the right.
- Click View DNS records.

- Click Copy next to the first CNAME under the HOST column.

Step 2 | Add the copied CNAME(s) to your DNS records
After copying the CNAME records from your email marketing dashboard, head over to the Domains page in your Wix account. There, you can authenticate your domain for email marketing by pasting those CNAME records.
To add the records:
- Go to Domains in your Wix account.
- Click the Domain Actions icon
 next to the relevant domain.
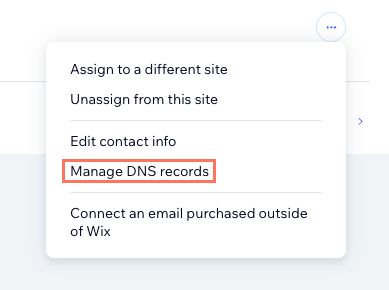
 - Click Manage DNS records.

- Scroll to the record type you'd like to add (e.g. CNAME, TXT) and click + Add Record.
- Enter the DNS record in the relevant fields.
Tip: If you're instructed to create a DNS record with the @ sign in the Host Name field, leave the Host Name field blank instead.

- Click Save.
- Click Save Changes in the pop-up message.
Important:
You can only edit one DNS record at a time. Save your changes before adding another record. Repeat this process until you have copied all provided DNS records.


