

Wix Multilingual: Setting up a Language Menu
7 min
In this article
- Reordering languages
- Changing the layout
- Changing the design
- Adding animation
- FAQs
The Language Menu is what site visitors use to navigate from one language to another. Customize its design and layout to perfectly suit your site's style. You can even add a lively animation to draw your visitors' attention to it.

Customize for all of your site's languages:
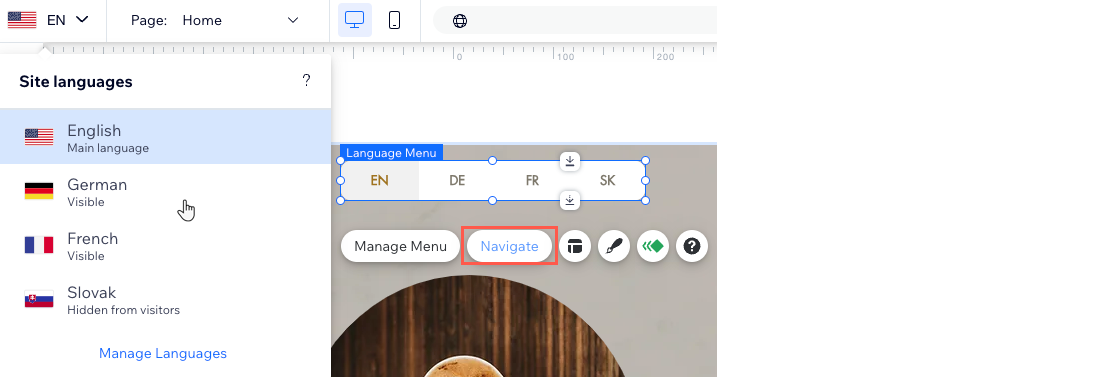
Designing the Language Menu in your site's main language affects all secondary languages. However, if you want to achieve a specific design for one of your secondary languages, click Navigate and select the relevant language.
Reordering languages
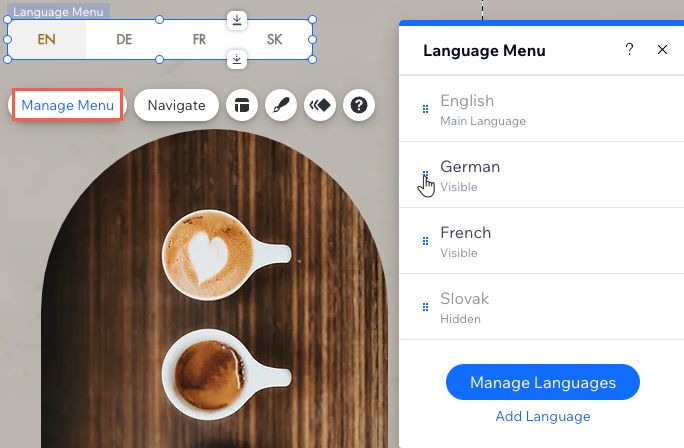
Display the languages in your Language Menu in any order you like. Simply drag and drop your languages into position.
Note:
Your main language will always appear first in your language menu.
Wix Editor
Studio Editor
- Go to the main language version in your editor.
- Click the Language Menu element on your page.
- Click Manage Menu.
- Click a language to drag and drop it into position.
Changing the layout
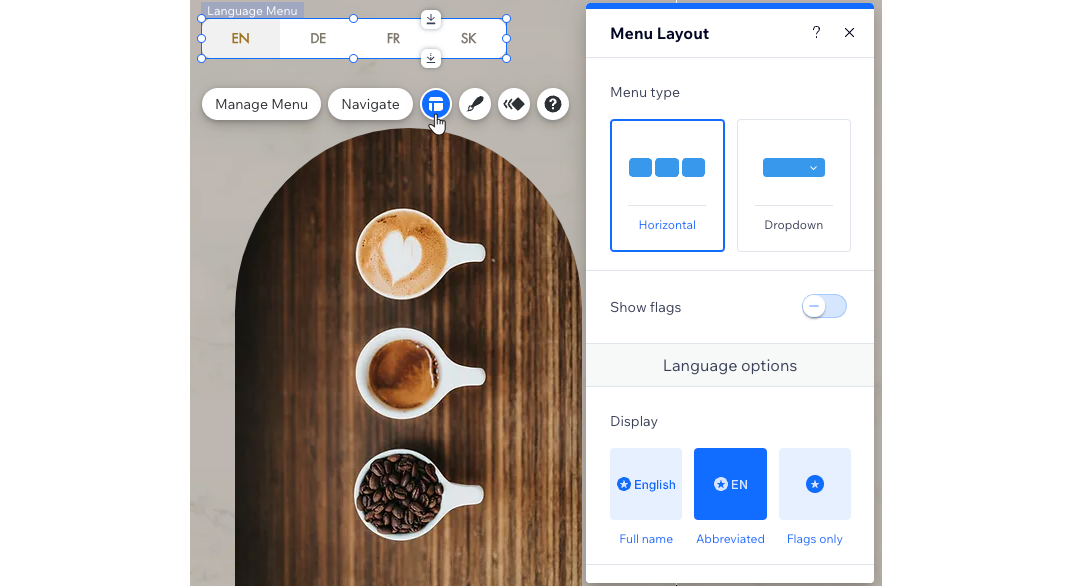
Customize your Language Menu to best fit your site's style. Decide if you prefer a horizontal or drop-down menu, select how to show flags, and determine how to represent languages.
Wix Editor
Studio Editor
- Go to the main language version in your editor.
- Click the Language Menu element on your page.
- Click the Menu Layout icon
 .
. - Customize your menu's layout using the options available:
- Menu type: Select a menu type:
- Horizontal: Language options are displayed side-by-side.
- Dropdown: Language options are displayed in a drop-down menu.
- Show Flags: Enable this toggle to show flags and customize them using the following options:
- Choose a flag style: Select your preferred style: Circle, Rectangle or Rounded.
- Size: Increase or decrease the flag size.
- Display: Choose how to display languages: Full name, Abbreviated or Flags only.
- Alignment: Select an alignment option: Left, Center or Right.
- Menu type: Select a menu type:
Changing the design
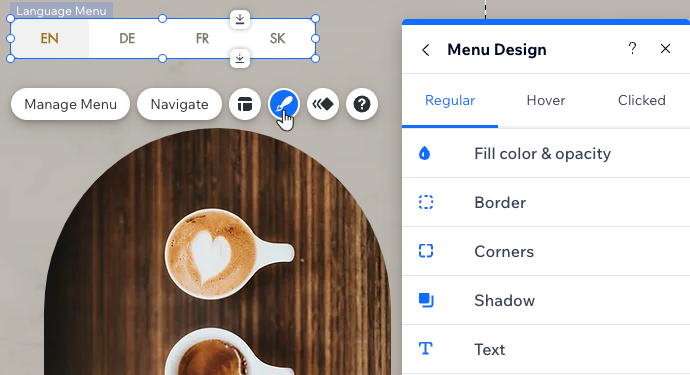
Design your language menu visually to complement the look and feel of your site. You can change the design for all three states: regular, hover and clicked.
Wix Editor
Studio Editor
- Go to the main language version in your editor.
- Click the Language Menu element on your page.
- Click the Menu Design icon
 .
. - (Optional) Select a design.
- Click Customize Design and customize your menu using the following options:
Note: You can set separate designs for the three different menu states: Regular, Hover and Clicked.

- Fill Color & Opacity: Adjust the color and opacity of the background and separators.
- Border: Adjust the color, opacity and width of the borders.
- Corners: Enter numerical pixel values to change the corner radius of the menu (the larger the values, the rounder the corners.) Tip: Click the center lock to assign different values to different corners.
- Shadow: Click the Enable Shadow toggle to create and customize a shadow around your menu.
- Text: Customize the text's color, font, theme and size.
Adding animation
Add an animation to your language menu to make it pop. You can control the animation direction, duration, delay, and decide to show it only in the first visit or in all visits.
To customize the animation settings:
- Go to the main language version in your editor.
- Click the Language Menu element on your page.
- Click the Choose Animation icon
 .
. - Select an animation.
- Click Customize to edit the animation direction, duration, delay, and decide whether to show it only in the first visit or in all visits.

FAQs
Click a question below to learn more about customizing the language menu:
Why is my Language Menu missing?
Can I design the Language Menu for mobile view?
Can I change the language abbreviation in my menu?
