Wix Blog: Customizing Your Blog Text (Fonts and Color)
5 min
In this article
- Customizing default text styles for blog feeds
- Customizing a default text style for the Post page
- Customizing text styles within a specific post
You can customize text styles, such as fonts style, size, and color, that suit your blog's style. This helps you create a unique and consistent look that matches your brand, making your blog more engaging for your readers.
For example, if you run a travel blog, you can use vibrant colors and playful fonts to convey a sense of adventure and excitement, making your content more appealing to your audience.
Customizing default text styles for blog feeds
Your blog feed displays a list of posts (either all posts or specific ones that you choose) and allows readers to scroll through and select the post they want to read. Make sure to choose a text style that's easy to read when scrolling.
To set default text style for your feeds:
Wix Editor
Studio Editor
- Go to your editor.
- Go to your Blog page:
- Click Pages & Menu
 on the left side of the editor.
 - Click Blog Pages.
- Click your Blog page under Blog Pages.
- Click Pages & Menu
- Click the Blog element on your page.
- Click Settings.
- Click the Design tab.
- Click Posts.
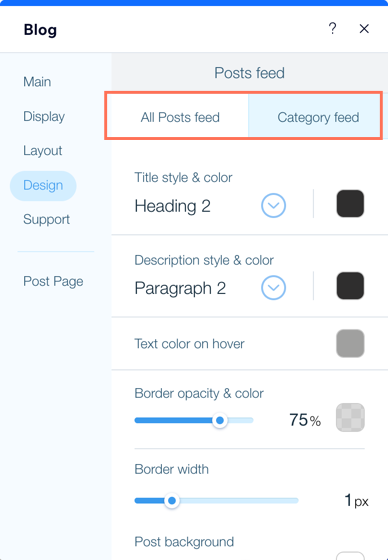
- Click the tabs to choose which feed you want to design:
- All Posts feed: This is your main post feed. It displays all of your posts or specific posts that you've selected. You can customize the colors and fonts of the text, choose the color of the text on hover, and adjust the overlay (the semi-transparent background).
- Category feed: This feed shows a list of all your blog categories. Select the colors and fonts of the text, choose what color the text appears on hover and customize the borders and backgrounds.
Customizing a default text style for the Post page
The Post page displays the full blog post. It's a dynamic page, meaning the design remains the same, no matter what post you open. Make sure to choose a font that's easily readable for longer paragraphs of text. The text style you set here applies to all of your blog posts, unless you override it while writing the post itself.
To set a default text style for your Post page:
Wix Editor
Studio Editor
- Go to your editor.
- Go to your Post page:
- Click Pages & Menu on the left side of the editor.
- Click Blog Pages.
- Click Post.
- Click Pages & Menu
- Click the Post Page element on your page.
- Click Settings.
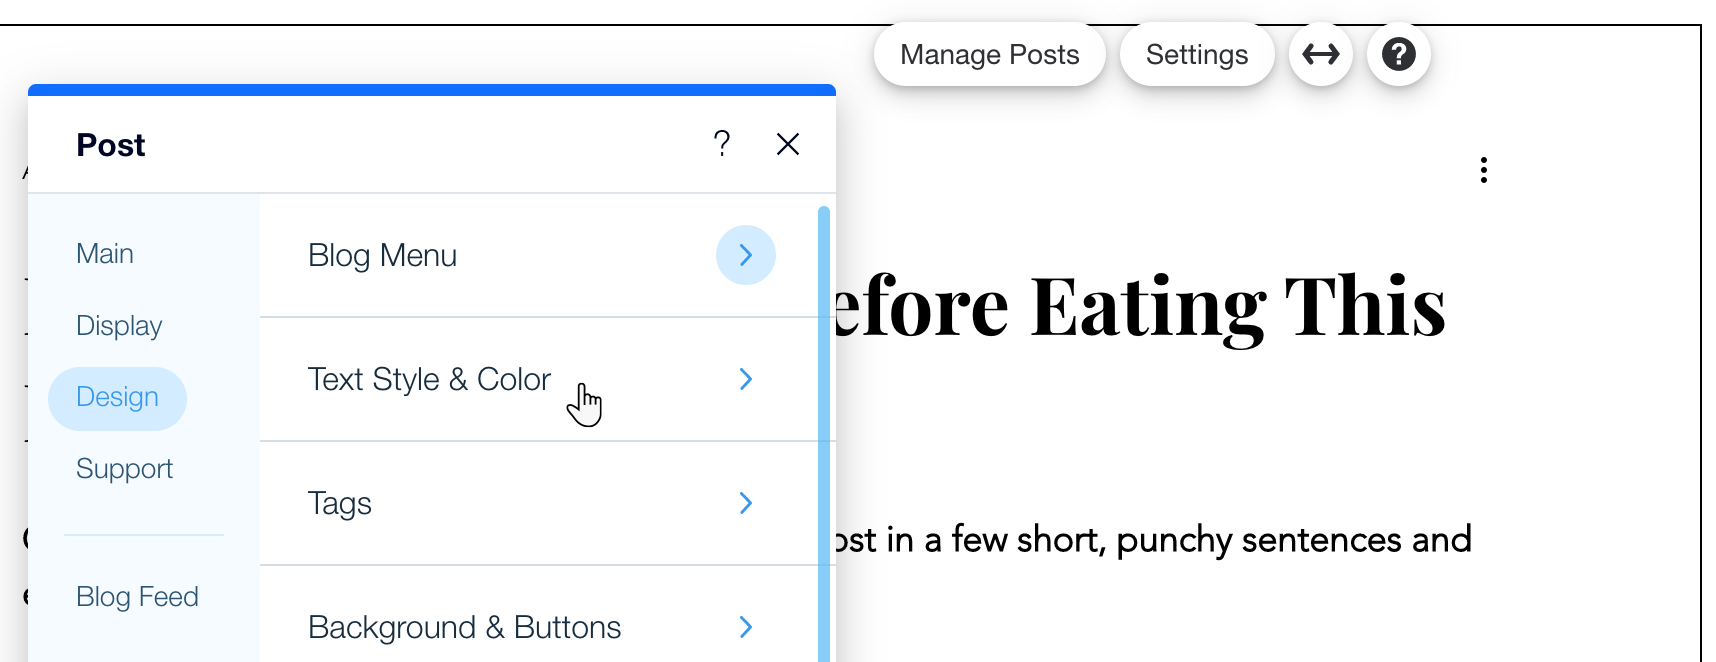
- Click the Design tab.
- Click Text Style & Color.
- Adjust the colors and fonts of the paragraph (main body) and heading text.
Customizing text styles within a specific post
By default, your posts use the text styles that you set for the Blog Feeds and Post page. However, you can override these settings for a specific post, or for a specific paragraph or word within a post. This is useful if you want to highlight a specific phrase or section.
To set the text style within a post:
- Go to Blog in your site's dashboard.
- Click + Create New Post or click an existing post.
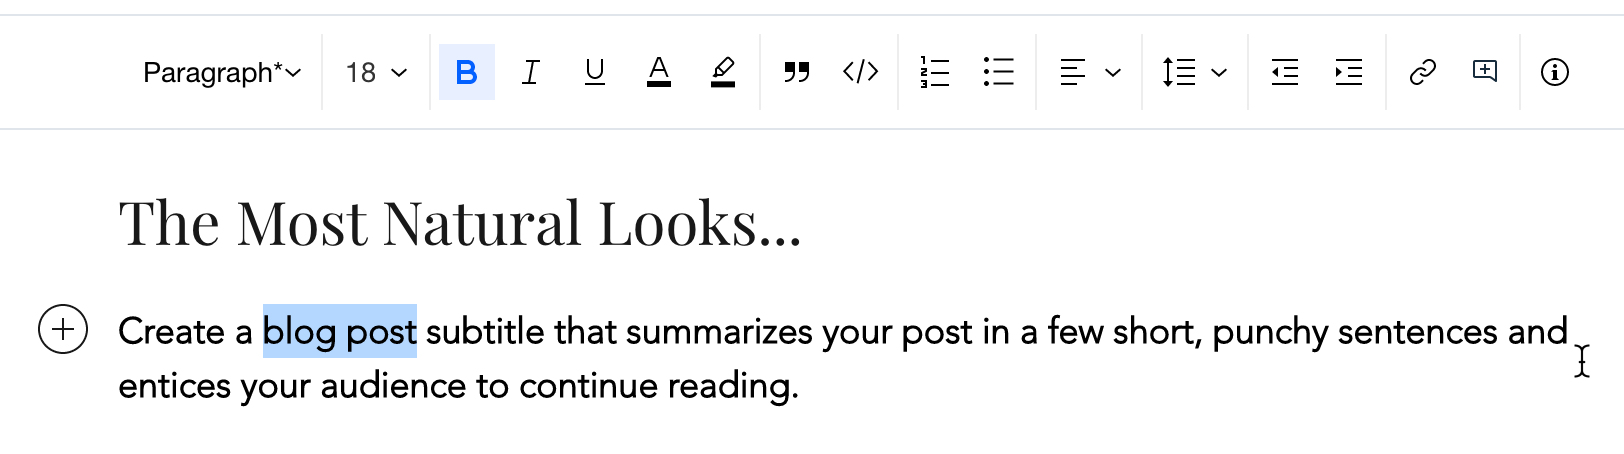
- Highlight the text you want to style.
- Customize the text using the options in the text editing toolbar.