ADI: Adding and Editing Your Images
4 min read
Bold images that showcase who you are as a business are crucial to any website. When you build a site with ADI, images are preselected for you based on the information you provided and the industry you're in. You can easily change any image on your site to one of your own or by using the tools in the media manager.
In this article, learn more about:
Adding a new image
To add a new image to your site you must first add a new section from the Add panel. There are many different image layouts to choose from depending on your purpose.
To add a new image:
- Hover over the Add drop-down in the top bar of the ADI builder.
- Click Section to Page.
- Scroll down to Elements in the Add Section Panel. Click Image.
- Choose an image layout that you like. Some layouts include a title and text along with the image, and some layouts offer standalone images only. Hover over your favorite one and click Add This Section.

Replacing an image
You can change any of the images on your site at any time.
To replace an image:
- Hover over the section that contains the image you want to change.
- Click Edit.
- Click Edit & Replace.
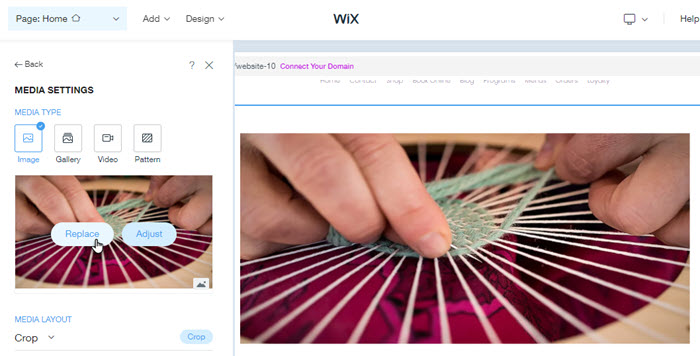
- Hover over the image and click Replace.
- Click Replace.
- Replace the image using the options in the Media Manager.
- Click Apply to add it to your site.
Changing the layout of an image
There are multiple types of image layouts to choose from. It's important to remember that media layouts are closely tied to section design. If you edit an image's layout on the page it will most likely alter the section layout as well.
To change the layout of an image:
- Select the image in the ADI builder that you want to change.
- Click Edit & Replace under Media to open the media settings.
- Select the drop-down under Media Layout.
- Choose a new image layout from the available options:
Note: Depending on the section design not every layout option will be available.- Full Image: The image box is contained in the section, usually beside text.
- Crop: The image is cut to fit within the section.
- Strip: The image stretches to the width of the section.
- Background: The image is the section background.
- Column: Ideal for a multiple image layout or side-by-side image with text.
Note:
If the new image layout requires you to update the section design, a pop-up appears to the right where you can choose the design you like the most.
Choosing the position of an image
Adjust the focal point of an image in order to draw your visitors' attention to the part of the image you want to showcase. You may need to change the section design to have the ability to adjust an image's position, as not all section layouts support it.
To change the position of an image:
- Select the image in the ADI builder that you want to adjust.
- Click Edit & Replace under Media to open the media settings.
- Click Position next to the Media Layout drop-down.
Note: If you don't see the position button it means adjusting the position isn't possible with this type of layout. Select another media layout to see it. - Click and drag the focal point dot to where you want the image focus to be. The image automatically adjusts on the page so you can view the change.
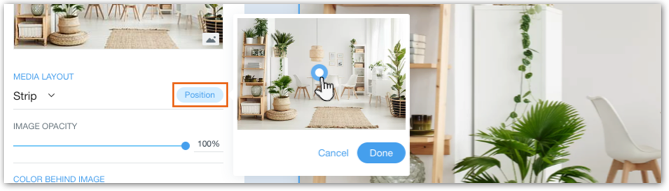
- Click Done.
Cropping an image
When you add an image to your page, the image is automatically cropped and re-positioned. You can crop your image by following the steps below.
To crop an image:
- Click the image you want to edit.
- Go to Edit & Replace.
- Click Adjust on the image thumbnail.
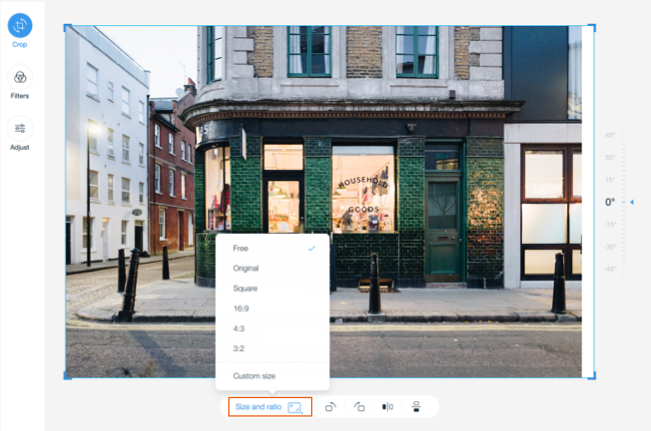
- Click Crop.
- Click Size and ratio.
- Select a preset image ratio or click Custom Size to define specific dimensions.
- Click Save.
Tip:
You can also drag the corners of your image to crop it manually.
Editing images with Wix Photo Studio
Customize the images on your site so they match your brand. The Wix Photo Studio allows you to easily enhance and edit images with user friendly tools without having to leave the ADI Builder. Add a filter to your image, an overlay, a decorative element and more.
To edit images with Wix Photo Studio:
- Click the image in the ADI builder that you want to edit.
- The Media Settings panel opens on the left. Click Adjust on the image thumbnail.

- Edit your image using the Photo Studio tools. Learn more
Note:
Your edited image is saved as a new file and applied to the section. The original image is available in the Media Manager.
Did this help?
|