Wix Bookings: Adding a 'Book' Button to Facebook
6 min
In this article
- Adding a Service List 'Book' button to your Facebook business page
- Adding a single service calendar 'Book' button to your Facebook business page
- Adding a single service 'Book' button to your Facebook business page
- Adding a custom link 'Book' button to your Facebook business page
- Frequently asked questions (FAQs)
- Troubleshooting adding a 'book' button to Facebook
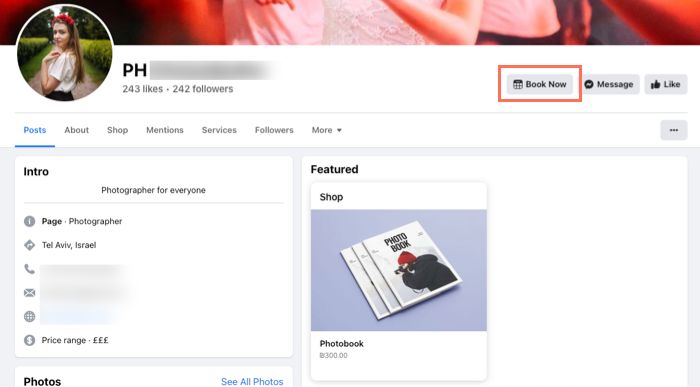
Add a 'Book' button to your Facebook business page to make it easier for clients to book your services while browsing social media. This is a great way to get clients booking your latest services during a promotional campaign on social media.

Important:
If you experience any technical issues, contact Facebook for support. You can also visit the Meta Business Help Center for more information.
Before you begin:
- Make sure to upgrade your site so you can accept online bookings.
- Connect a domain to your site.
- Create the relevant Wix Bookings service you want to connect to the Book button.
- Create a Meta Business Manager.
Adding a Service List 'Book' button to your Facebook business page
Add a 'Book' button to your Facebook business page that directs clients to your service list. Here they can see all of the services you offer and choose which one is right for them. This is a great option when you have just launched your business.
To add a Service List 'Book' button to Facebook:
- Go to Booking Integrations in your site's dashboard.
- Click Connect under Facebook.
- Set up your button:
- Select Service List from the drop-down.
- Click Continue.
- Review the link settings for the Facebook Business Manager, Facebook Page and Meta Pixel.
Note: Visit the Meta Business Help Center for more information. - If you encounter issues connecting your business profile, contact Meta support.
- (Optional) Enable the Automatic advanced matching toggle to increase the visibility of your business to users on Facebook.
- Click Continue.
- Click Next.
- Click Done.
Adding a single service calendar 'Book' button to your Facebook business page
Add a single service calendar 'Book' button to your Facebook business page to direct clients to the calendar for a specific service. They can then choose the session date and time that suits them.
Note:
Single service calendar is only available for appointments and classes.
To add a single service calendar 'Book' button:
- Go to Booking Integrations in your site's dashboard.
- Click Connect under Facebook.
- Set up your button:
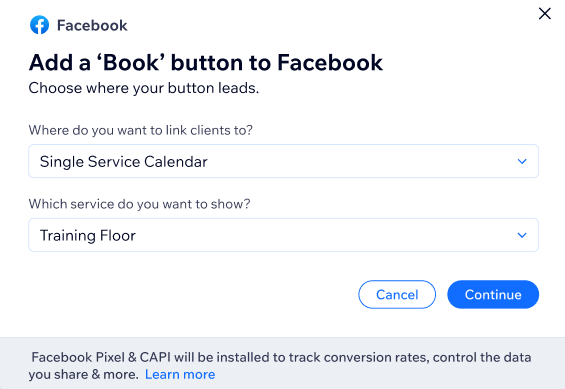
- Select Single Service Calendar from the drop-down under Where do you want to link clients to?.
- Choose a service from the drop-down under Which service do you want to show?.
- Click Continue.
- Review the link settings for the Facebook Business Manager, Facebook Page and Meta Pixel.
Note: Visit the Meta Business Help Center for more information. - (Optional) Enable the Automatic advanced matching toggle to increase the visibility of your business to users on Facebook.
- Click Continue.
- Click Next.
- Click Done.

Adding a single service 'Book' button to your Facebook business page
Direct clients to a specific service page with all relevant information they need to book a session. This is a great option for promoting your new services on social media.
To add a single service 'Book' button:
- Go to Booking Integrations in your site's dashboard.
- Click Connect under Facebook.
- Set up your button:
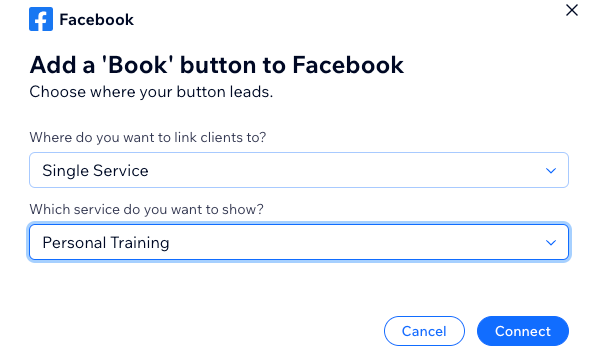
- Select Single Service from the drop-down under Where do you want to link clients to?.
- Choose a service from the drop-down under Which service do you want to show?.
- Click Continue.
- Review the link settings for the Facebook Business Manager, Facebook Page and Meta Pixel.
Note: Visit the Meta Business Help Center for more information. - (Optional) Enable the Automatic advanced matching toggle to increase the visibility of your business to users on Facebook.
- Click Continue.
- Click Next.
- Click Done.

Adding a custom link 'Book' button to your Facebook business page
Direct clients to any page on your site, depending on your needs. For example, this is a great way to promote your memberships and packages.
To add a custom link 'Book' button:
- Go to Booking Integrations in your site's dashboard.
- Click Connect under Facebook.
- Set up your button:
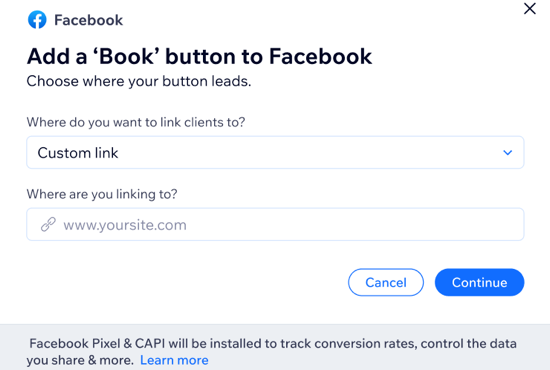
- Select Custom Link from the drop-down under Where do you want to link clients to?.
- Enter the link to the page you want to direct clients to.
- Click Continue.
- Review the link settings for the Facebook Business Manager, Facebook Page and Meta Pixel.
Note: Visit the Meta Business Help Center for more information. - (Optional) Enable the Automatic advanced matching toggle to increase the visibility of your business to users on Facebook.
- Click Continue.
- Click Next.
- Click Done.

Frequently asked questions (FAQs)
Here are some frequently asked questions about adding a 'Book' button to Facebook:
Can I link my Facebook page to multiple Wix sites?
Can I update my 'Book' button links?
What happens if I delete a service linked to my 'Book' button on Facebook?
Can I link a course to my single service calendar 'Book' button?
Troubleshooting adding a 'book' button to Facebook
Click from the list of common errors below, where it is not possible to add a 'book' button to Facebook.
Your request is pending review.
Contact the admin of "Business Manager Name" for permission to connect this page.
You need permission from the admin of "Ad account name" to connect this pixel. Contact the account admin for access.
"Page Name" is not connected to "Commerce Account Name". Please check your Commerce Manager settings
This is the primary page of "Business Name". Choose another page or review your Business Manager settings.
Request permission from the admin of "Business Manager Name" to continue.
Contact the admin of "Business manager name" for permission to connect this page.


