Wix Table Reservations: Adding and Customizing the Experience List Element
In this article
- Adding the Experience List element
- Customizing the Experience List element
With
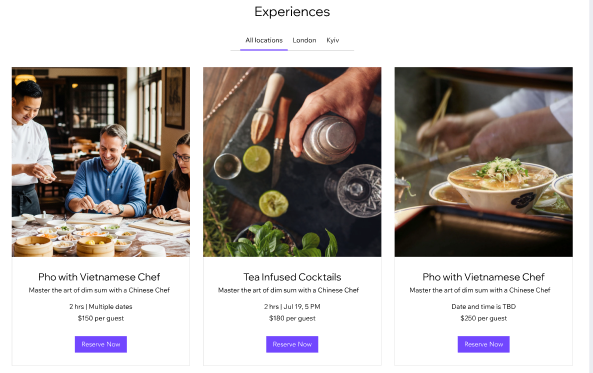
Wix Table Reservations, you can display your experiences on any static page with the Experience List element. This lets you highlight the experiences you want site visitors to see, whether you want to show all experiences, filter by location, or choose a custom list.
Before you begin:
Make sure you’ve already created at least one
experience.
Adding the Experience List element
Add the Experience List element to any static page in your editor to highlight your dining experiences where they fit best, e.g. on your homepage or a dedicated experiences page.
Wix Editor
Studio Editor
Harmony Editor
- Go to your editor.
- Go to the page where you want to display your experiences.
- Click Add Elements
 on the left side of the editor.
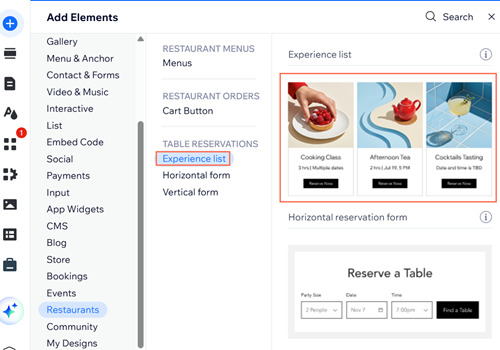
 - Click Restaurants.
- Click Experience List or drag the element onto your page.
- Move the experience list to the section where you want it to appear.
Tip:
You can also add the experience list element from the
Settings panel of any
Table Reservations page.
Customizing the Experience List element
Once you add the
Experience List element
to your page, you can customize what appears in the list and how it looks. This includes choosing which experiences to show, which details visitors can see, and updating the layout, text, and design.
Note:
Only experiences that are available to display on your site can appear in the Experience List element.
Wix Editor
Studio Editor
Harmony Editor
- Go to your editor.
- Click the Experience list element.
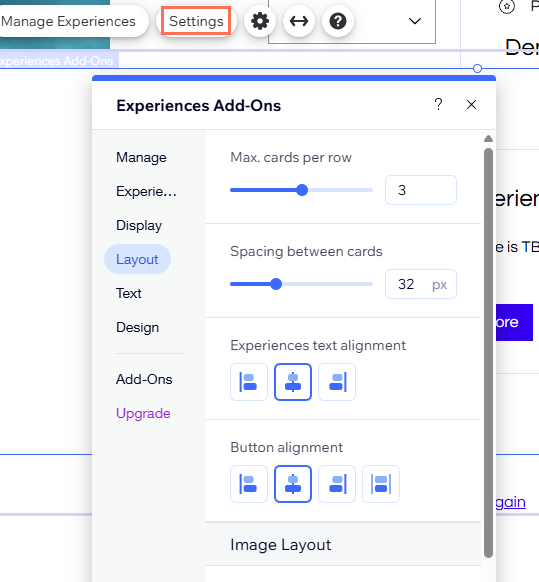
- Click Settings.
- Click the tab for what you want to customize:
- Experiences: Choose which experiences to show: All experiences, Custom, or By location — and filter them by status: Upcoming & Past, Upcoming, or Past.
- Display: Choose what appears in the list, such as the Experience list title, Location Tabs, Image, Summary, Duration, Date, and Price.
- Layout: Adjust the number of cards per row, the spacing between cards, the text and button alignment, and the image layout.
- Text: Edit the List title, the All locations tab text, and the reservation button text.
- Design: Customize the Text, Image, Button, and Background and borders.