Wix Blog: Adding a Button to a Blog Post
2 min read
Buttons are a great way to get your visitors interacting with various parts of your blog. For example, you can add 'click here', or 'view post' text to your button that prompts visitors to click and read other blog posts that they may like.

To add a button to a blog post:
- Go to your blog in your dashboard.
- Open the relevant post.
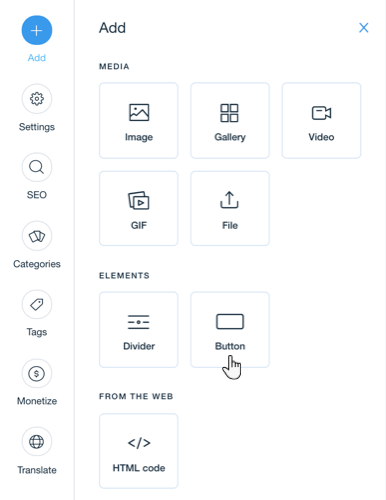
- Click the Add icon
 in the panel on the left.
 - Click Button.
- Click the Settings icon
 and customize your button.
- Button text: Enter the text that is displayed on your button.
- Link: Enter the destination for the button.
- Link opens in a new tab: Select the checkbox to open the button link in a new tab on the browser.
- Tell Google to ignore this link (nofollow): Select the checkbox to prevent the link showing up in SEO results.
- Click Save.
- Click the Design tab to change the design of your button:
- Border: Drag the sliders to change the width and corners of the border around the button.
- Button colors: Click the colors to choose the color for the text, background and border of your button.
- Click Save.
Did this help?
|