Site Members: Add and Set Up the Members Area
9 min read
This article refers to the new version of the Members Area app which is not available to all users yet. If you're using the previous version, read the information here. Click here to check which version you're using.
Add a Members Area so visitors can create their own account on your site. Once members sign up, they can access exclusive pages and services. This tool works great for both business solutions (e.g. Wix Stores, Wix Bookings) or any social apps you're using (e.g. Wix Forum, Wix Blog).
Step 1 | Add the Members Area app
To get started, open the Add panel in your editor and add the Members Area app. This installs some elements automatically (a login bar, for example), but you'll personalize them as needed in the next few steps.
Using other Wix Apps?
When you add certain Wix Apps (e.g. Wix Stores, Wix Bookings, Wix Blog), a Members Area is also added automatically. In this case, you can skip to step 2.
Wix Editor
Studio Editor
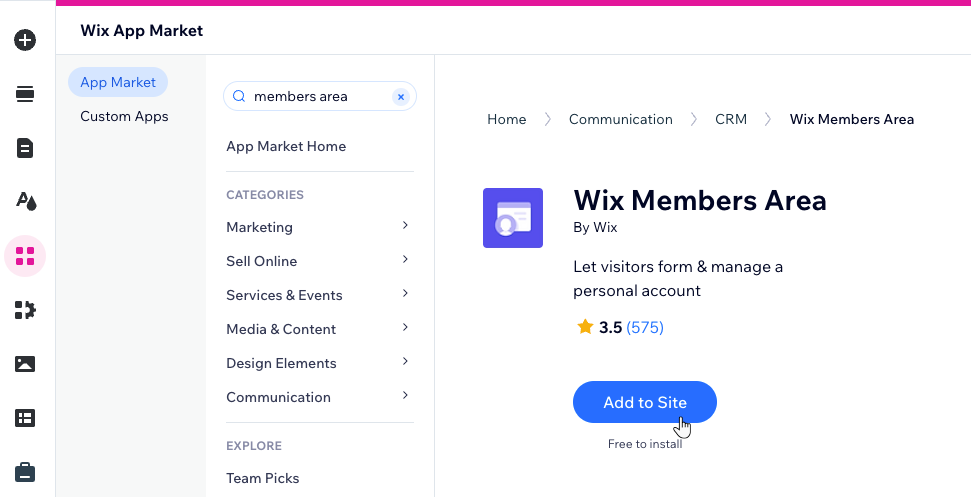
- Click Add Apps
 on the left side of the Editor.
 - Enter "Members Area" or "Wix Members Area" in the search bar.
- Select the Wix Members Area app.
- Click Add to Site.
Step 2 | Set up the Member Page
Once the editor is done installing the app, you can see the Member Page was added to your site. This page contains all the tabs that make up your Members Area. Choose a layout that fits your needs and decide which elements to show on the page.
Wix Editor
Studio Editor
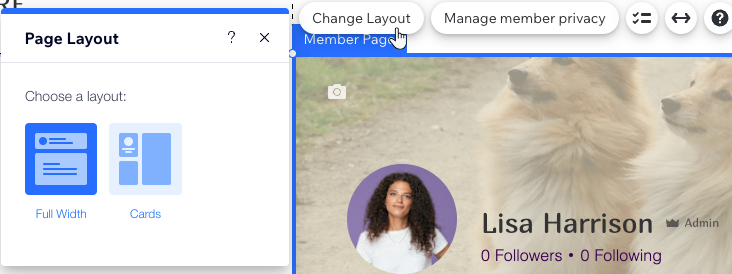
- Choose a layout for the Members Area:
- Select the Member Page element.
- Click Change Layout.
- Choose a layout you like (Full Width or Cards).
- Choose which elements to show in the Members Area:
- Click the Elements icon
 .
. - Select the checkboxes next to the elements you want members to see:
- Member Card: This element shows each member's name and profile picture. It appears on every tab of their account.
- Member Menu: This is the menu members use in order to navigate between tabs.
- Click the Elements icon
Step 3 | Customize the Member Menu
The Member Menu appears on every tab of your Members Area, allowing members to navigate between with ease. You can decide which tabs appear on this menu and control its layout and design.
In addition to the Member Menu, you can customize the login bar menu which is completely separate. When logged-in members click the login bar, the drop-down menu opens.
Wix Editor
Studio Editor
- Select the Member Menu element.
- Click Manage and Navigate.
- Choose what to do next:
- Add more tabs: Enhance the Members Area with new capabilities, like the Profile tab that lets members introduce themselves to the community.
Note: The available tabs depend on the Wix apps installed on this site (e.g. the "My Wallet" tab is only available for Wix Stores). - Remove a tab: Hover over a tab, click the More Actions icon
 and Delete Tab.
 - Rename a tab: Hover over a tab, click the More Actions icon and Edit Tab Name.
- Reorder tabs: Hold the Reorder icon
 next to a tab and drag it to the desired position.
- Add more tabs: Enhance the Members Area with new capabilities, like the Profile tab that lets members introduce themselves to the community.
- (Optional) Design the menu and adjust the layout using the available options.
Step 4 | Customize the member profile card
Another element that appears on every tab is the member profile card. Depending on the layout you selected earlier, it's either a card or a full-width header. Either way, you can personalize it by editing the text, adding a default cover image and much more.
How do members use their profile card?

Wix Editor
Studio Editor
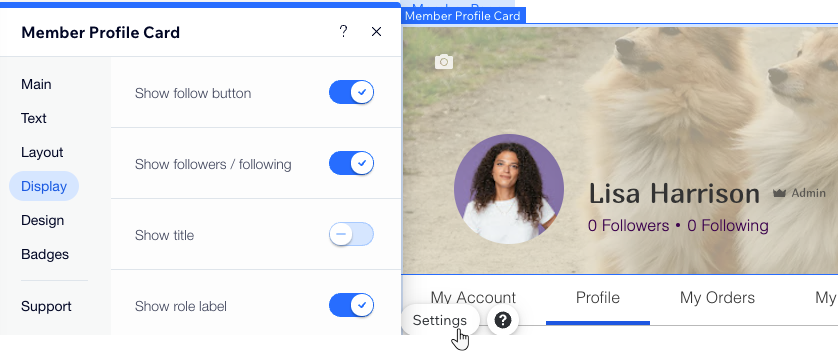
- Select the Member Profile Card element.
- Click Settings.
- Customize the Member Profile Card to your liking:
- Text: Edit every piece of text appearing on the card to sound like your brand.
- Layout: Change the shape and size of the member's profile picture.
- Display: Choose what info and buttons to show on the card.
- Design: Choose the colors and fonts, and set up a default cover photo to give the card a more interesting background.
- Badges: If you created badges, you can design the way they appear on this card.
Step 5 | View and set up every tab
Now that you've decided what the Member Menu shows, it's time to see how each tab looks like and customize it. Personalize the text members see and adjust the design to your needs.
Wix Editor
Studio Editor
- Select the Member Menu element.
- Click Manage and Navigate.
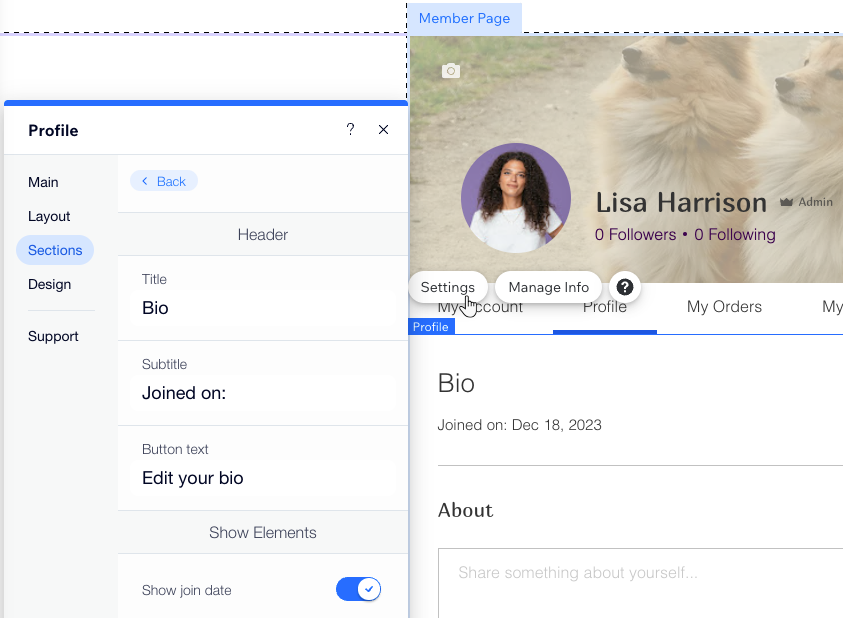
- Click the relevant tab to access it.
- Click anywhere on the tab's content to select it.
- Click Settings.
- Use the available options to adjust the text, layout and design.
Tip:
In the My Account tab, you can click Manage Fields to change the information you collect from members. Add new fields, edit existing ones and decide which ones are public to other members.
Step 6 | Adjust settings in the dashboard
Before going live with your new Members Area, go to your site's dashboard to check out:
- The Site Members tab, where you can see the member list, make changes to your members' info, assign roles and more.
- The Site Members Settings area, where you can adjust the privacy settings, add member roles, decide what info to collect upon signup and more.
Did this help?
|