


Pricing Plans: Collecting Additional Information With a Custom Form
- Step 1 | Create your custom form
- Step 2 | Connect the form to one or more plans
- FAQs
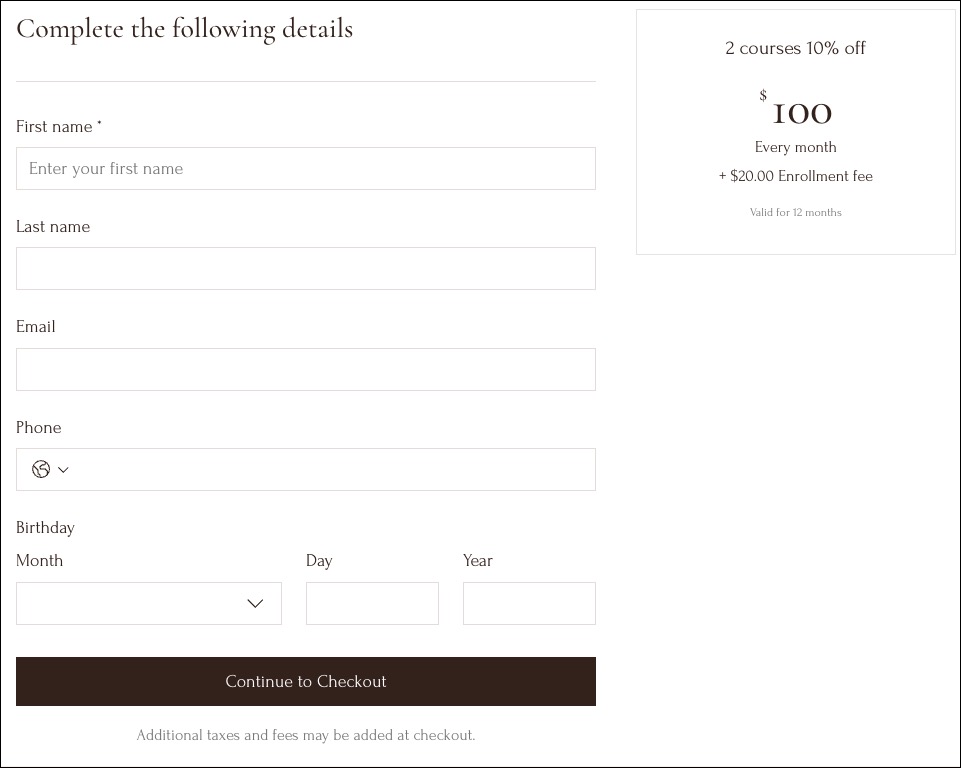
Step 1 | Create your custom form
To create your form:
Go to Pricing Plans Settings in your site's dashboard.
Click Manage Forms next to Custom forms for plans.
Click + Create Form.
(Optional) Edit the default My Form title at the top of the form builder and click the Save
 icon.
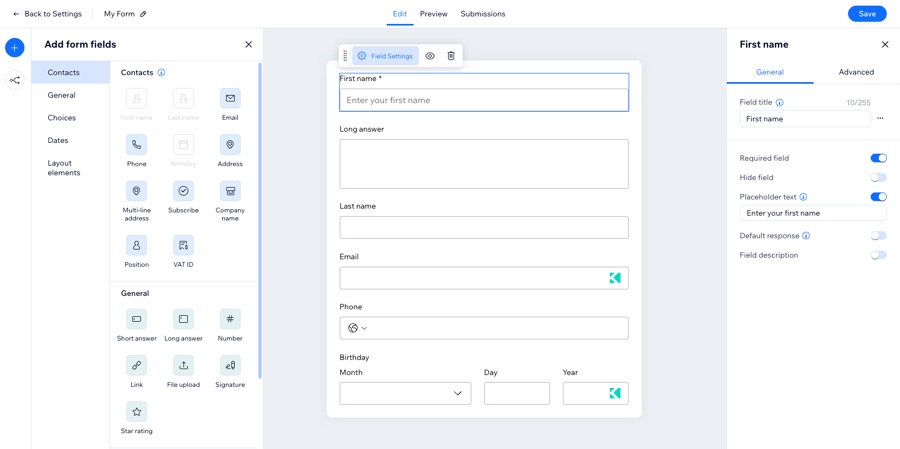
icon. Drag the relevant fields to the form, or click a field to add it.
(Optional) Customize the new field using the options below:
Edit field settings: Click Field Settings to edit the field title, make it a required field, enter placeholder text and more.
Reorder the field: Drag and drop the field to change the order within the form.
Duplicate the field: Click the Duplicate icon
 to add another similar field.
Note: This option is only available for specific fields.
Repeat steps 5-6 to add and customize additional fields.
Click Save at the top right.
Step 2 | Connect the form to one or more plans
To connect the form:
- Go to Pricing Plans Settings in your site's dashboard.
- Click Manage Forms next to Custom forms for plans.
- Click Connect to Plans next to the relevant form.
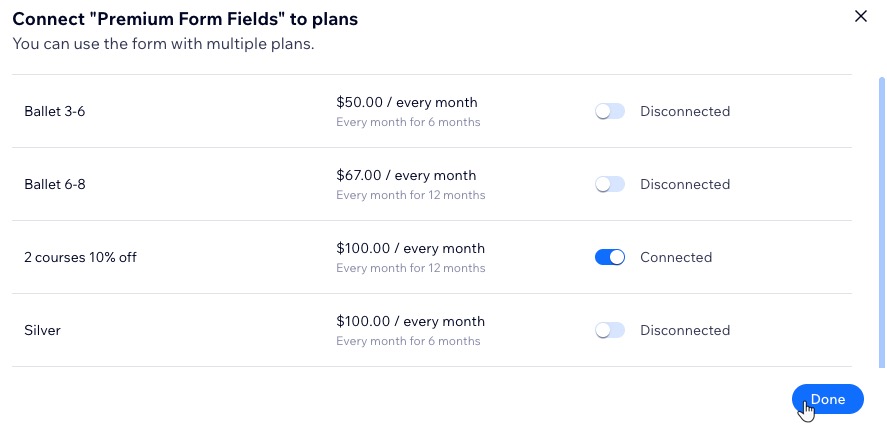
- Enable the toggle next to each plan you want to connect.
- Click Done.

 icon next to the relevant form.