Editor X: Creating Tables Using Repeaters
5 min read
In this article
- Step 1 | Add a repeater
- Step 2 | Set up the table
- Step 3 | Design and add content to the table
Editor X is transitioning to Wix Studio, our new platform for agencies and freelancers.Learn more about Wix Studio
Add a table to your site using a repeater, a list of items with the same design and layout but different content in each.
By adding grids to your repeater items, you create the rows and columns that form the table:

Step 1 | Add a repeater
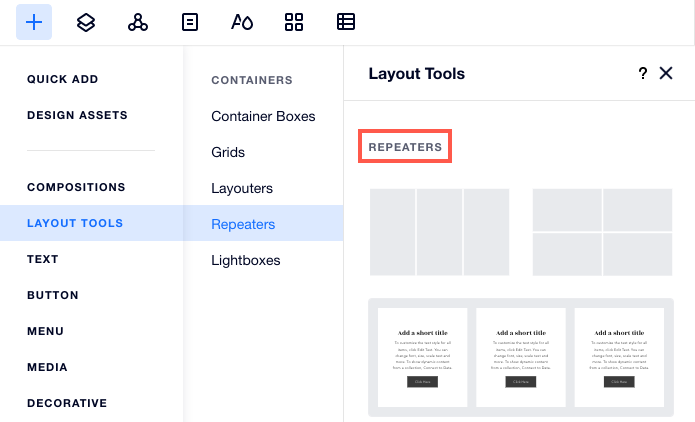
To get started, choose a repeater from the Add panel and add it to your site.
To add a repeater:
- Click Add on the top of the Editor.
- Click Layout Tools.
- Click Repeaters.
- Select a repeater and drag it to the desired location on your page.

Step 2 | Set up the table
After adding a repeater, create the rows of your table by changing the display type to List. Next, add the columns by applying a grid. You can drag the grid lines as necessary to make it fit your desired table.
To set up the table:
- Change your repeater layout:
- Select the new repeater in the Editor.
- Click the Inspector icon at the top right.
- (In the Inspector) Click the Layout tab .
- Select List under Display type.
- (Optional) Set the spacing between your rows next to Gaps.
- Apply a grid to your repeater items:
- Select any repeater item.
- Click the 1x1 drop-down.
- Depending on the number of columns you need, choose a layout.
Tip: Click Other to choose a different amount of rows and columns. - Set the table cells by dragging the grid lines as needed.

Step 3 | Design and add content to the table
Now that you've created your table, customize the design and add the relevant content. You can add as many rows as you need and elements like text, images and separator lines.
When you add an element to a repeater item, it is automatically added to every item in the repeater to keep the design consistent. Accordingly, removing an element deletes it from all items. You can customize the individual elements inside an item (e.g., editing the text, changing the images), but the design always stays the same.
Click an option below to learn more:
Add separator lines
Add more rows to the table
Customize the design of the table
 on the top of the Editor.
 at the top right.
 .
.
 .
. : Click the color picker to change the background color of your rows. Drag the slider to adjust the opacity of the fill color.
 : Change the border color of your rows. Use the sliders to adjust the border's opacity and width.
  : Round the corners of your rows by changing the radius (in px).
  : Adjust the shadow of your rows. You can change settings like the angle, distance, size, color and more.