Customizing Your Member Profile Fields
In this article
- Adding fields to member profiles
- Applying fields to selected members
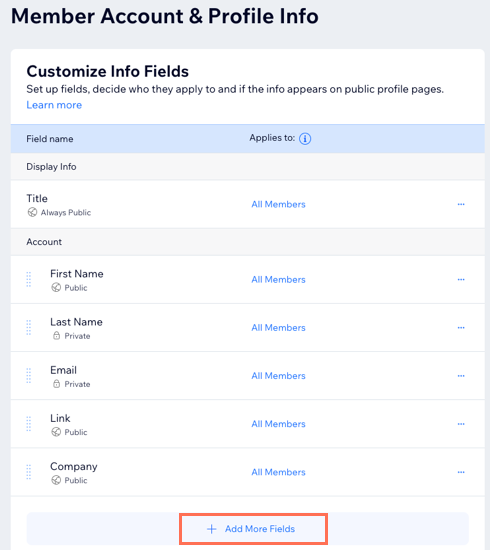
Choose what information is displayed in your members' My Account and Profile pages. Pick from existing fields like name and email, or create custom member fields based on your business. For each field you can decide if all site members or only selected members have access to it.
Adding fields to member profiles
By default, member profiles include their name, email and phone number. Choose to add more existing fields or create custom fields to allow members to share any info relevant to your site (e.g. birthdate, favorite animal, astrological sign).
To add fields to member profiles:
- Click + Add More Fields at the bottom.
- (In the pop-up) Choose whether to add an existing field or create a custom field:
- Existing field: Click + Add next to any of the preset fields.
- Custom field:
- Click + Add Custom Field at the bottom.
- Enter the custom field details:
- Field Name: Enter the title of the field.
- Field Privacy: Choose the privacy level:
- Public: The information appears on the members' public Profile pages.
- Private: Only the member can see this information.
Note: Your members can also change this setting at anytime.
- Field Type: Choose the type of information you want your members to provide.
- Click Save.
- (Optional) Repeat steps 1-3 to add more fields to your member profiles.
Want to edit, hide or delete fields?
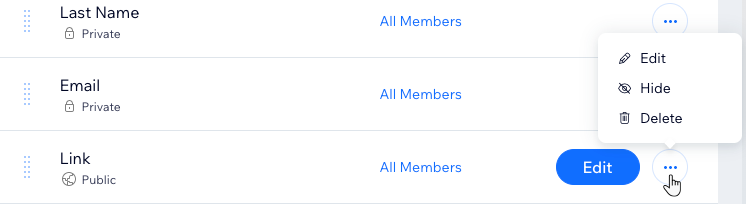
Click the More Actions icon
 to manage your fields. For preset fields (e.g. Name, Email) you can hide them but not delete them permanently.
to manage your fields. For preset fields (e.g. Name, Email) you can hide them but not delete them permanently.
Applying fields to selected members
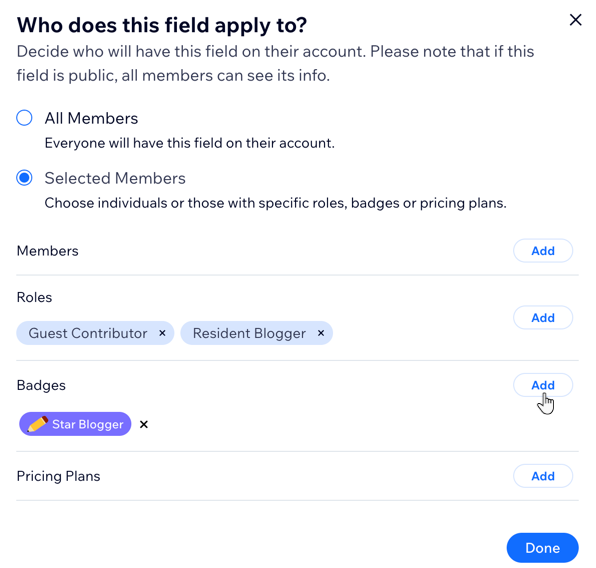
Decide who your fields apply to. You can choose to have all of your members fill out each field, or limit fields to selected members according to their member role, a badge they have, or pricing plan they've purchased.
To apply fields to selected members:
- Click All Members next to the relevant field.
- (In the pop-up) Choose which members will have this field on their account:
- All Members: Everyone will have this field.
- Selected Members: Only the members you choose will have this field:
- Click Add next to a category:
- Members: Specific members that you select by name.
- Roles: Members with a specific member role.
- Badges: Members with a specific badge.
- Pricing Plans: Members who purchased a specific Pricing Plan.
- Click Save.
- Click Add next to a category:
- Click Done.