Wix Studio App: Creating and Editing Your Workspace
3 min read
Introducing the new Wix Studio app, exclusively tailored for agencies. You can manage sites, projects and clients when you’re on-the-go. Respond quickly to new leads, message contacts, handle payments and contact Customer Care.
From the app, you can create new workspaces, join others, and switch between them so you can stay on top of every project.
In this article, learn more about:
Creating a workspace
Create a workspace to help you manage all of your projects and teammates seamlessly, while optimizing collaboration with your clients.
To create a workspace:
- Log in to the Wix Studio app.
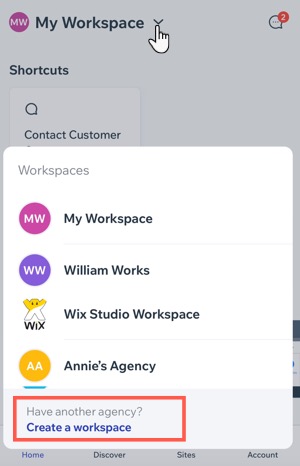
- Tap the workspaces drop-down at the top.
- Tap Create a workspace.
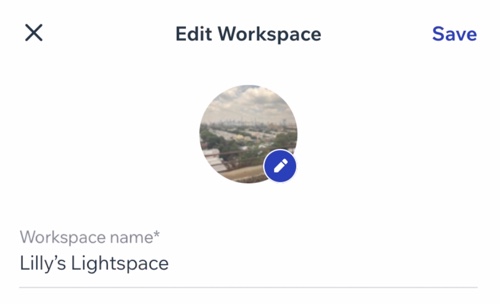
- (Optional) Add a Workspace profile photo.
- Enter the relevant Workspace name.
- Tap Create.
Note:
Your sites within the workspace maintain the same order as in your Wix Studio account, including any folders you've used for organization.
Editing your workspace
Edit your workspace by updating its name and profile photo. This ensures easy identification, especially when collaborating across multiple workspaces with teammates and collaborators.
Note:
You can only edit the workspace you are the owner of.
To edit your workspace:
- Log in to the Wix Studio app.
- Tap the workspaces drop-down at the top.
- Tap the Edit icon
 next to the relevant workspace.
 - Choose what you want to edit:
- Workspace profile photo: Upload an image or a logo for your workspace.
- Workspace name: Update the name that will help all teammates identify the workspace easily.
- Tap Save.
FAQs
Click a question below to learn about having your own workspace and being part of multiple workspaces.
How do I switch between workspaces?

Is there a limit of the number of workspaces I can belong to?
Which sites can I see in the workspaces I belong to?
Can I transfer sites between workspaces?
Can I add people to join my workspace from the Studio app?
Did this help?
|