Wix プロギャラリー:ギャラリーアイテムにフレームを追加する
2分
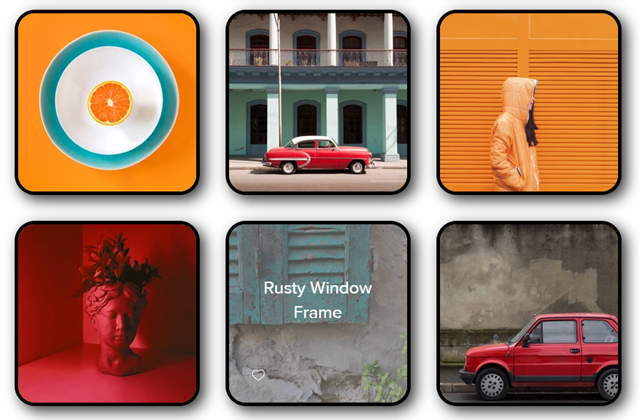
ギャラリーにフレームを追加して、アイテムを目立たせましょう。ギャラリーの「デザイン」設定で枠線と角の丸みオプションを使用して、ユニークで色のあるフレームを作成することができます。
Wix プロギャラリーのアイテムにフレームを追加する方法:
- エディタにアクセスします。
- ページ上のプロギャラリーをクリックします。
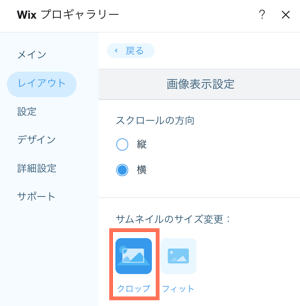
- 「設定」をクリックします。
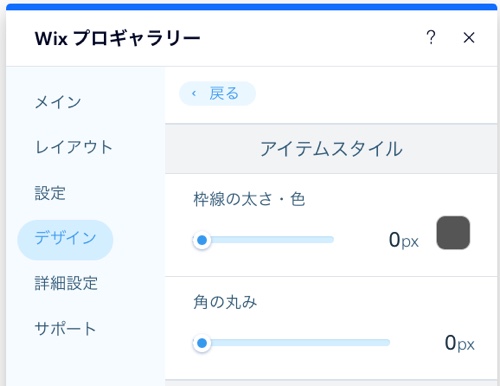
- 「デザイン」タブをクリックします。
- 「アイテムスタイル」をクリックし、以下のオプションを使用してフレームをカスタマイズします:
枠線の太さ・色
角の丸み
注意:
「枠線の太さ・色」、「角の丸み」デザインオプションは、「レイアウトを編集」パネルでサムネイルのサイズ変更オプションとして「クロップ」を選択した場合にのみ使用できます。