Wix Automations: Sending Data via Webhook
2 min read
Send automation data to a third-party app or to your own web server using a webhook. Webhooks are a way for apps that aren't connected to send messages and information to one another in real-time. When you connect an automation via a webhook, every time that automation is triggered the webhook sends information to a URL you've specified.
Note:
We recommend only using webhooks if you have prior technical knowledge and experience working with them.
To connect automations with a webhook:
- Go to Automations in your site's dashboard.
- Click + New Automation in the top right corner.
- Click + Start from Scratch or choose a suggested automation.
- Click the title to give your automation a name.
- Select a trigger for your automation.
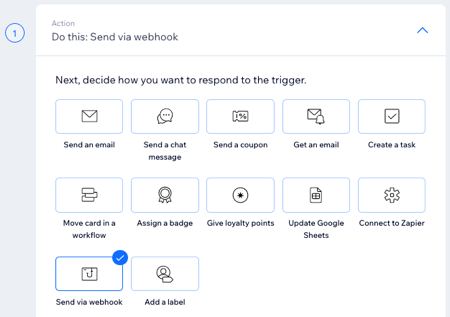
- Choose Send via webhook as your automation's action.
- Enter the URL the webhook should send a notification to under Target URL. Every time your automation is triggered (e.g. a customer fills out a form on your site) the webhook sends data to the URL you've specified.
- Choose whether the webhook should send all available data to the URL or only certain data:
- All keys and values: All data from the trigger is sent to the target URL. For example, if the trigger is Wix Forms, the webhook sends data from every form field.
Tip: Click View Structure to see all the data that the webhook will send. When you're done, click Got It. - Customize structure: Only specific data is sent to the target URL. For example, if your trigger is Wix Forms you might only want to send the Name and Email fields.
- Click Customize structure next to Add your own keys and values.
- Enter a key name in the Key field. This helps you distinguish what data is sent.
- Click Insert Variable next to Value to choose the data that should match the key.
- (Optional) Click + Add Key-Value to add another row and match key names to data.
Note: If you choose not to map a specific key to a value, the webhook will notify the URL without any additional information from the trigger. - When you're done, click Save.
- All keys and values: All data from the trigger is sent to the target URL. For example, if the trigger is Wix Forms, the webhook sends data from every form field.
- Click the Timing drop-down to select a timing for your automation.
- Click Activate or Save.
Did this help?
|