Editor X: Adding and Customizing Shape Dividers
5 min read
In this article
- Adding a shape divider
- Customizing your shape divider
- Designing a custom shape divider
- FAQs
Editor X is transitioning to Wix Studio, our new platform for agencies and freelancers.Learn more about Wix Studio
Add shape dividers to your sections to create an interesting and stylish layout. Instead of using clear-cut lines to divide content, choose a shape (e.g. Ellipse, Waves) or upload your own. These dividers can go at the top and bottom of a section, and you can customize their design as needed.
In this article, learn how to:
Adding a shape divider
Get started by adding a shape divider to your section. You can add the divider to the top or bottom of your section, or both.
There are a range of shapes you can choose from, as well as additional designs in the Media Manager. You can also upload your own SVG file to give this transition a personal touch.
Uploading your own file?
See the FAQs section below for guidelines on file size and proportions.
To add a shape divider to your section:
- Click the section in your Editor.
- Click the Shape Dividers icon
.
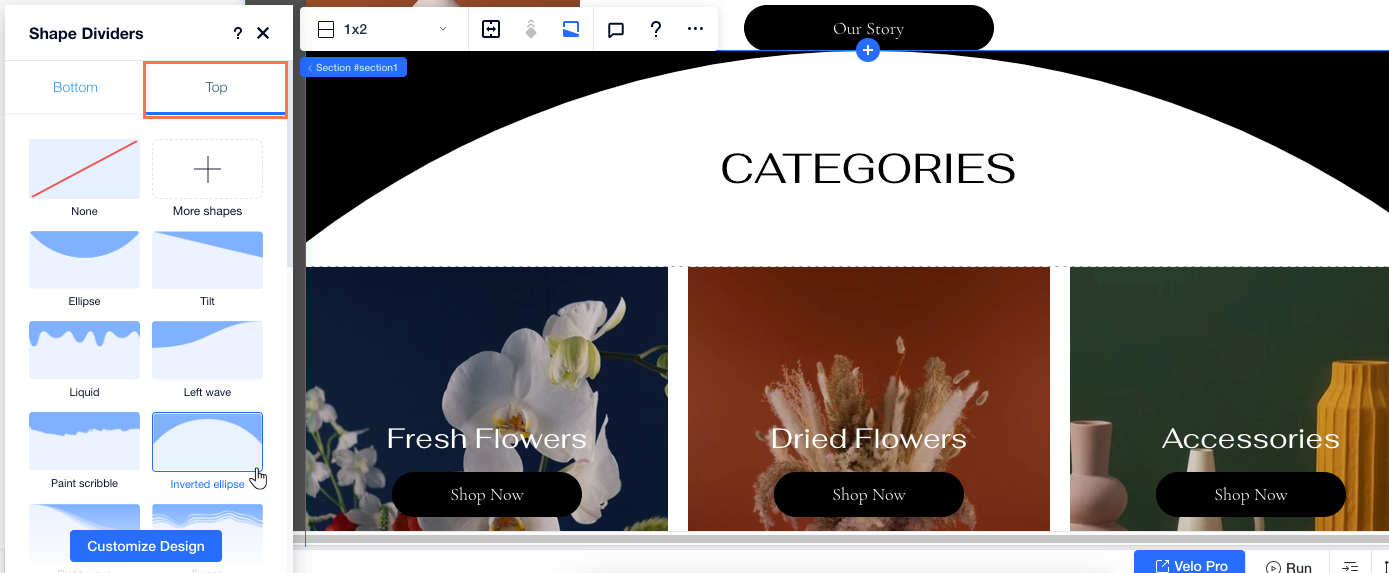
- Click the Top or Bottom tab to choose where to add the divider.
- Select a divider to add:
- Suggested designs: Click one of the styles available in the panel.
- Additional designs offered by Wix:
- Click + More Shapes.
- (In the Media Manager) Select a design from the Media from Wix tab.
- Click Choose File to apply it.
- Your own shape divider:
- Click + More Shapes.
- (In the Media Manager) Select the shape you want to use from the Site Files tab, or upload a new one.
- Click Choose File to apply it.
Customizing your shape divider
After choosing one of our shape dividers, design it to your liking. Adjust the height, color, opacity and layers to personalize the transition and make it look exactly how you want.
Note:
The available options depend on the shape divider you choose.
To customize your shape divider:
- Click the section in your Editor.
- Click the Shape Dividers icon
- Click the Top or Bottom tab to access the divider you want to design.
- Click Customize Design at the bottom.
- Choose how you want to adjust the look of your shape divider:
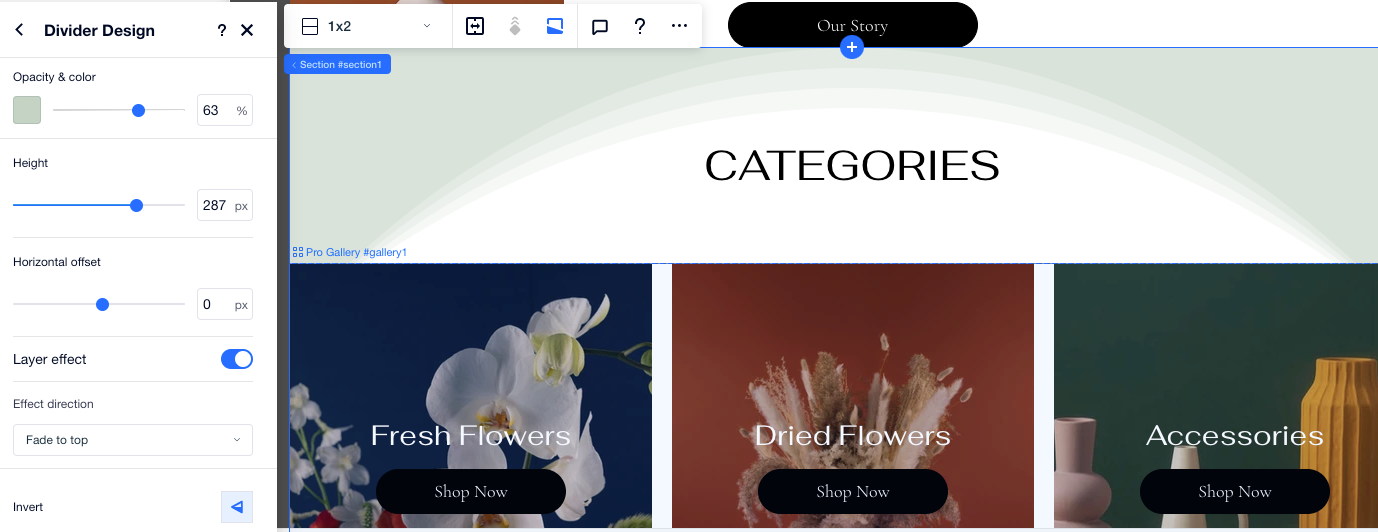
- Opacity & color: Choose the color you want for your divider, and make it more or less visible on the section.
- Height: Set how high or low you want the divider to go on your section.
- Horizontal offset: Re-position your shape divider, moving it to the left or right.
- Layer effect: Enable the toggle to add a fade effect to the divider, then select a direction from the drop-down:
- Centered: The effect is visible on the entire divider.
- Fade to top: The effect lessens towards the top of the divider.
- Fade to bottom: The effect lessens towards the bottom of the divider.
- Invert: Invert the shape of the divider (vertically).
- Flip: Set the divider to display the opposite way (horizontally) on your section.
- Number of repeats: Set how many times the pattern repeats across the divider.
Designing a custom shape divider
When you upload your own shape divider, you can use a variety of options to further personalize it. Adjust settings like the divider's color, visibility and scale to create a unique structure and design on your page.
Note:
The available options depend on the specific file you upload. See the FAQs section below for more details.
To customize the design of your own shape divider:
- Click the section in your Editor.
- Click the Shape Dividers icon
- Click the Top or Bottom tab to access the divider you want to design.
- Click Customize Design at the bottom.
- Choose how you want to adjust the look of your shape divider:
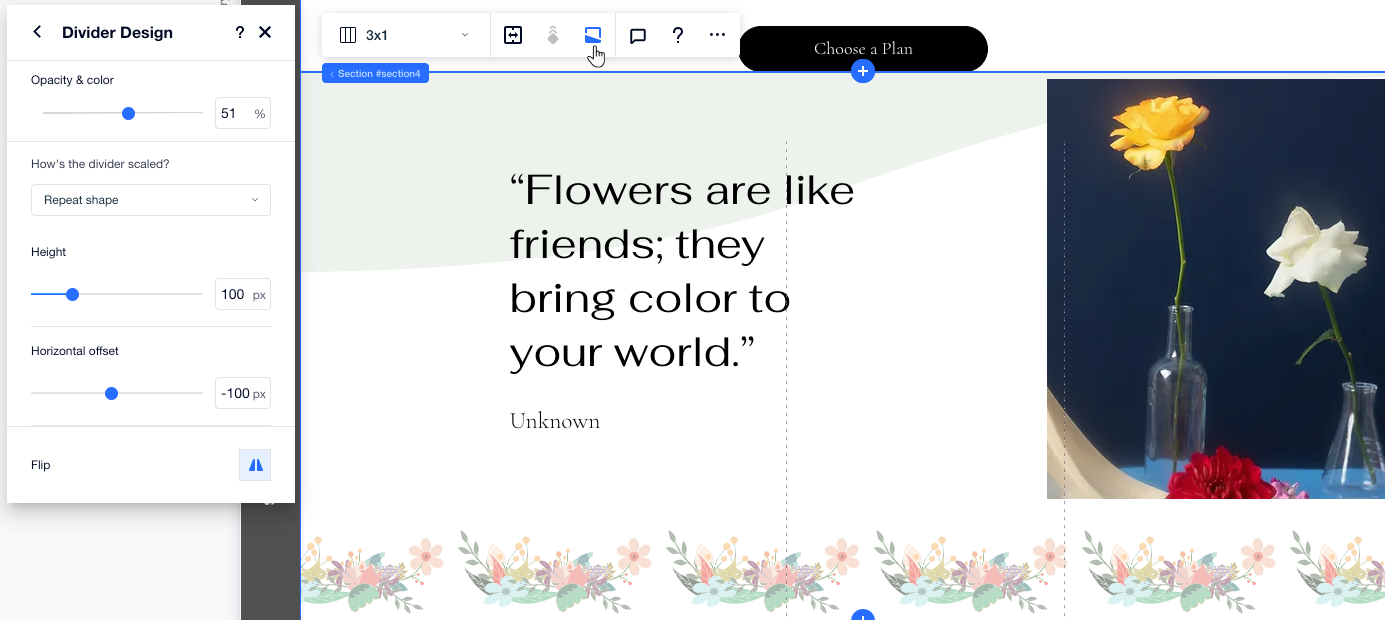
- Opacity & color: Choose whatever color you want for your divider, and make it more or less visible on the section.
- How's the divider scaled?: Select whether you want the divider pattern to stretch across the section or repeat.
- Height: Set how high or low you want the highest point of the divider to be on your section.
- Horizontal offset: Set the divider's offset from the sides of the section.
- Flip: Set the divider to display the opposite way (horizontally) on your section.
FAQs
Click a question below to learn more about shape dividers.
Are shape dividers responsive?
What kind of custom shape dividers can I upload?
Can I customize the design of my own uploads?
