

Blocks Tutorial - the Stock Quote Widget (Beta)
7 min
Wix Blocks Beta
This product was a limited beta (2018) and will soon be outdated. See our updated help articles to learn more about the redesigned upcoming Wix Blocks workspace.
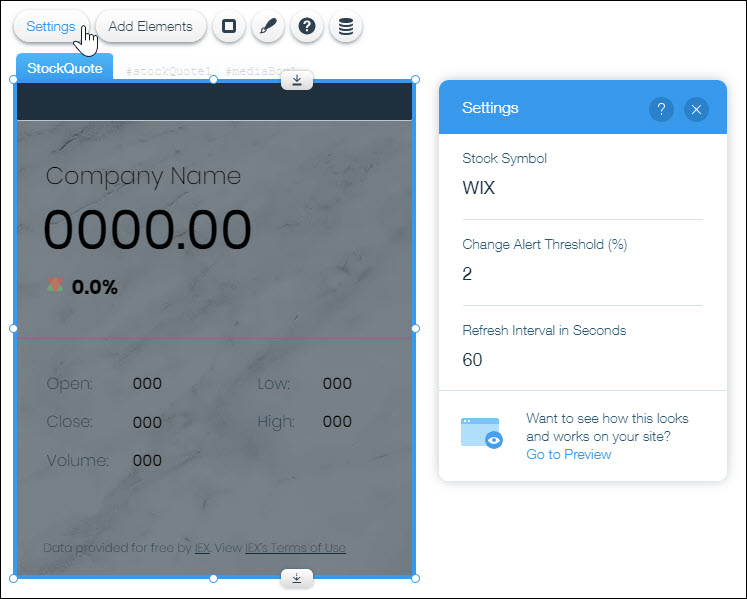
In this tutorial you will develop a stock widget. Enter a stock symbol and the widget returns the latest stock performance data. The data is provided for free by IEX. View IEX’s Terms of Use here.
We recommend that you follow all of the steps in the tutorial. Copy the code from this page and paste it in your widget code, but read the comments to understand what we do in the code.
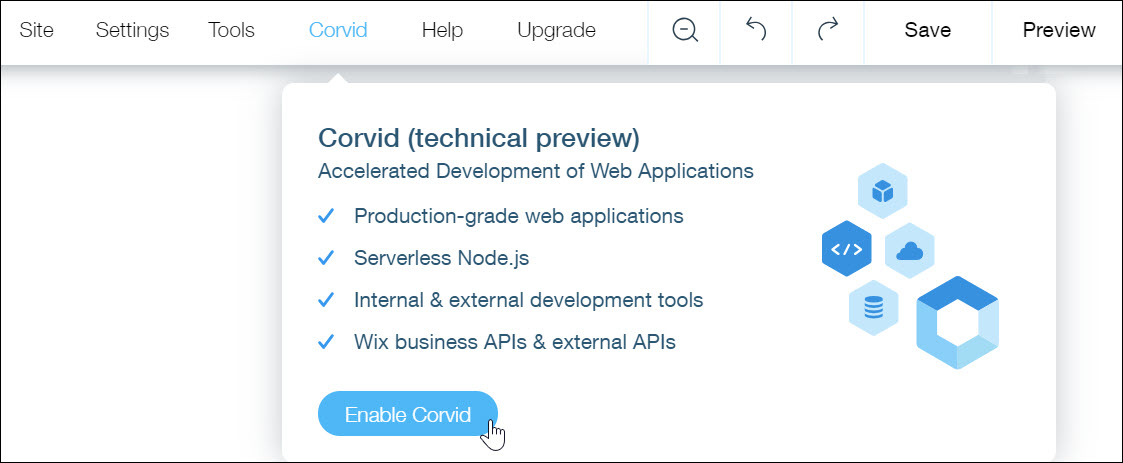
- In the Wix Editor, enable Velo Wix.
- In the left pane, hover over My Apps, open the ... menu, and select Create New. This opens a Blocks page for developing a single app. The page opens with one empty widget. Rename the widget StockQuote to keep track of your work.
- Select Save to save your app. Give it a meaningful name, such as StockWidgets. In the Beta release you cannot rename your apps.
- Add five text elements to serve as labels, and in the Properties section of the right panel change their IDs to openLabel, closeLabel, volumeLabel, lowLabel, and highLabel.
Add five text elements to display the detailed stock information, and change their IDs to open, close, volume, low, and high.
Add one more text element to display the date, and change its ID to date.
Tip
Any text element will serve your purposes, so pick the ones that fit your design needs.
- Add two vector art images:
- A green “up” arrow. Change its ID to positiveChangeSVG
- A red “down” arrow negativeChangeSVG
In the code, we will make one of these appear depending on whether the price has gone up or down.
6. Organize the various elements on the page as you see fit, adjusting font size, etc. These can also be modified by the site owner.
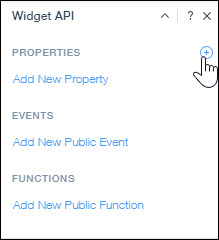
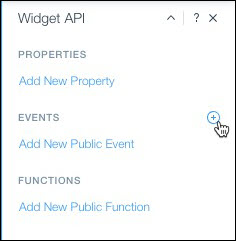
7. In the right panel you should see the Widget API panel. If you don’t, from the Tools menu select Widget API. Widget API is where you can add properties, events, and functions you you want to expose in your widget. Add a property by clicking the + next to PROPERTIES.
Add three properties:
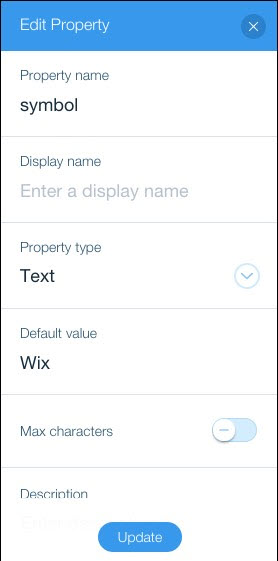
A property called symbol, with the type Text, where the user will be able to input the symbol of the stock they want to follow.
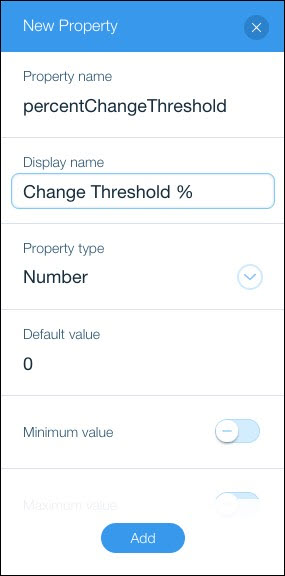
A property called percentChangeThreshold, with the type Number, which determines how big a change fires the changeAlert event.
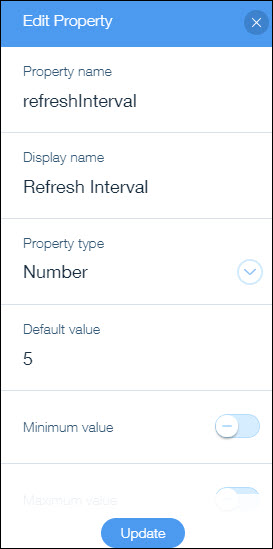
A property called refreshInterval, with the type Number, which will enable the user to control how frequently the widget refreshes the stock data.
Widget users will be able to set those three properties from the widget’s settings panel.
8. Add the event changeAlert, which fires when the percentChangeThreshold is exceeded.
The site owner can write code to determine what happens when the event is fired. Blocks automatically adds the basic code for the event to the Code panel. You can see how the event is defined by searching for changeAlert in the code. For example, they might add a text element to the page and make it appear when the event fires.
9. Add the refresh function, which enables control over widget refresh from Velo by Wix in the Editor. Blocks automatically adds the basic code for the event to the Code panel. The designer of the website who chooses to include this widget can use this function to determine what triggers a refresh of the stock data (in addition to the refresh interval). When you click Add New Public Function, Blocks automatically adds this code in the Code panel:
1/**
2*@function
3*@description describe your function
4*@param {string} arg1 - a sample parameter to the function
5*@returns {boolean} true on success, false on error
6*See http://wix.to/a8C0AFI for more information on function annotation
7*/
8export function foo(arg1){
9    //This function is part of my public API
10}
11
10. Change the function code to create the refresh function:
1/**
2*@function
3*@description refreshes the stock information
4*See http://wix.to/a8C0AFI for more information on function annotation
5*/
6export function refresh(arg1){
7    //This function is part of my public API
8}
9
11. Drag the Code Panel up from the bottom of the page to open it, and write this code:
1//wix-fetch enables the use of the API, which fetches data from a 3rd-party service
2import {fetch} from 'wix-fetch';
3
4//When setting the percentage changed text, we'll use HTML, so that we can change the color on the fly. This represents the template for that HTML. %COLOR% and %CHANGE% are placeholders that will be replaced in the code below
5const percentChangeHTMLTemplate = '<p class="p1"><span style="color:%COLOR%;font-family:poppins-semibold,poppins,sans-serif">%CHANGE% %</span></p>'
6
7let refreshTimer;
8
9//onReady is called when the widget loads
10$w.onReady(function () {
11    //Refresh the stock quote
12    refresh();
13});
14
15//onPropsChanged is called when the widget's properties change
16$widget.onPropsChanged((oldProps, newProps) => {
17    //Refresh the stock quote
18    refresh();
19});
20
21/*
22@function
23@description Refreshes the stock quote
24*/
25export function refresh(){
26    //Call the stock API and process the results
27    getStockData();
28
29    //If there was a previous refresh timer, clear it first
30    clearInterval(refreshTimer);
31
32    //Set the new interval based on the timing defined in the property 'refreshInterval'
33    let intervalInMilliseconds = $widget.props.refreshInterval * 1000;
34    refreshTimer = setInterval(() => {
35        //Call the stock API and process the results
36        getStockData();
37    }, intervalInMilliseconds);
38}
39
40function getStockData(){
41    //The widget's property 'symbol' holds the stock symbol for which we want to get the quote
42    let symbol = $widget.props.symbol;
43
44    //Build the URL for data retrieval from https://iextrading.com/
45    let url = 'https://api.iextrading.com/1.0/stock/';
46    let fullUrl = url + symbol + '/batch?types=quote';
47
48    //Make an HTTP GET call to that URL
49    fetch(fullUrl, {method: 'get'})
50        //When that comes back successfully, read the response as a json object (for the sake of this example, we're ignoring error cases)
51        .then(response => response.json())
52        //When the json response is ready, keep going
53        .then(json => {
54            //Make sure we got the expected data back (in this case, the API returns the bulk of the data in the 'quote' member of the object)
55            let quote = json.quote;
56            if(!quote){
57                console.log('Missing quote in response from API');
58                return;
59            }
60
61            try {
62                //Try to process the quote
63                processQuote(quote);
64            } catch (err) {
65                console.log('Error processing quote from API - ', err);
66            }
67        });
68}
69
70function processQuote(quote){
71    //Process the JSON returned by the iextrading.com API. See API reference here - https://iextrading.com/developer/docs/#quote
72
73    //set the latestPrice and companyName elements accordingly
74    $w('#latestPrice').text = '$' + quote.latestPrice.toFixed(2);
75    $w('#companyName').text = quote.companyName;
76
77    //Get the percentage changed and put it in the HTML template we'll use to display it
78    let percentChange = quote.changePercent * 100;
79    let percentChangeHTML = percentChangeHTMLTemplate.replace('%CHANGE%', percentChange.toFixed(2));
80    let changeColor;
81
82    //Check if this was a positive or negative change
83    if(percentChange >= 0){
84        //Set the color to green and show the 'positiveChangeSVG' element which displays the green arrow
85        changeColor = '#6BC76B';
86        $w('#positiveChangeSVG').show();
87        $w('#negativeChangeSVG').hide();
88    }
89    else {
90        //Set the color to red and show the 'negativeChangeSVG' element which displays the red arrow
91        changeColor = '#FA4B4B';
92        $w('#positiveChangeSVG').hide();
93        $w('#negativeChangeSVG').show();
94    }
95    //Use the color determined above to replace the color in the HTML snippet, then display it on the 'percentChange' element
96    percentChangeHTML = percentChangeHTML.replace('%COLOR%', changeColor);
97    $w('#percentChange').html = percentChangeHTML;
98
99    //Set all the other elements according to the different values we received
100    $w('#open').text = quote.open.toFixed(2);
101    $w('#close').text = quote.close.toFixed(2);
102    $w('#low').text = quote.low.toFixed(2);
103    $w('#high').text = quote.high.toFixed(2);
104    $w('#volume').text = quote.latestVolume.toString();
105    $w('#date').text = quote.latestTime;
106
107    //If the change is bigger than the requested trigger, trigger an event
108    if(Math.abs(percentChange) >= $widget.props.percentChangeThreshold){
109        //$widget.fireEvent fires an event that can be handled with custom Wix Code JavaScript on the site
110        $widget.fireEvent('changeAlert', percentChange);
111        console.log('Fired OnChangeAlert with value of ', percentChange);
112    }
113
11. Build your app by clicking Build in the upper right corner of Blocks.
10. From your Wix dashboard, open one of your websites.
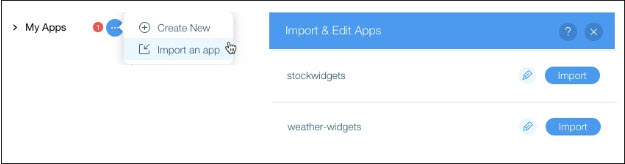
11. Expand My Apps, select Import an App, and import your app.
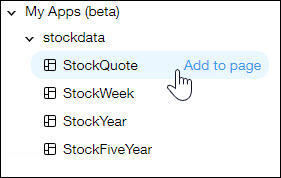
12. Expand the app, hover over a widget, and select Add to page.
13. Open the widget settings panel, and change the properties.
14. Preview the site to see that your property changes show up in the widget.
Learn more about Wix Blocks from these articles:
